
Why You’ll Love This Berry Chia Pudding Parfait
- It’s a make-ahead dream. Seriously, the hardest part is remembering to make it the night before. Once you do, your future self will thank you profusely for a grab-and-go breakfast that requires zero morning effort.
- The texture is pure magic. The chia seeds transform the liquid into a wonderfully thick and creamy pudding with a delightful little pop in every bite. It’s surprisingly satisfying and far more interesting than a standard yogurt.
- It’s your personal canvas. This recipe is a fantastic base. Once you master the basic pudding, you can run wild with different milks, sweeteners, and an endless array of toppings based on what’s in your fridge or what you’re craving that day.
- It feels fancy without the fuss. Layering it in a glass jar makes it look like it came from a chic café, but it’s honestly one of the simplest things you’ll ever assemble. It’s a surefire way to impress yourself—and any houseguests.
Ingredients & Tools
- 6 tablespoons chia seeds
- 2 cups milk of choice (almond, oat, and coconut are all fantastic)
- 2-3 tablespoons maple syrup or honey
- 1 teaspoon pure vanilla extract
- A tiny pinch of fine sea salt
- 1 ½ cups mixed fresh berries (like strawberries, blueberries, raspberries)
- ½ cup granola or toasted nuts, for crunch
Tools: A medium mixing bowl or large jar with a lid, a whisk, a spoon for stirring, and serving glasses or jars.
You’ll notice I’ve listed a range for the sweetener—this is really a personal thing. Start with the smaller amount; you can always stir in more later. And that pinch of salt? Don’t skip it! It might seem insignificant, but it works wonders to balance the sweetness and make all the other flavors pop.
Serves: 2 generous parfaits | Prep Time: 10 minutes (plus overnight soaking) | Cook Time: 0 minutes | Total Time: 8 hours 10 minutes (mostly hands-off)
Before You Start: Tips & Ingredient Notes
- What’s the deal with chia seeds? These tiny powerhouses are what create the pudding. They absorb liquid and swell up to 10 times their size, creating a gel-like consistency. The key is to give them a really good stir right after mixing to prevent clumps.
- Can I use frozen berries? Absolutely! For the pudding itself, fresh or frozen work fine. If you’re using frozen berries for the layers, just let them thaw in the fridge overnight. They’ll release some lovely juices that act as a natural syrup.
- My pudding is too thick/thin. Help! No worries, it’s an easy fix. If it’s too thick after soaking, just whisk in a splash more milk until it reaches your desired consistency. If it’s too thin, you probably need to let it sit a bit longer or add another spoonful of chia seeds.
- The vanilla extract is non-negotiable. Well, almost. It adds a warm, sweet aroma that takes the pudding from “good” to “where-have-you-been-all-my-life” good. Pure vanilla extract makes a noticeable difference compared to imitation.
How to Make Berry Chia Pudding Parfait
Step 1: Create the Pudding Base. In your mixing bowl or jar, combine the chia seeds, milk, maple syrup, vanilla extract, and that all-important pinch of salt. Now, grab your whisk and whisk everything together vigorously for a good 30-45 seconds. You really want to make sure the chia seeds are evenly distributed and not clumping together at the bottom. This initial stir is the secret to a smooth, lump-free pudding.
Step 2: The First Rest. Let the mixture sit on the counter for about 5 minutes. Then, give it another really good stir. You’ll notice it’s already starting to thicken slightly. This second stir breaks up any seeds that decided to stick together after the first whisk. Cover the bowl or screw the lid on the jar tightly.
Step 3: The Overnight Magic. Place the covered pudding in the refrigerator for at least 4 hours, but ideally overnight. This long, slow soak is what allows the chia seeds to fully hydrate and create that perfect, spoonable pudding texture. There’s no rushing this step—it’s the heart of the recipe.
Step 4: Prep Your Berries. While the pudding is setting (or right before assembling), prepare your berries. If you’re using strawberries, hull them and slice them thinly. Larger blueberries can be left whole or halved if you prefer. The goal is bite-sized pieces that will layer beautifully.
Step 5: The Grand Assembly. Now for the fun part! Grab your serving glasses. Start with a layer of the set chia pudding at the bottom. Follow with a generous layer of your mixed fresh berries. Then, add a sprinkle of your crunchy granola or nuts. Repeat the layers—pudding, berries, crunch—until you reach the top of the glass. I like to finish with a final flourish of berries and a last little sprinkle of crunch on top for visual appeal.
Step 6: Serve and Enjoy Immediately. The parfait is best enjoyed right after you assemble it, so the granola stays crisp against the creamy pudding. Dive in with a long spoon to get a bit of every layer in one perfect bite.
Serving Suggestions
Complementary Dishes
- Scrambled Eggs with Herbs — For a more substantial brunch, the savory, fluffy eggs provide a perfect protein-packed counterpart to the sweet, cool parfait.
- Avocado Toast on Sourdough — The creamy, rich avocado balances the fruity brightness of the parfait, creating a well-rounded and utterly satisfying meal.
- A Simple Green Smoothie — If you’re really leaning into the healthy vibes, a light green smoothie alongside the parfait makes for a hydrating and nutrient-dense start.
Drinks
- A Hot Cup of English Breakfast Tea — The bold, slightly malty notes of the tea are a wonderful contrast to the cold, fruity parfait, waking up your palate beautifully.
- Iced Coffee with a Dash of Oat Milk — The bitter coffee cuts through the sweetness of the pudding, and the creaminess of the oat milk echoes the texture of the parfait.
- Sparkling Water with a Lemon Twist — Sometimes simplicity is best. The effervescence cleanses the palate between bites, making each spoonful taste fresh and new.
Something Sweet
- A Warm, Flaky Almond Croissant — This is the ultimate indulgence. Tearing off a piece of buttery, warm croissant after a bite of cool parfait is a textural dream.
- Dark Chocolate-Covered Almonds — Just a few of these on the side add a sophisticated, bitter-sweet crunch that complements the berries wonderfully.
- Lemon Poppy Seed Muffin — The zesty lemon flavor is a fantastic friend to the berries, and the poppy seeds add another layer of subtle crunch.
Top Mistakes to Avoid
- Mistake: Not stirring enough at the beginning. If you just give it a lazy stir, the chia seeds will sink and form one giant, impenetrable clump at the bottom of your jar. A vigorous whisk is your best friend here.
- Mistake: Using old chia seeds. Chia seeds can go rancid over time. If yours smell a bit off or paint-y, it’s time for a new bag. Fresh seeds have a very neutral smell and taste.
- Mistake: Assembling the parfait too far in advance. If you layer the granola in and then let it sit for hours, it will lose its crunch and become soggy. Assemble just before you’re ready to eat for the best texture contrast.
- Mistake: Skipping the salt. I know I’ve mentioned it, but it’s worth repeating. Without salt, the flavors can taste a bit flat and one-dimensional. That tiny pinch makes a world of difference.
Expert Tips
- Tip: Add flavor to the pudding base. Stir in a tablespoon of cocoa powder for a chocolate version, or a teaspoon of citrus zest (lemon or orange) for a bright, sunny twist. The base is incredibly adaptable.
- Tip: Make a quick berry compote. Gently heat half of your berries with a teaspoon of maple syrup until they break down into a saucy consistency. Let it cool, then use this as a layer—it adds incredible depth of berry flavor.
- Tip: Toast your own nuts. If you’re using nuts instead of granola, toast them in a dry pan for a few minutes until fragrant. This simple step unlocks their oils and makes them infinitely more flavorful and crunchy.
- Tip: Layer in some creaminess. For an extra-decadent treat, add a layer of Greek yogurt or coconut whipped cream between the pudding and the berries. It’s pure luxury.
FAQs
Can I make this without any sweetener?
You absolutely can! The berries themselves provide natural sweetness. If you’re avoiding added sugars, just omit the maple syrup. You might find you want to add a mashed, very ripe banana to the pudding base instead—it adds natural sweetness and creaminess. Or, a drop or two of liquid stevia can work if you’re used to that taste.
How long does the chia pudding last in the fridge?
The prepared chia pudding (without toppings) will keep beautifully in an airtight container in the refrigerator for 4-5 days. It might thicken a bit more over time, so just give it a stir and add a splash of milk if needed before you use it. This makes it perfect for weekly meal prep.
My pudding is still runny after 4 hours. What happened?
This usually means one of two things: either the ratio of chia seeds to liquid was a bit off (perhaps your “cup” of milk was a little too generous), or the chia seeds themselves are older and less absorbent. The fix is easy—just whisk in another tablespoon of chia seeds and let it sit for another hour or two. It should thicken up nicely.
Can I use water instead of milk?
Technically, yes, the chia seeds will still gel. However, the result will be much less creamy and flavorful. The milk (whether dairy or plant-based) adds body and richness that water just can’t provide. I really recommend sticking with a milk for the best texture and taste experience.
Is there a way to make this faster? I don’t want to wait overnight!
I feel you! While overnight is best, you can make a “quick” version. Use a blender to combine the ingredients—the blending action helps the chia seeds start to gel faster. Then, let it sit for at least 1-2 hours, giving it a stir every 30 minutes. The texture won’t be *quite* as perfect, but it’ll still be delicious in a pinch.
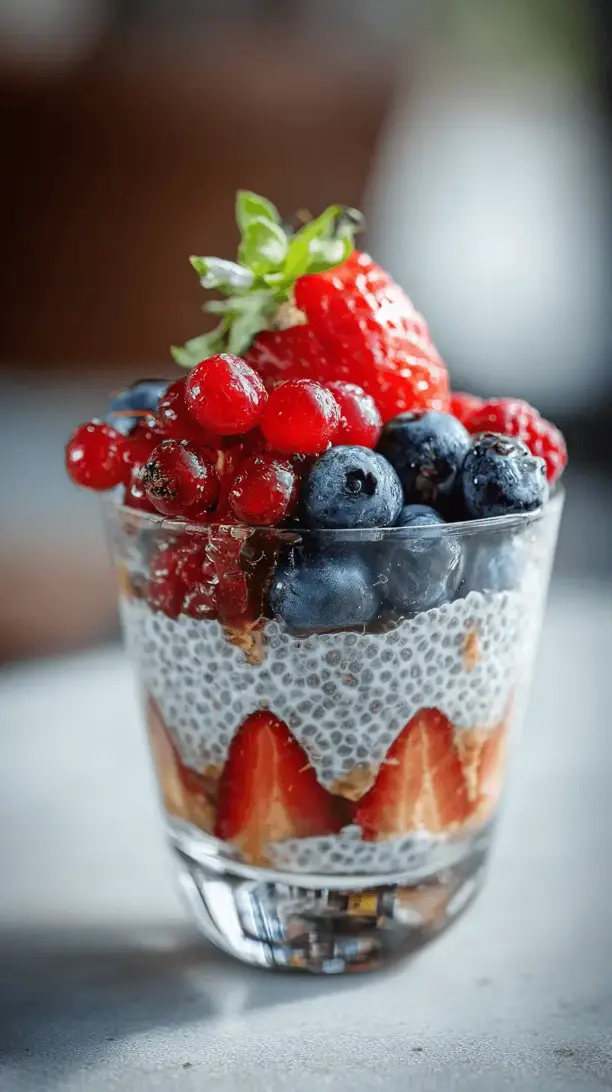
Berry Chia Pudding Parfait
Whip up this easy Berry Chia Pudding Parfait! A no-cook, make-ahead breakfast with creamy chia pudding, fresh berries & crunchy granola. Perfect for busy mornings!
Ingredients
Ingredients
-
6 tablespoons chia seeds
-
2 cups milk of choice (almond, oat, and coconut are all fantastic)
-
2-3 tablespoons maple syrup or honey
-
1 teaspoon pure vanilla extract
-
A tiny pinch fine sea salt
-
1 ½ cups mixed fresh berries (like strawberries, blueberries, raspberries)
-
½ cup granola or toasted nuts (for crunch)
Instructions
-
Create the Pudding Base. In your mixing bowl or jar, combine the chia seeds, milk, maple syrup, vanilla extract, and that all-important pinch of salt. Now, grab your whisk and whisk everything together vigorously for a good 30-45 seconds. You really want to make sure the chia seeds are evenly distributed and not clumping together at the bottom. This initial stir is the secret to a smooth, lump-free pudding.01
-
The First Rest. Let the mixture sit on the counter for about 5 minutes. Then, give it another really good stir. You'll notice it's already starting to thicken slightly. This second stir breaks up any seeds that decided to stick together after the first whisk. Cover the bowl or screw the lid on the jar tightly.02
-
The Overnight Magic. Place the covered pudding in the refrigerator for at least 4 hours, but ideally overnight. This long, slow soak is what allows the chia seeds to fully hydrate and create that perfect, spoonable pudding texture. There's no rushing this step—it's the heart of the recipe.03
-
Prep Your Berries. While the pudding is setting (or right before assembling), prepare your berries. If you're using strawberries, hull them and slice them thinly. Larger blueberries can be left whole or halved if you prefer. The goal is bite-sized pieces that will layer beautifully.04
-
The Grand Assembly. Now for the fun part! Grab your serving glasses. Start with a layer of the set chia pudding at the bottom. Follow with a generous layer of your mixed fresh berries. Then, add a sprinkle of your crunchy granola or nuts. Repeat the layers—pudding, berries, crunch—until you reach the top of the glass. I like to finish with a final flourish of berries and a last little sprinkle of crunch on top for visual appeal.05
-
Serve and Enjoy Immediately. The parfait is best enjoyed right after you assemble it, so the granola stays crisp against the creamy pudding. Dive in with a long spoon to get a bit of every layer in one perfect bite.06


