
Why You’ll Love This Banana Oatmeal Muffins
- They’re the ultimate zero-waste hero. This recipe is the perfect destination for those bananas that have gone a bit too brown. You know the ones. Instead of tossing them, you’re transforming them into something delicious.
- The texture is just dreamy. The combination of mashed banana and soaked oats creates an incredibly moist and tender crumb, while the oats themselves give a lovely, substantial heartiness that’s so satisfying.
- They’re wonderfully adaptable. Feel like adding chocolate chips? Go for it. A handful of walnuts? Absolutely. This recipe is a fantastic base that welcomes your personal touches.
- They freeze like a dream. Making a double batch is always a good idea. You can pop these muffins in the freezer and have a ready-to-go breakfast or snack for weeks to come—just thaw and enjoy.
Ingredients & Tools
- 3 large, very ripe bananas (the more speckled, the better!)
- 1/3 cup (80 ml) melted coconut oil or neutral oil (like avocado or canola)
- 1/2 cup (100 g) light brown sugar, packed
- 1 large egg, at room temperature
- 1 tsp pure vanilla extract
- 1 cup (120 g) whole wheat pastry flour or all-purpose flour
- 1 cup (90 g) old-fashioned rolled oats (not instant)
- 1 tsp baking soda
- 1/2 tsp baking powder
- 1/2 tsp fine sea salt
- 1 tsp ground cinnamon
- 1/4 tsp ground nutmeg (optional, but lovely)
- A big handful of chocolate chips or chopped nuts (optional)
Tools: A 12-cup muffin tin, muffin liners, a large mixing bowl, a medium mixing bowl, a whisk, a fork or potato masher for the bananas, and an ice cream scoop for easy portioning.
The quality of your bananas really is key here—the riper they are, the sweeter and more flavorful your muffins will be. And using old-fashioned oats is important for that perfect texture; they hold their shape just enough to give a lovely bite.
Serves: 12 muffins | Prep Time: 15 minutes | Cook Time: 20-22 minutes | Total Time: 40 minutes
Before You Start: Tips & Ingredient Notes
- Banana Ripeness is Non-Negotiable. Honestly, don’t even think about using yellow bananas. You want them brown, soft, and super fragrant. This is where all the natural sweetness and moisture comes from.
- Why Room Temperature Egg? A cold egg can cause the melted coconut oil to solidify a bit, which can affect the emulsion. Taking the egg out 30 minutes beforehand ensures a smooth, well-combined batter.
- To Sift or Not to Sift? I’m a bit lazy and rarely sift my flour for muffins. The trick is to fluff your flour in the bag, spoon it into the measuring cup, and level it off. This prevents over-packing and keeps the muffins light.
- Don’t Overmix! This is the golden rule of muffin-making. Stir the wet and dry ingredients together until they are *just* combined. A few lumps are absolutely fine—overmixing leads to tough, dense muffins.
How to Make Banana Oatmeal Muffins
Step 1: First, preheat your oven to 375°F (190°C). This might seem high for muffins, but that initial blast of heat helps them get a beautiful, domed top. Line your muffin tin with paper liners or give the cups a very light coating of oil. This is also the perfect time to melt your coconut oil if you’re using it—just a quick zap in the microwave or a warm pan will do.
Step 2: Now, let’s tackle those bananas. Peel them and add them to your large mixing bowl. Grab a fork or a potato masher and go to town! You want to mash them until they’re relatively smooth, but a few small lumps are totally okay—they add little pockets of pure banana flavor. To this glorious banana mush, add the melted (and slightly cooled) oil, brown sugar, room temperature egg, and vanilla extract. Whisk it all together until it’s smooth and well-combined. You’ll notice the mixture looks a bit like a thin pudding.
Step 3: In your medium bowl, it’s time for the dry ingredients. Whisk together the flour, rolled oats, baking soda, baking powder, salt, cinnamon, and nutmeg. Make sure everything is evenly distributed—you want every muffin to have its fair share of that warm spice. This is also when you’d toss in any mix-ins like chocolate chips with a tablespoon of the flour mixture; this helps prevent them from sinking to the bottom.
Step 4: Here’s the crucial part. Pour the dry ingredient mixture into the wet ingredients. Use a spatula or a wooden spoon to gently fold them together. Stir until you no longer see streaks of flour, but stop the very second that happens. Remember, a few lumps are your friend! Overmixing is the enemy of a tender muffin. If you’re adding extras, fold them in now, again, with just a few gentle strokes.
Step 5: Divide the batter evenly among the 12 muffin cups. An ice cream scoop is fantastic for this—it keeps things neat and ensures they’re all the same size. You should fill each liner about 3/4 of the way full. This gives them plenty of room to rise into that perfect muffin top we all love. If you like, you can sprinkle a few extra oats or a pinch of sugar on top for a little crunch.
Step 6: Pop the tin into your preheated oven and bake for 18-22 minutes. You’re looking for golden brown tops, and a toothpick inserted into the center of a muffin should come out clean or with a few moist crumbs attached—no wet batter. The smell in your kitchen will be absolutely divine at this point.
Step 7: As soon as they’re out of the oven, let the muffins cool in the tin for about 5 minutes. This allows them to set up a bit. Then, carefully transfer them to a wire rack to cool completely. I know it’s hard, but try to let them cool for at least 15 minutes before diving in—this allows the flavors to settle and makes them easier to handle.
Serving Suggestions
Complementary Dishes
- A bowl of Greek yogurt with berries — The creamy, tangy yogurt is a perfect contrast to the sweet, spiced muffin, making it feel like a complete, balanced breakfast.
- A simple green smoothie — Pairing a wholesome muffin with a vibrant, nutrient-packed smoothie is my go-to for a quick and energizing start to the day.
- A soft-boiled egg with a sprinkle of salt — For a more savory-leaning breakfast, the richness of the egg complements the muffin’s sweetness beautifully.
Drinks
- A hot cup of black coffee — The bitterness of the coffee cuts through the sweetness of the muffin and just feels like the most classic, comforting pairing.
- A glass of cold milk — It’s a timeless combo for a reason! Especially wonderful if you’ve added chocolate chips to your batch.
- Chai tea latte — The warm spices in the chai echo the cinnamon and nutmeg in the muffins, creating a wonderfully cozy experience.
Something Sweet
- A small scoop of vanilla bean ice cream — Turn a muffin into a decadent dessert by serving it warm with a melting scoop of ice cream on top.
- A drizzle of salted caramel sauce — For a real treat, warm a muffin, slice it in half, and drizzle with a little caramel. The sweet and salty combination is incredible.
- A handful of fresh raspberries — The bright, tart pop of a fresh berry is a lovely, light way to finish a meal featuring these muffins.
Top Mistakes to Avoid
- Mistake: Using underripe bananas. Yellow, firm bananas lack the intense sweetness and moisture that brown, spotty bananas provide. Your muffins will be bland and dry.
- Mistake: Overmixing the batter. I’ve messed this up before too… you stir and stir thinking you’re being thorough, but you’re actually developing the gluten in the flour, which leads to a tough, rubbery texture instead of a tender crumb.
- Mistake> Not filling the muffin cups enough. If you’re too shy and only fill them halfway, you’ll end up with flat, sad muffins. Be bold! 3/4 full is the sweet spot for a beautiful dome.
- Mistake: Leaving them in the tin to cool completely. The residual heat from the tin will continue to cook the bottoms, and steam will get trapped, making the liners soggy and the bottoms a bit wet.
Expert Tips
- Tip: Soak your oats for extra-soft muffins. For an even more tender texture, you can soak the rolled oats in the wet ingredients (the mashed banana, oil, egg mixture) for 15-20 minutes before adding the dry ingredients. This allows the oats to soften fully.
- Tip: Create a bakery-style domed top. The initial high oven temperature (375°F) is key. It gives the muffins a quick burst of rising power before the outside sets, creating that perfect peaked top.
- Tip> Make them your own with mix-ins. Don’t be afraid to get creative! A 1/2 cup of dark chocolate chips, toasted walnuts or pecans, or even a handful of dried cranberries can transform this basic recipe into something new each time.
- Tip: Freeze individual muffins for easy grab-and-go. Once completely cooled, wrap each muffin tightly in plastic wrap and then place them all in a large freezer bag. They’ll keep for up to 3 months. Thaw at room temperature or warm gently in the microwave.
FAQs
Can I make these gluten-free?
Absolutely! You can easily make these gluten-free by using a 1:1 gluten-free all-purpose flour blend in place of the regular flour. Just make sure your oats are certified gluten-free, as oats are often processed in facilities that also handle wheat.
Can I use quick oats instead of old-fashioned rolled oats?
You can, but the texture will be different. Quick oats are cut smaller and will absorb more moisture, resulting in a denser, less textured muffin. Old-fashioned oats give a much heartier, more satisfying bite, so I highly recommend sticking with them if you can.
My muffins turned out dense. What happened?
The most common culprit is overmixing the batter. Remember, mix until *just* combined! Another possibility is that your baking soda or powder might be old and have lost its leavening power. It’s a good idea to check the expiration dates every so often.
Can I reduce the amount of sugar?
You can, but keep in mind that the sugar doesn’t just add sweetness; it also contributes to moisture and tenderness. If you’re using very ripe bananas, you could likely reduce the brown sugar to 1/3 cup without major issues. Any less than that and you might end up with a drier muffin.
How should I store these muffins, and how long will they keep?
Once completely cool, store them in an airtight container at room temperature for up to 2 days. After that, I recommend transferring them to the refrigerator for up to 5 days, as the moisture from the bananas can make them spoil faster. For longer storage, freezing is definitely the way to go!
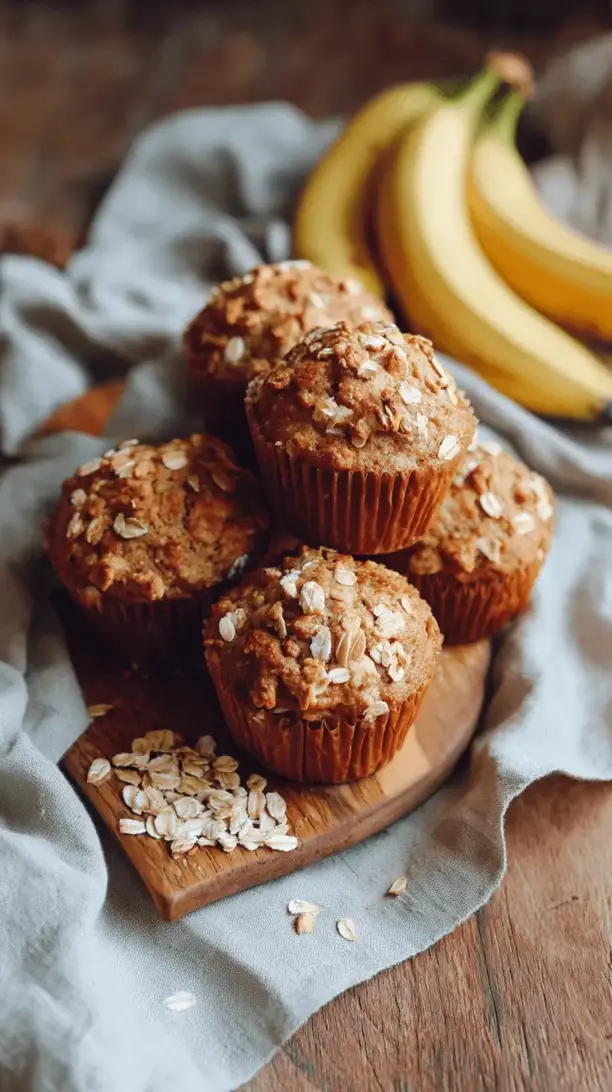
Banana Oatmeal Muffins
Whip up the BEST Banana Oatmeal Muffins! My easy, wholesome recipe uses overripe bananas for a moist, tender crumb. Perfect for breakfast or a snack. Freezer-friendly and totally delicious!
Ingredients
Ingredients
-
3 large, very ripe bananas (the more speckled, the better!)
-
1/3 cup melted coconut oil or neutral oil (like avocado or canola)
-
1/2 cup light brown sugar (packed)
-
1 large egg (at room temperature)
-
1 tsp pure vanilla extract
-
1 cup whole wheat pastry flour or all-purpose flour
-
1 cup old-fashioned rolled oats (not instant)
-
1 tsp baking soda
-
1/2 tsp baking powder
-
1/2 tsp fine sea salt
-
1 tsp ground cinnamon
-
1/4 tsp ground nutmeg (optional, but lovely)
-
A big handful chocolate chips or chopped nuts (optional)
Instructions
-
First, preheat your oven to 375°F (190°C). This might seem high for muffins, but that initial blast of heat helps them get a beautiful, domed top. Line your muffin tin with paper liners or give the cups a very light coating of oil. This is also the perfect time to melt your coconut oil if you're using it—just a quick zap in the microwave or a warm pan will do.01
-
Now, let's tackle those bananas. Peel them and add them to your large mixing bowl. Grab a fork or a potato masher and go to town! You want to mash them until they're relatively smooth, but a few small lumps are totally okay—they add little pockets of pure banana flavor. To this glorious banana mush, add the melted (and slightly cooled) oil, brown sugar, room temperature egg, and vanilla extract. Whisk it all together until it's smooth and well-combined. You'll notice the mixture looks a bit like a thin pudding.02
-
In your medium bowl, it's time for the dry ingredients. Whisk together the flour, rolled oats, baking soda, baking powder, salt, cinnamon, and nutmeg. Make sure everything is evenly distributed—you want every muffin to have its fair share of that warm spice. This is also when you'd toss in any mix-ins like chocolate chips with a tablespoon of the flour mixture; this helps prevent them from sinking to the bottom.03
-
Here's the crucial part. Pour the dry ingredient mixture into the wet ingredients. Use a spatula or a wooden spoon to gently fold them together. Stir until you no longer see streaks of flour, but stop the very second that happens. Remember, a few lumps are your friend! Overmixing is the enemy of a tender muffin. If you're adding extras, fold them in now, again, with just a few gentle strokes.04
-
Divide the batter evenly among the 12 muffin cups. An ice cream scoop is fantastic for this—it keeps things neat and ensures they're all the same size. You should fill each liner about 3/4 of the way full. This gives them plenty of room to rise into that perfect muffin top we all love. If you like, you can sprinkle a few extra oats or a pinch of sugar on top for a little crunch.05
-
Pop the tin into your preheated oven and bake for 18-22 minutes. You're looking for golden brown tops, and a toothpick inserted into the center of a muffin should come out clean or with a few moist crumbs attached—no wet batter. The smell in your kitchen will be absolutely divine at this point.06
-
As soon as they're out of the oven, let the muffins cool in the tin for about 5 minutes. This allows them to set up a bit. Then, carefully transfer them to a wire rack to cool completely. I know it's hard, but try to let them cool for at least 15 minutes before diving in—this allows the flavors to settle and makes them easier to handle.07


