
Why You’ll Love This Banana Oat Pancakes
- They’re secretly good for you. Made with whole rolled oats and bananas, these pancakes are packed with fiber and natural sweetness, so you can feel great about starting your day this way.
- The texture is dreamy. You get this lovely, tender crumb from the oats that’s somehow both hearty and light as air—a far cry from dense, whole-grain pancakes that can sometimes feel like a brick.
- They come together in a blender. Seriously, just toss everything in and blend. It’s the easiest cleanup ever and ensures your batter is perfectly smooth (or delightfully textured if you pulse it less).
- They’re incredibly versatile. Feel like adding chocolate chips, blueberries, or a dash of cinnamon? Go for it. This recipe is a fantastic base for all your pancake creativity.
Ingredients & Tools
- 2 large, very ripe bananas (the spottier, the better!)
- 2 large eggs
- 1 cup rolled oats (old-fashioned, not instant)
- 1/2 cup milk of your choice (dairy, almond, or oat milk work beautifully)
- 1 1/2 tsp baking powder
- 1 tsp vanilla extract
- 1/4 tsp salt
- 1 tbsp maple syrup or honey (optional, depending on your banana’s sweetness)
- Butter or coconut oil, for greasing the pan
Tools: A good blender, a non-stick skillet or griddle, a spatula, and a ladle or measuring cup for pouring.
The real star here is the banana—its ripeness is non-negotiable for maximum sweetness and flavor. And using rolled oats instead of flour not only makes these gluten-free (if you use certified GF oats) but also gives them that wonderfully substantial texture. Don’t skip the baking powder; it’s the key to getting that lovely lift and fluffiness.
Serves: 2-3 (makes about 8-10 medium pancakes) | Prep Time: 5 minutes | Cook Time: 15 minutes | Total Time: 20 minutes
Before You Start: Tips & Ingredient Notes
- How ripe should the bananas be? Think black spots and super soft. Honestly, if they’re almost too ripe for banana bread, they’re perfect for this. This deep ripeness means more natural sugar, which translates to better browning and a richer taste.
- Can I use quick oats? You can, but the texture will be a bit different. Quick oats are more finely cut, so your pancakes might be less hearty and have a slightly gummier texture. Old-fashioned rolled oats are really the ideal choice for the best structure.
- What if I don’t have a blender? No problem! You can use a food processor, or even mash the bananas very well with a fork and then whisk everything together vigorously. The pancakes will be a bit more textured and rustic, which is also delicious.
- Why let the batter rest? After blending, giving the batter just 5 minutes to sit allows the oats to absorb the liquid fully. This results in a thicker batter and ultimately, a fluffier pancake. It’s a small step with a big payoff.
How to Make Banana Oat Pancakes
Step 1: Combine the ingredients in your blender. Add the rolled oats first, followed by the bananas (broken into chunks), eggs, milk, baking powder, vanilla, salt, and maple syrup if using. The order isn’t super critical, but starting with the dry ingredients at the bottom helps everything blend more evenly.
Step 2: Blend until completely smooth. This usually takes about 30-60 seconds on high speed. You’ll want to stop and scrape down the sides once to make sure no oat bits are hiding. The batter should be thick but pourable—think a similar consistency to traditional pancake batter. If it seems too thick, add a tablespoon more milk and blend again.
Step 3: Let the batter rest. This is the secret weapon! Pour the batter into a bowl or just let it sit in the blender jar for 5 minutes. You’ll notice it thicken up slightly as the oats hydrate. This resting period is what gives the pancakes their lovely, light texture.
Step 4: Heat your skillet. Place a non-stick skillet or griddle over medium heat. Add a small pat of butter or a teaspoon of coconut oil. You’ll know it’s ready when a drop of water sizzles and dances on the surface. Don’t rush this—a properly heated pan is crucial for a golden-brown exterior.
Step 5: Cook the pancakes. Pour about 1/4 cup of batter for each pancake onto the hot skillet. They won’t spread as much as traditional pancakes, so you can gently spread them into a round shape with the back of your ladle. Cook for 2-3 minutes, until you see bubbles forming on the surface and the edges look set.
Step 6: Flip and finish cooking. Slide your spatula underneath and flip each pancake confidently. They should be a beautiful golden brown. Cook for another 1-2 minutes on the second side until cooked through. The second side always cooks faster, so keep an eye on them. You can keep finished pancakes warm on a baking sheet in a 200°F (95°C) oven while you cook the rest.
Serving Suggestions
Complementary Dishes
- Crispy turkey bacon or sausage — The savory, salty crunch is the perfect counterpoint to the sweet, soft pancakes, creating a truly balanced breakfast plate.
- Scrambled eggs with chives — A classic for a reason. The creamy, savory eggs add a protein punch that makes the meal feel even more substantial and satisfying.
- A simple fruit salad — A mix of fresh berries, orange segments, and a little mint adds a bright, refreshing element that cuts through the richness beautifully.
Drinks
- A strong cup of coffee — The bitterness of the coffee enhances the caramelized banana flavor in the pancakes, making each bite taste even more incredible.
- Cold glass of milk or a latte — There’s something nostalgically perfect about pancakes and milk. A latte feels like a cozy café treat right at home.
- Freshly squeezed orange juice — The bright acidity and sweetness of OJ cleanse the palate between bites, making every mouthful taste like the first.
Something Sweet
- Warm maple syrup and a pat of butter — The ultimate classic. The butter melts into the nooks and crannies, and the syrup soaks in, creating pockets of pure, sweet joy.
- A dollop of Greek yogurt and a drizzle of honey — This adds a tangy creaminess that’s less sweet than syrup but equally delicious and adds a boost of protein.
- A sprinkle of cinnamon sugar and toasted walnuts — For a little extra texture and warmth. The crunch of the nuts against the soft pancake is just divine.
Top Mistakes to Avoid
- Mistake: Using a skillet that’s too hot. If your pan is smoking, it’s way too hot. The outside of the pancake will burn before the inside has a chance to cook through, leaving you with a raw, gummy center. Medium heat is your friend—be patient!
- Mistake: Pressing down on the pancakes with the spatula. I know it’s tempting, but resist! Pressing squeezes out the air bubbles that make the pancakes light and fluffy, resulting in a dense, sad disk. Just let them be.
- Mistake: Flipping too early. Wait for those bubbles to pop on the surface and the edges to look matte and set. If you try to flip too soon, the pancake might tear because it hasn’t formed a proper crust yet.
- Mistake: Over-blending the batter. You just need to blend until the oats are fully broken down and the batter is smooth. Over-blending can sometimes make the batter a bit gummy, though honestly, this recipe is quite forgiving.
Expert Tips
- Tip: Make a “test pancake” first. Always cook one small pancake first to test your heat level and batter consistency. This is your chance to adjust—add a splash more milk if it’s too thick, or turn up the heat if it’s not browning. It saves the whole batch!
- Tip: Keep them warm properly. To prevent your beautiful stack from getting soggy, place cooked pancakes in a single layer on a wire rack set over a baking sheet in the warm oven. This allows air to circulate, keeping them warm and crisp.
- Tip: Freeze for instant breakfasts. These pancakes freeze exceptionally well. Let them cool completely, then layer them between parchment paper in a freezer bag. Reheat in a toaster or oven for a quick, healthy breakfast on busy mornings.
- Tip: Add mix-ins after blending. If you’re adding chocolate chips or blueberries, fold them into the batter *after* you’ve blended it. This prevents them from getting pulverized and ensures they’re evenly distributed.
FAQs
Can I make this batter the night before?
You can, but with a caveat. The batter will thicken significantly as the oats soak up the liquid overnight. In the morning, you’ll likely need to thin it out with a tablespoon or two of extra milk to get it back to a pourable consistency. The baking powder will also lose some of its potency, so the pancakes might be slightly less fluffy. For the best results, I prefer blending fresh, but an overnight rest is totally workable if you’re in a pinch!
Are these pancakes gluten-free?
Yes, as long as you use certified gluten-free rolled oats! Oats are naturally gluten-free, but they are often processed in facilities that also handle wheat, leading to cross-contamination. So, if you need them to be strictly gluten-free, just double-check the packaging on your oats to ensure they’re certified. All the other ingredients are naturally gluten-free, making this a fantastic option for those with dietary restrictions.
Why are my pancakes gummy in the middle?
This usually happens for one of two reasons. First, the heat might be too high, causing the outside to cook too quickly while the inside remains underdone. Second, you might be flipping them too often. Try cooking them on a slightly lower heat and only flipping once when the surface is bubbly. Let them cook undisturbed—patience is key here to achieving that perfect, cooked-through center.
Can I make these without eggs?
It’s a bit trickier, as the eggs provide structure and lift. However, you can try a “flax egg” as a substitute. Mix 1 tablespoon of ground flaxseed with 2.5 tablespoons of water for each egg and let it sit for 5 minutes to gel up before adding it to the blender. The texture will be a bit denser and more delicate, but it can work! You might need an extra minute of cooking time per side.
My batter is too thin/too thick. How do I fix it?
No worries, this is an easy fix! If the batter is too thin and runny, add another tablespoon or two of rolled oats and blend again for a few seconds. If it’s too thick and gloopy, add milk, one tablespoon at a time, blending after each addition until it reaches the right consistency. It should pour slowly off a spoon or ladle, not run off in a stream or plop off in a blob.
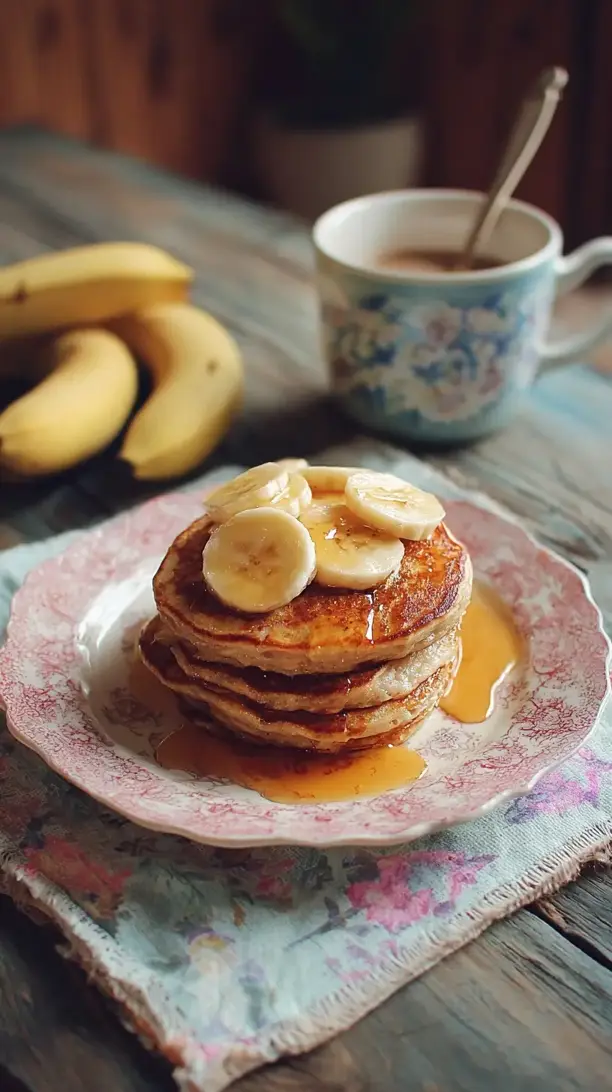
Banana Oat Pancakes
Whip up fluffy, wholesome Banana Oat Pancakes in your blender! This easy, healthy recipe uses ripe bananas & oats for a naturally sweet, satisfying breakfast everyone will love.
Ingredients
Ingredients
-
2 large, very ripe bananas (the spottier, the better!)
-
2 large eggs
-
1 cup rolled oats (old-fashioned, not instant)
-
1/2 cup milk of your choice (dairy, almond, or oat milk work beautifully)
-
1 1/2 tsp baking powder
-
1 tsp vanilla extract
-
1/4 tsp salt
-
1 tbsp maple syrup or honey (optional, depending on your banana's sweetness)
-
Butter or coconut oil (for greasing the pan)
Instructions
-
Combine the ingredients in your blender. Add the rolled oats first, followed by the bananas (broken into chunks), eggs, milk, baking powder, vanilla, salt, and maple syrup if using. The order isn't super critical, but starting with the dry ingredients at the bottom helps everything blend more evenly.01
-
Blend until completely smooth. This usually takes about 30-60 seconds on high speed. You'll want to stop and scrape down the sides once to make sure no oat bits are hiding. The batter should be thick but pourable—think a similar consistency to traditional pancake batter. If it seems too thick, add a tablespoon more milk and blend again.02
-
Let the batter rest. This is the secret weapon! Pour the batter into a bowl or just let it sit in the blender jar for 5 minutes. You'll notice it thicken up slightly as the oats hydrate. This resting period is what gives the pancakes their lovely, light texture.03
-
Heat your skillet. Place a non-stick skillet or griddle over medium heat. Add a small pat of butter or a teaspoon of coconut oil. You'll know it's ready when a drop of water sizzles and dances on the surface. Don't rush this—a properly heated pan is crucial for a golden-brown exterior.04
-
Cook the pancakes. Pour about 1/4 cup of batter for each pancake onto the hot skillet. They won't spread as much as traditional pancakes, so you can gently spread them into a round shape with the back of your ladle. Cook for 2-3 minutes, until you see bubbles forming on the surface and the edges look set.05
-
Flip and finish cooking. Slide your spatula underneath and flip each pancake confidently. They should be a beautiful golden brown. Cook for another 1-2 minutes on the second side until cooked through. The second side always cooks faster, so keep an eye on them. You can keep finished pancakes warm on a baking sheet in a 200°F (95°C) oven while you cook the rest.06