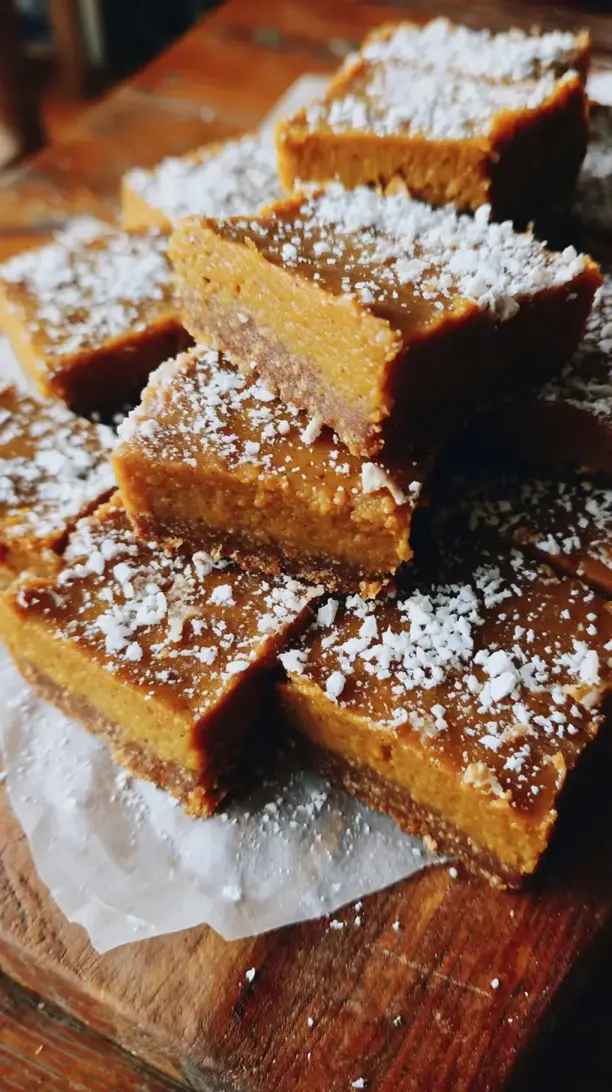
Why You’ll Love This Banana Bread Blondies
- One-bowl wonder. Seriously, you can mix the entire batter in a single bowl, which means less cleanup and more time enjoying that incredible smell wafting from your oven.
- The perfect texture hybrid. You get the soft, cake-like crumb of banana bread married with the dense, chewy, and slightly gooey interior of a classic blondie. It’s the best of both worlds in every single bite.
- Deep, caramelized banana flavor. Using very ripe, almost black bananas is the secret here. They mash easily and pack a punch of natural sweetness and flavor that you just can’t get from less-ripe fruit.
- Endlessly adaptable. This recipe is a fantastic base. Feel free to stir in chocolate chips, chopped nuts, or even a swirl of peanut butter to make it your own signature treat.
Ingredients & Tools
- 3 large, very ripe bananas (about 1 ½ cups mashed)
- ½ cup (115 g) unsalted butter, melted and slightly cooled
- 1 cup (200 g) light brown sugar, packed
- 1 large egg, at room temperature
- 2 teaspoons pure vanilla extract
- 1 ½ cups (180 g) all-purpose flour
- 1 teaspoon ground cinnamon
- ½ teaspoon baking powder
- ½ teaspoon fine sea salt
- ¼ teaspoon ground nutmeg (optional, but lovely)
- 1 cup (170 g) semi-sweet chocolate chips (or walnuts/pecans)
Tools: 8×8-inch square baking pan, parchment paper, a large mixing bowl, a whisk and spatula, and a cooling rack.
The quality of your bananas really makes a difference here—the spottier, the better. And using brown sugar instead of white gives these blondies a deeper, more molasses-like flavor and that signature moist, chewy texture. Don’t skip the cinnamon; it’s what gives that classic banana bread warmth.
Nutrition (per serving)
- Calories: 280 kcal
- Protein: 3 g
- Fat: 12 g
- Carbohydrates: 42 g
- Fiber: 2 g
Serves: 9 | Prep Time: 15 minutes | Cook Time: 30-35 minutes | Total Time: 50 minutes (plus cooling)
Before You Start: Tips & Ingredient Notes
- Banana ripeness is non-negotiable. You want bananas that are deeply yellow with lots of brown spots, or even almost completely black. They should mash effortlessly and provide the maximum amount of natural sweetness and flavor to your batter.
- Don’t over-mix the batter. Once you add the flour, switch to a spatula and mix just until the last streaks of flour disappear. Over-mixing develops gluten, which can lead to a tougher, more cake-like texture instead of the desired dense and fudgy blondie.
- Let your melted butter cool. Adding piping hot butter to your banana and sugar mixture could potentially start cooking the egg. Let the butter sit for 5-7 minutes after melting so it’s warm, not hot, to the touch.
- Line your pan properly. Using parchment paper with a slight overhang on two sides is a game-changer. It creates a “sling” that allows you to lift the entire slab of blondies out of the pan once cooled, making for incredibly clean and easy slicing.
How to Make Banana Bread Blondies
Step 1: Prep your pan and preheat the oven. Start by preheating your oven to 350°F (175°C). This gives it plenty of time to reach the perfect temperature. Then, line your 8×8-inch baking pan with parchment paper, leaving some overhang on two opposite sides. A little light spray or butter on the pan underneath the paper helps it stick in place. This simple step guarantees you’ll get perfect, intact squares later.
Step 2: Mash and mix the wet ingredients. In your large bowl, peel and add your three very ripe bananas. Use a fork or a potato masher to mash them until they’re relatively smooth, but a few small lumps are totally fine—they add little pockets of pure banana flavor. To the mashed bananas, add the melted (and slightly cooled) butter, packed brown sugar, room temperature egg, and vanilla extract. Whisk everything together vigorously for a good minute or two. You’ll notice the mixture becomes slightly thicker and more cohesive.
Step 3: Combine the dry ingredients. In a separate small bowl (or you can just sprinkle them over the wet ingredients), whisk together the all-purpose flour, cinnamon, baking powder, salt, and nutmeg if using. This ensures the leavening agents and spices are evenly distributed throughout the flour, preventing any bitter pockets in your final blondies.
Step 4: Bring the batter together. Add the dry ingredient mixture to the wet ingredients. Now, put the whisk away and grab a spatula. Gently fold the dry ingredients into the wet until you can no longer see any streaks of white flour. Be careful not to overwork it. The batter will be quite thick and almost like a very sticky cake batter.
Step 5: Fold in your mix-ins. Now is the time to add your chocolate chips or nuts. Gently fold about ¾ cup of them into the batter, reserving the remaining ¼ cup to sprinkle on top. This gives you a nice distribution inside and a pretty, studded look on the surface.
Step 6: Bake to perfection. Pour and spread the thick batter into your prepared pan, using the spatula to push it into an even layer. Scatter the reserved chocolate chips over the top. Bake for 30-35 minutes. The top should be golden brown, set, and will have a lovely crackly appearance. A toothpick inserted into the center should come out with a few moist crumbs attached, but not wet batter.
Step 7: The most important step: cool completely. I know it’s tempting, but you must let the blondies cool completely in the pan set on a wire rack. If you try to cut them while warm, they will be too soft and fall apart. For the cleanest slices, you can even pop the pan into the refrigerator for an hour after they’ve cooled to room temperature.
Serving Suggestions
Complementary Dishes
- A scoop of vanilla bean ice cream — The classic warm-and-cold contrast is heavenly here. The creamy vanilla melts into the warm, spiced blondie for an instant dessert upgrade.
- A dollop of Greek yogurt and fresh berries — For a slightly lighter take, the tangy yogurt and bright, juicy berries cut through the sweetness beautifully, making it feel almost acceptable for breakfast.
- A side of salted caramel sauce — Drizzle it over the top for a truly decadent experience. The salt enhances the buttery, banana flavors and adds a wonderful sticky richness.
Drinks
- A cold glass of milk — It’s a timeless pairing for a reason. The creaminess of the milk is the perfect companion to the rich, sweet blondie.
- A hot cup of coffee — The bitterness of a good, strong brew provides a fantastic counterpoint to the sweetness, making each bite of blondie taste even more complex.
- Chai tea latte — The warm spices in the chai echo the cinnamon and nutmeg in the blondies, creating a wonderfully cozy and harmonious flavor experience.
Something Sweet
- A simple fruit salad — Something bright and fresh like a mix of oranges, pineapple, and berries provides a palate-cleansing finish that feels refreshing after the rich blondie.
- A small square of dark chocolate — For the true chocolate lover, a piece of high-cocoa dark chocolate alongside the blondie intensifies the chocolate chips within and satisfies any deep cocoa cravings.
- Lemon sorbet — The sharp, citrusy zing of a clean lemon sorbet is a brilliant way to end the meal, cutting through the richness and leaving your palate feeling refreshed.
Top Mistakes to Avoid
- Mistake: Using underripe bananas. Yellow, firm bananas lack the intense sweetness and flavor of their overripe counterparts. Your blondies will taste bland and be less moist. I’ve learned this the hard way—wait for those spots!
- Mistake: Over-baking. It’s easy to think they need more time because the center might look a little soft, but they continue to set as they cool. Over-baking is the primary cause of dry, cakey blondies instead of fudgy ones. Trust the toothpick test with moist crumbs.
- Mistake: Skipping the parchment paper. Trying to pry these soft, tender blondies out of a greased pan is a recipe for crumbled disaster. The parchment sling is your best friend for presentation.
- Mistake: Cutting while warm. Your patience will be rewarded! Cutting into warm blondies causes them to smoosh and tear. Let them set fully for those picture-perfect, clean-edged squares.
Expert Tips
- Tip: Brown your butter for a nutty twist. Take your melted butter one step further by browning it. Cook it in a saucepan over medium heat until it smells nutty and you see little brown bits at the bottom. Let it cool before using. It adds an incredible depth of flavor that pairs wonderfully with banana.
- Tip: Add a sprinkle of flaky sea salt on top. Right when the blondies come out of the oven, sprinkle a tiny pinch of flaky sea salt over the top. It doesn’t make them taste salty, it just makes all the other flavors—the banana, the brown sugar, the chocolate—pop in the most amazing way.
- Tip: For an extra-gooey center, slightly under-bake. If you’re a fan of a super fudgy, almost brownie-like center, take them out when the toothpick inserted has a bit of thick, wet batter clinging to it. They will be very delicate, so chilling before cutting is essential.
- Tip: Freeze individual portions. These blondies freeze beautifully. Once completely cooled, slice them, wrap each square tightly in plastic wrap, and store in a freezer bag. You can grab one for a quick treat anytime—just let it thaw at room temperature or pop it in the microwave for 15 seconds.
FAQs
Can I use frozen bananas?
Absolutely! Thaw frozen, peeled bananas completely in a bowl first, as they’ll release a lot of liquid. You can either drain off some of this excess liquid or use it all—it will just make your blondies a bit more moist and dense. Mash them as you would fresh ones and proceed with the recipe. It’s a fantastic way to use up bananas you’ve stockpiled in the freezer.
Can I make these gluten-free?
Yes, you can! A 1:1 gluten-free all-purpose flour blend works very well as a direct substitute in this recipe. I’ve had great success with brands like Bob’s Red Mill or King Arthur. The texture might be a tiny bit more crumbly, but they will still be deliciously chewy and flavorful. Just be sure your baking powder is certified gluten-free.
How should I store these blondies, and how long do they last?
Once completely cool, store them in an airtight container at room temperature for up to 3 days. For longer storage, I recommend the freezer. They stay wonderfully moist and taste almost fresh-baked when thawed. If you refrigerate them, they will become quite firm, so let them come to room temperature before serving for the best texture.
My blondies turned out cakey. What happened?
A cakey texture usually points to two things: over-mixing the batter after adding the flour, or over-baking. Remember, mix just until combined, and take them out of the oven when the top is set and a toothpick has a few moist crumbs. They firm up significantly as they cool on the counter.
Can I reduce the sugar in this recipe?
You can, but it will affect the texture. The brown sugar contributes not just sweetness but also moisture and that classic chewy blondie consistency. Reducing it by more than a quarter cup might make them drier and more cake-like. If you try it, I’d suggest using the ripest bananas possible to maximize their natural sweetness as a compensation.

Banana Bread Blondies
Get the best Banana Bread Blondies recipe! A one-bowl dessert with banana bread flavor and blondie texture. Easy, fudgy, and perfect for using ripe bananas. Bake a batch today!
Ingredients
For the Blondies:
-
3 large very ripe bananas (about 1 ½ cups mashed)
-
1/2 cup unsalted butter (melted and slightly cooled)
-
1 cup light brown sugar (packed)
-
1 large egg (at room temperature)
-
2 teaspoons pure vanilla extract
-
1 1/2 cups all-purpose flour
-
1 teaspoon ground cinnamon
-
1/2 teaspoon baking powder
-
1/2 teaspoon fine sea salt
-
1/4 teaspoon ground nutmeg (optional, but lovely)
-
1 cup semi-sweet chocolate chips (or walnuts/pecans)
Instructions
-
Prep your pan and preheat the oven. Start by preheating your oven to 350°F (175°C). This gives it plenty of time to reach the perfect temperature. Then, line your 8x8-inch baking pan with parchment paper, leaving some overhang on two opposite sides. A little light spray or butter on the pan underneath the paper helps it stick in place. This simple step guarantees you’ll get perfect, intact squares later.01
-
Mash and mix the wet ingredients. In your large bowl, peel and add your three very ripe bananas. Use a fork or a potato masher to mash them until they're relatively smooth, but a few small lumps are totally fine—they add little pockets of pure banana flavor. To the mashed bananas, add the melted (and slightly cooled) butter, packed brown sugar, room temperature egg, and vanilla extract. Whisk everything together vigorously for a good minute or two. You’ll notice the mixture becomes slightly thicker and more cohesive.02
-
Combine the dry ingredients. In a separate small bowl (or you can just sprinkle them over the wet ingredients), whisk together the all-purpose flour, cinnamon, baking powder, salt, and nutmeg if using. This ensures the leavening agents and spices are evenly distributed throughout the flour, preventing any bitter pockets in your final blondies.03
-
Bring the batter together. Add the dry ingredient mixture to the wet ingredients. Now, put the whisk away and grab a spatula. Gently fold the dry ingredients into the wet until you can no longer see any streaks of white flour. Be careful not to overwork it. The batter will be quite thick and almost like a very sticky cake batter.04
-
Fold in your mix-ins. Now is the time to add your chocolate chips or nuts. Gently fold about ¾ cup of them into the batter, reserving the remaining ¼ cup to sprinkle on top. This gives you a nice distribution inside and a pretty, studded look on the surface.05
-
Bake to perfection. Pour and spread the thick batter into your prepared pan, using the spatula to push it into an even layer. Scatter the reserved chocolate chips over the top. Bake for 30-35 minutes. The top should be golden brown, set, and will have a lovely crackly appearance. A toothpick inserted into the center should come out with a few moist crumbs attached, but not wet batter.06
-
The most important step: cool completely. I know it’s tempting, but you must let the blondies cool completely in the pan set on a wire rack. If you try to cut them while warm, they will be too soft and fall apart. For the cleanest slices, you can even pop the pan into the refrigerator for an hour after they've cooled to room temperature.07