
Why You’ll Love This Avocado Chocolate Mousse
- Unbelievably Creamy Texture. Forget any grainy or icy textures you might associate with healthy desserts. The fat content in the avocado blends into a mousse that’s smoother than satin and richer than your wildest chocolate dreams.
- It’s Seriously Quick. You’re literally about ten minutes away from dessert heaven. There’s no baking, no whipping egg whites, no waiting for things to set for hours. Just blend, chill, and devour.
- A Clever Little Secret. This is the perfect dessert for when you want to feel a little virtuous without sacrificing an ounce of indulgence. It’s naturally dairy-free (if you use the right chocolate) and packed with good fats.
- Endlessly Customisable. Once you’ve mastered the base, the flavour world is your oyster. Think orange zest, a pinch of chili, a swirl of peanut butter, or a sprinkle of sea salt on top.
Ingredients & Tools
- 2 large, ripe avocados (about 300g flesh)
- 100 g high-quality dark chocolate (70% cocoa works beautifully), melted and slightly cooled
- 3 tbsp maple syrup, or to taste
- 2 tbsp cocoa powder, unsweetened
- 1 tsp pure vanilla extract
- A pinch of fine sea salt
- 2-4 tbsp of a plant-based milk (almond, oat, or coconut) to adjust consistency
Tools: A good food processor or high-speed blender, a spatula, a small bowl for melting chocolate, and ramekins or small glasses for serving.
The quality of your chocolate really is the star here, so don’t skimp! A good bar will give you a deep, complex flavour that makes the mousse taste incredibly luxurious. As for the avocados, they need to be perfectly ripe—yielding gently to a soft squeeze. If they’re underripe, the mousse will be grainy; if they’re overripe and brown inside, you’ll taste it.
Serves: 4 | Prep Time: 10 minutes | Chill Time: 30 minutes (minimum) | Total Time: 40 minutes
Before You Start: Tips & Ingredient Notes
- Ripe Avocados are Non-Negotiable. This is the single most important step. Your avocados should be dark in colour and give slightly when you press them gently. If they’re rock hard, wait a day or two. The creamy flesh is what creates that magical texture.
- Melt Your Chocolate Gently. You can use a double boiler or the microwave. If using a microwave, do it in 20-second bursts, stirring well each time. The goal is to just melt it, not cook it. Let it cool for a few minutes so it doesn’t “cook” the avocado when you mix it in.
- Taste as You Go! Before you pour the mousse into serving glasses, give it a quick taste. Depending on your chocolate’s sweetness and your personal preference, you might want an extra drizzle of maple syrup. This is your dessert—make it perfect for you.
- Don’t Rush the Blending. You really want to let the food processor or blender run for a good minute or two. This incorporates air and ensures every last tiny bit of avocado is broken down into that dreamy, silky consistency we’re after.
How to Make Avocado Chocolate Mousse
Step 1: Prepare Your Avocados. Slice your ripe avocados in half, remove the pits, and scoop the beautiful green flesh directly into the bowl of your food processor or blender. A little tip: run the blade of your knife through the flesh in a grid pattern before scooping—it makes it much easier to get every last bit out.
Step 2: Combine the Base Ingredients. Add the melted (and slightly cooled) chocolate, maple syrup, cocoa powder, vanilla extract, and that all-important pinch of salt to the food processor with the avocado. That pinch of salt isn’t just for show—it will make the chocolate flavour pop and taste much richer.
Step 3: The Grand Blend. Now, put the lid on securely and start blending. Start on a low speed and gradually increase to high. Let it run for a full minute. You’ll notice it might look a bit grainy or thick at first, but just keep going. It will suddenly come together into a smooth, homogenous mixture.
Step 4: Check the Consistency. Stop the machine, scrape down the sides with a spatula, and have a look. If it seems a little too thick for your liking, add a tablespoon of your chosen plant-based milk. Blend again for another 30 seconds. Repeat until it’s your perfect mousse consistency—thick, but easily spoonable.
Step 5: Taste and Adjust. This is the most important chef’s moment. Dip a clean spoon in and taste it. Does it need more sweetness? A bit more vanilla? Now is the time to add it and give it one last quick blend. Remember, the flavours will meld and deepen a little as it chills.
Step 6: Chill to Perfection. Divide the mousse evenly between four small glasses or ramekins. Smooth the tops with the back of a spoon. Cover them with cling film (press it directly onto the surface of the mousse to prevent it from browning) and pop them in the fridge for at least 30 minutes. This chilling time is crucial—it firms up the texture and makes it even more mousse-like.
Serving Suggestions
Complementary Dishes
- Fresh Berry Compote — The bright, sharp acidity of berries cuts through the richness of the chocolate beautifully. Simply simmer some mixed berries with a tiny bit of maple syrup until they break down into a saucy consistency.
- A Dollop of Coconut Whipped Cream — For an extra layer of decadence, a spoonful of lightly sweetened coconut cream on top adds a wonderful contrast in texture and a subtle tropical note.
- Toasted Nuts or Seeds — A sprinkle of toasted flaked almonds, chopped hazelnuts, or even pumpkin seeds provides a delightful crunch and a nutty flavour that pairs wonderfully with dark chocolate.
Drinks
- A Bold Red Wine — A glass of Cabernet Sauvignon or Zinfandel has the body and dark fruit notes to stand up to the intense chocolate without being overwhelmed.
- An Espresso or Strong Coffee — The classic pairing. The bitterness of the coffee enhances the deep cocoa flavours and makes for a truly sophisticated end to a meal.
- A Cold Glass of Oat Milk — Keeping it simple and plant-based, a creamy, cold glass of oat milk is a surprisingly perfect and comforting partner to this mousse.
Something Sweet
- Orange and Almond Biscuits — The zesty citrus flavour is a match made in heaven with dark chocolate. A crunchy, not-too-sweet biscuit is perfect for dipping.
- Vanilla Poached Pears — For a truly elegant dessert duo, serve the mousse alongside a half pear that has been gently poached in a vanilla-infused syrup. The soft, fragrant pear is a dream with the mousse.
- Simple Dark Chocolate Shavings — Sometimes, more is more. Shaving a little extra dark chocolate over the top right before serving looks stunning and doubles down on the chocolate intensity.
Top Mistakes to Avoid
- Mistake: Using underripe avocados. This is the number one reason for a grainy, disappointing mousse. The avocado must be soft and creamy to blend seamlessly. I’ve been impatient and tried it with a slightly firm one, and honestly, you can tell immediately.
- Mistake: Adding hot melted chocolate. If your chocolate is too hot when you add it to the avocado, it can start to “cook” the avocado, leading to a weird texture and sometimes a slight avocado flavour coming through. Let it cool for 5 minutes first.
- Mistake: Not blending for long enough. Impatience is the enemy of smooth mousse. You really need to let the machine run for a good minute or two to ensure every single bit of avocado is completely puréed. Scrape down the sides halfway through!
- Mistake: Skipping the chill time. The mousse will taste good right out of the blender, but it will be a bit soft. The fridge time is what gives it that classic, firm-yet-airy mousse texture. It’s worth the wait.
Expert Tips
- Tip: Add a flavour boost. Once you’ve mastered the basic recipe, try adding a twist. A tablespoon of orange zest, a quarter teaspoon of cinnamon or instant espresso powder, or even a tiny pinch of chili flakes can take this mousse to a whole new level of deliciousness.
- Tip: Make it ahead. This mousse is a fantastic make-ahead dessert. It will keep beautifully in the fridge, covered, for up to two days. In fact, the flavours meld and improve overnight. It’s a lifesaver for dinner parties.
- Tip: Get creative with toppings. The topping is where you can really show off. Think crushed raspberries, a drizzle of salted caramel, cacao nibs for crunch, or edible flowers for a stunning presentation. It’s your canvas!
- Tip: For an ultra-silky texture, sieve the cocoa powder. If you’re a perfectionist, sifting your cocoa powder before adding it will ensure there are no little lumps, guaranteeing the smoothest mousse imaginable.
FAQs
Can I taste the avocado?
Honestly, if you make it correctly with ripe avocados and enough high-quality chocolate and sweetener, you should not taste the avocado at all. Its job is purely to provide that incredible, creamy base. The dominant flavour will be rich, dark chocolate. If you do detect it, it’s often a sign that the avocados weren’t quite ripe enough or the chocolate wasn’t strong enough to mask it.
Can I make this with milk chocolate?
You can, but you’ll need to adjust the recipe. Milk chocolate is much sweeter, so I’d recommend starting by omitting the maple syrup entirely. Blend with just the avocado and milk chocolate, then taste and only add a tiny bit of syrup if you feel it’s needed. The result will be sweeter and less intensely chocolatey, but still delicious.
How long does it keep in the fridge?
It keeps really well! Stored in an airtight container (or with cling film pressed directly onto the surface), it will be perfect for 2-3 days. The colour might darken very slightly due to the avocado, but the flavour will be great. I don’t recommend freezing it, as the texture can become watery when thawed.
My mousse is a bit bitter. What happened?
This usually points to the cocoa powder. Using a natural, unsweetened cocoa powder (which is what the recipe calls for) can be quite bitter if not balanced with enough sweetness. The fix is easy! Just blend in another tablespoon of maple syrup until it suits your palate. It could also be that your dark chocolate was very high cocoa content (like 85% or above).
Can I make this without a food processor?
It’s tricky, but not impossible. You would need an immersion (stick) blender and a very tall, narrow container to get enough blending power. A standard blender is your best bet if you don’t have a food processor. Using a fork or a whisk by hand won’t give you the smooth, airy texture we’re aiming for—you’ll likely end up with a chunky avocado-chocolate mix.
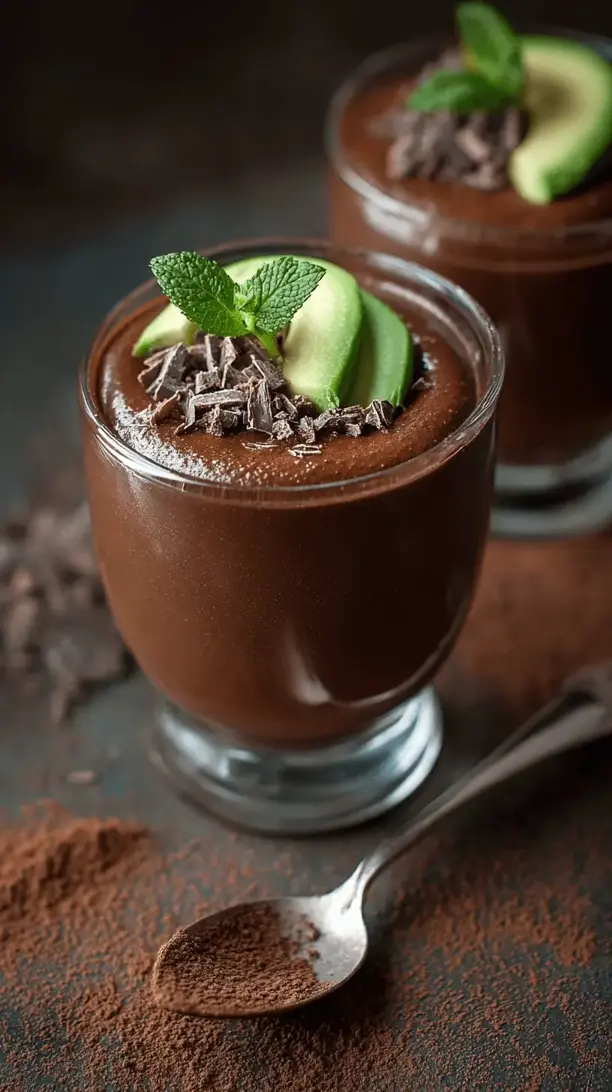
Avocado Chocolate Mousse
Creamy, decadent avocado chocolate mousse ready in 10 minutes! This easy, dairy-free dessert is a healthy indulgence. A secret ingredient recipe that will wow everyone.
Ingredients
Ingredients
-
2 large, ripe avocados (about 300g flesh)
-
100 g high-quality dark chocolate (70% cocoa works beautifully, melted and slightly cooled)
-
3 tbsp maple syrup (or to taste)
-
2 tbsp cocoa powder (unsweetened)
-
1 tsp pure vanilla extract
-
A pinch fine sea salt
-
2-4 tbsp plant-based milk (almond, oat, or coconut to adjust consistency)
Instructions
-
Prepare Your Avocados. Slice your ripe avocados in half, remove the pits, and scoop the beautiful green flesh directly into the bowl of your food processor or blender. A little tip: run the blade of your knife through the flesh in a grid pattern before scooping—it makes it much easier to get every last bit out.01
-
Combine the Base Ingredients. Add the melted (and slightly cooled) chocolate, maple syrup, cocoa powder, vanilla extract, and that all-important pinch of salt to the food processor with the avocado. That pinch of salt isn't just for show—it will make the chocolate flavour pop and taste much richer.02
-
The Grand Blend. Now, put the lid on securely and start blending. Start on a low speed and gradually increase to high. Let it run for a full minute. You'll notice it might look a bit grainy or thick at first, but just keep going. It will suddenly come together into a smooth, homogenous mixture.03
-
Check the Consistency. Stop the machine, scrape down the sides with a spatula, and have a look. If it seems a little too thick for your liking, add a tablespoon of your chosen plant-based milk. Blend again for another 30 seconds. Repeat until it's your perfect mousse consistency—thick, but easily spoonable.04
-
Taste and Adjust. This is the most important chef's moment. Dip a clean spoon in and taste it. Does it need more sweetness? A bit more vanilla? Now is the time to add it and give it one last quick blend. Remember, the flavours will meld and deepen a little as it chills.05
-
Chill to Perfection. Divide the mousse evenly between four small glasses or ramekins. Smooth the tops with the back of a spoon. Cover them with cling film (press it directly onto the surface of the mousse to prevent it from browning) and pop them in the fridge for at least 30 minutes. This chilling time is crucial—it firms up the texture and makes it even more mousse-like.06


