
Why You’ll Love This Apple Slices with Peanut Butter
- It’s unbelievably fast and flexible. We’re talking about five minutes from thought to plate. Whether you need a quick breakfast, a desk lunch side, or a healthy dessert, this recipe adapts to your moment.
- The texture contrast is pure magic. The cold, crisp crunch of the apple against the smooth, dense creaminess of the peanut butter is a sensory experience that never gets old. It’s far more satisfying than either component on its own.
- It’s a perfect energy booster. With a great balance of natural sugars, healthy fats, and a bit of protein, this snack provides sustained energy without the crash you might get from processed alternatives.
- It’s a fantastic canvas for creativity. Once you master the basic duo, a world of toppings opens up. A sprinkle of cinnamon, a drizzle of honey, or a few dark chocolate chips can transform it into something new every time.
Ingredients & Tools
- 1 large, crisp apple (like Honeycrisp, Granny Smith, or Fuji)
- 2-3 tablespoons of your favourite peanut butter (creamy or crunchy)
- A tiny pinch of flaky sea salt (optional, but highly recommended)
- Optional toppings: a drizzle of honey or maple syrup, a sprinkle of cinnamon or chia seeds, a few dark chocolate chips, or a handful of granola.
Tools: A sharp knife, a cutting board, a small bowl for the peanut butter (if you’re dipping), and a spoon or small offset spatula for spreading.
The beauty here is in the quality of your two main stars. A really good, crisp apple makes all the difference—it needs to stand up to the peanut butter without getting mushy. And your peanut butter? Choose one where the ingredients are just peanuts and maybe salt. That pure, roasted flavour is what we’re after.
Serves: 1 | Prep Time: 5 minutes | Cook Time: 0 minutes | Total Time: 5 minutes
Before You Start: Tips & Ingredient Notes
- Apple selection is key. You want an apple that’s firm and offers a contrast to the peanut butter. A tart Granny Smith is classic, but a super-sweet and crisp Honeycrisp or Jazz apple is also fantastic. Avoid mealy apples like Red Delicious—they just won’t give you that satisfying crunch.
- To prevent browning. If you’re not eating immediately, a quick toss of the apple slices in a little lemon juice (about a teaspoon diluted in water) will keep them looking fresh. Honestly, for a solo snack, I usually just slice and eat, but it’s a great tip for making a platter for friends.
- Warm your peanut butter slightly. If your peanut butter is stored in the fridge, it can be too stiff to spread nicely. Let the jar sit in a bowl of warm water for a few minutes, or give it a quick 10-second blast in the microwave (with the lid off!) to make it beautifully drizzle-able.
- Embrace the optional salt. I know it sounds odd, but a tiny pinch of flaky sea salt on top of the peanut butter elevates the entire experience. It enhances the sweetness of the apple and the nuttiness of the peanut butter in a way that’s just… chef’s kiss.
How to Make Apple Slices with Peanut Butter
Step 1: Choose and Wash Your Apple. Start by picking your apple. Give it a good rinse under cool water and dry it thoroughly with a clean towel. A dry apple is easier to handle and the peanut butter will stick better. You’ll notice that a firm apple feels heavy for its size—that’s a sign of juiciness.
Step 2: The Core Decision. You have a couple of options here. The classic method is to slice the apple vertically into quarters first. Then, using your sharp knife, cut out the core from each quarter. Alternatively, you can use an apple corer to remove the core from the whole apple before slicing. Either way works perfectly; it’s just a matter of what tools you have and what you prefer.
Step 3: Slice Evenly. Now, slice your cored apple quarters into even slices, about ¼-inch thick. Even slicing isn’t just for looks—it ensures every bite has the perfect ratio of apple to peanut butter. If the slices are too thin, they might break when you spread; too thick, and the balance is off. You’re aiming for the Goldilocks zone of apple slices.
Step 4: Prepare the Peanut Butter. Scoop your desired amount of peanut butter into a small bowl. If it’s a bit stiff, give it a good stir. This is where warming it slightly, as mentioned before, really pays off. You want it to be smooth and spreadable, not a gloopy struggle. If you’re using crunchy peanut butter, give it a stir to redistribute the peanut bits.
Step 5: The Assembly. Here’s the fun part. You can either spread the peanut butter directly onto each apple slice with a small knife or spatula, or you can arrange the slices on a plate and use the bowl of peanut butter as a dip. Spreading gives you more control over the coverage, while dipping is faster and feels a bit more playful. There’s no wrong answer!
Step 6: The Final Flourish. This is where you make it your own. If you’re using that flaky sea salt, now’s the time for a delicate sprinkle over the peanut butter. If you’re adding any other toppings—a dusting of cinnamon, a few chocolate chips, a drizzle of honey—add them immediately so they stick to the peanut butter. The peanut butter acts like a delicious glue for all your extra goodies.
Step 7: Enjoy Immediately! This isn’t a make-ahead meal. The joy is in the contrast of the crisp apple and the creamy topping. So, find a comfortable spot, take a bite, and appreciate the simple perfection you’ve just created. Listen for that crunch—it’s the sound of success.
Serving Suggestions
Complementary Dishes
- A simple green salad — The freshness of the salad is a lovely, light counterpart to the rich peanut butter, making it a great light lunch combination.
- A bowl of Greek yogurt with berries — Serve this alongside for a protein-packed breakfast or snack that feels abundant and varied.
- A handful of baby carrots and celery sticks — Create a crudité platter with the apple slices for a variety of dipping textures and flavours.
Drinks
- A cold glass of milk — It’s a classic pairing for a reason. The creaminess of the milk complements the peanut butter beautifully and cools the palate.
- A hot cup of chai tea — The warm spices in chai, like cinnamon and cardamom, echo the warm, roasted notes in the peanut butter for a cosy feel.
- Sparkling water with a twist of lime — The bubbles and citrus cut through the richness, leaving your palate feeling clean and refreshed.
Something Sweet
- A small square of dark chocolate — Enjoyed after the last apple slice, it extends the indulgent feeling without being too much.
- A few dried apricots or dates — Their concentrated sweetness and chewy texture provide a different kind of fruit experience that pairs well.
- A spoonful of vanilla ice cream — For a real treat, place a couple of the peanut-butter-slathered apple slices on top of a small scoop of ice cream. Trust me on this one.
Top Mistakes to Avoid
- Mistake: Using a soft, mealy apple. This is the number one error. A soft apple will become mushy under the weight of the peanut butter and won’t provide that essential crisp contrast. The texture becomes sadly one-note.
- Mistake: Spreading cold, hard peanut butter. Trying to spread rock-solid peanut butter from the fridge will just tear your delicate apple slices. It’s a frustrating experience that’s easily avoided with a quick warm-up.
- Mistake: Preparing it too far in advance. The apple will oxidize and brown, and worse, it will release moisture, making the peanut butter slide off and the apple lose its crunch. This is a snack best made and eaten right away.
- Mistake: Going overboard with toppings. While toppings are fun, the star of the show is the apple and peanut butter duo. Piling on too many extras can overwhelm the simple, perfect balance you’re trying to achieve.
Expert Tips
- Tip: Create a “peanut butter pit.” If you’re serving this for a party, slice the apples and arrange them in a sunburst pattern on a plate. Place a small bowl of peanut butter in the centre for dipping—it looks impressive and is so easy.
- Tip: Mix-in magic. Stir a teaspoon of honey, a pinch of cinnamon, or even a few mini chocolate chips directly into the peanut butter before spreading. This distributes the flavour evenly and is a fun surprise.
- Tip: The horizontal slice. For a fun variation, try slicing the apple horizontally instead of vertically. You’ll get beautiful star-shaped patterns from the core in the centre of each round slice—perfect for a fancy presentation.
- Tip: Freeze for a frosty treat. For a hot day, assemble the slices on a parchment-lined tray, freeze until solid (about an hour), and then enjoy. The apple becomes slushy and the peanut butter firms up, creating a fantastic frozen snack.
FAQs
Can I use a different nut butter?
Absolutely! This recipe is incredibly adaptable. Almond butter, cashew butter, or even sunflower seed butter (a great nut-free alternative) work wonderfully. Each will bring its own unique flavour profile—almond butter is a bit milder and earthier, while sunflower seed butter has a deep, rich taste. The method remains exactly the same, so feel free to experiment and find your favourite combination.
How do I keep the apple slices from turning brown if I’m packing them for lunch?
The lemon juice trick is your best friend here. Toss the sliced apples in a mixture of one tablespoon of lemon juice and one cup of cold water. Drain them well and pat dry before packing. You can also try rubbing the cut sides with the juicy part of a lemon wedge. Another neat hack is to keep the apple whole and slice it at work or school—just pack a small knife and the peanut butter separately.
Is it better to use creamy or crunchy peanut butter?
This is entirely a matter of personal preference and it changes the experience! Creamy peanut butter gives you a smooth, uniform texture that contrasts sharply with the apple’s crunch. Crunchy peanut butter adds an extra layer of texture and a more intense peanut flavour in each bite. I honestly love both and switch depending on my mood. Why not try it both ways and see which one you prefer?
What are the best apples for this recipe?
You want apples that are known for their crisp texture and balanced flavour. My top picks are Honeycrisp (very sweet and explosively crisp), Granny Smith (tart and firm, a classic contrast to the sweet peanut butter), Fuji (sweet, juicy, and firm), and Pink Lady (a perfect sweet-tart balance with great crunch). Avoid McIntosh or Red Delicious, as they tend to be softer.
Can I make this into a more substantial meal?
Definitely! To turn this snack into a light meal, think about adding more components. Serve the apple and peanut butter slices alongside a hard-boiled egg, a handful of nuts, and a cheese stick for a balanced plate with protein, fat, and carbs. You could also crumble the apple-peanut butter combo over a bowl of oatmeal or yogurt for a heartier breakfast. It’s a very versatile starting point.
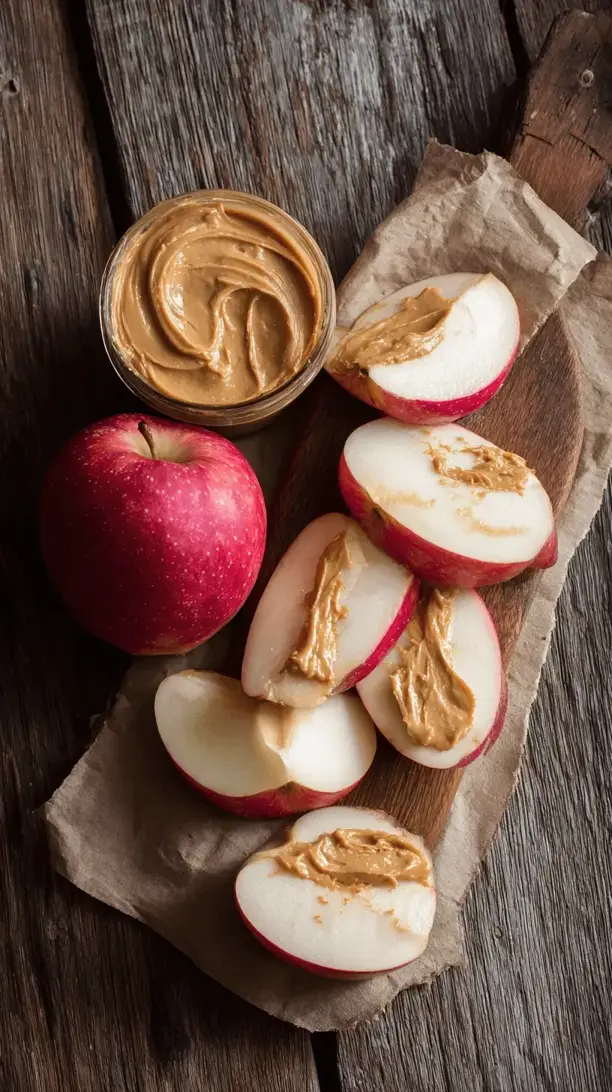
Apple Slices With Peanut Butter
Whip up the perfect apple slices with peanut butter snack in 5 mins! Get Mike's tips for the best crisp apple, creamy PB, and tasty toppings. Healthy, easy & delicious.
Ingredients
Ingredients
-
1 large, crisp apple (like Honeycrisp, Granny Smith, or Fuji)
-
2-3 tablespoons peanut butter (creamy or crunchy)
-
tiny pinch flaky sea salt (optional, but highly recommended)
-
optional toppings (a drizzle of honey or maple syrup, a sprinkle of cinnamon or chia seeds, a few dark chocolate chips, or a handful of granola)
Instructions
-
Choose and Wash Your Apple. Start by picking your apple. Give it a good rinse under cool water and dry it thoroughly with a clean towel. A dry apple is easier to handle and the peanut butter will stick better. You'll notice that a firm apple feels heavy for its size—that's a sign of juiciness.01
-
The Core Decision. You have a couple of options here. The classic method is to slice the apple vertically into quarters first. Then, using your sharp knife, cut out the core from each quarter. Alternatively, you can use an apple corer to remove the core from the whole apple before slicing. Either way works perfectly; it's just a matter of what tools you have and what you prefer.02
-
Slice Evenly. Now, slice your cored apple quarters into even slices, about ¼-inch thick. Even slicing isn't just for looks—it ensures every bite has the perfect ratio of apple to peanut butter. If the slices are too thin, they might break when you spread; too thick, and the balance is off. You're aiming for the Goldilocks zone of apple slices.03
-
Prepare the Peanut Butter. Scoop your desired amount of peanut butter into a small bowl. If it's a bit stiff, give it a good stir. This is where warming it slightly, as mentioned before, really pays off. You want it to be smooth and spreadable, not a gloopy struggle. If you're using crunchy peanut butter, give it a stir to redistribute the peanut bits.04
-
The Assembly. Here's the fun part. You can either spread the peanut butter directly onto each apple slice with a small knife or spatula, or you can arrange the slices on a plate and use the bowl of peanut butter as a dip. Spreading gives you more control over the coverage, while dipping is faster and feels a bit more playful. There's no wrong answer!05
-
The Final Flourish. This is where you make it your own. If you're using that flaky sea salt, now's the time for a delicate sprinkle over the peanut butter. If you're adding any other toppings—a dusting of cinnamon, a few chocolate chips, a drizzle of honey—add them immediately so they stick to the peanut butter. The peanut butter acts like a delicious glue for all your extra goodies.06
-
Enjoy Immediately! This isn't a make-ahead meal. The joy is in the contrast of the crisp apple and the creamy topping. So, find a comfortable spot, take a bite, and appreciate the simple perfection you've just created. Listen for that crunch—it's the sound of success.07


