
Why You’ll Love This Apple Pie Energy Bars
- They taste like dessert, but they’re a snack. Seriously, the combination of sweet dates, tart apples, and warm cinnamon creates a flavour that is pure comfort food, without any of the guilt. It’s the perfect way to satisfy a sweet tooth with intention.
- Incredibly simple to make with minimal cleanup. You’ll notice there’s no oven involved here. Just one food processor bowl to wash, and you’re done. It’s the kind of recipe that feels almost too easy for how impressive the results are.
- Packed with whole-food energy. These bars rely on the natural sweetness of dates and apples, and the staying power of oats and nuts. You get a real, slow-release energy boost instead of a sugar crash an hour later.
- They’re wonderfully customizable. Feel like adding walnuts instead of almonds? Go for it. Want a hint of ginger? Toss some in! This recipe is a fantastic template that you can make your own.
Ingredients & Tools
- 1 cup (about 150g) pitted Medjool dates
- 1 cup (about 120g) rolled oats (gluten-free if needed)
- 1/2 cup (about 60g) raw almonds or walnuts
- 1/2 cup dried apples, unsweetened
- 2 tablespoons chia seeds or ground flaxseed
- 1 1/2 teaspoons ground cinnamon
- 1/4 teaspoon ground nutmeg
- Pinch of sea salt
- 1-2 tablespoons maple syrup or honey (optional, depending on sweetness preference)
- 1-2 tablespoons water, if needed
Tools: An 8×8 inch baking pan, parchment paper, and a food processor.
The magic of these bars really lies in the quality of the dates—they’re the primary binder and sweetener, so using soft, fresh Medjool dates is key. If your dates are a little dry, a quick soak in warm water for 10 minutes can make all the difference. And don’t skip the salt! It might seem like a tiny amount, but it works wonders to balance and enhance all the other flavours.
Serves: 9 bars | Prep Time: 15 minutes | Chill Time: 1 hour | Total Time: 1 hour 15 minutes
Before You Start: Tips & Ingredient Notes
- Your dates need to be soft. This is the single most important tip. If your dates are hard and dry, the mixture won’t stick together properly. Soaking them in warm water for 5-10 minutes and then draining them well will save the day.
- Why unsweetened dried apples? You’ll find some dried apples are coated in sugar. We want the pure, tart apple flavour to shine through, so unsweetened is the way to go. They provide little chewy bursts of fruitiness.
- Don’t have a food processor? Honestly, a high-powered blender can work in a pinch, but you’ll need to stop and scrape down the sides more frequently. A food processor really is the ideal tool for this job.
- The texture is in your hands. Literally. The mixture should hold together firmly when you squeeze a handful. If it’s too crumbly, that’s what the extra water or maple syrup is for—add it a teaspoon at a time until it reaches that perfect, moldable consistency.
How to Make Apple Pie Energy Bars
Step 1: Prepare Your Pan. This first step is all about setting yourself up for success. Line your 8×8 inch baking pan with parchment paper, leaving some overhang on two opposite sides. This creates little “handles” that will make it incredibly easy to lift the whole slab of bars out later. Trust me, you don’t want to skip this—it’s a total game-changer for clean cutting.
Step 2: Pulse the Dry Ingredients. Add your rolled oats, almonds, and chia seeds to the bowl of your food processor. Pulse about 10-15 times until the mixture resembles a coarse meal. You’re looking for the almonds to be broken down into small pieces, but not so much that it turns into a fine flour. You’ll notice this creates a great base texture for the bars—a little bit crunchy, a little bit chewy.
Step 3: Bring in the Flavour Makers. Now, add the pitted dates, dried apples, cinnamon, nutmeg, and that all-important pinch of salt to the food processor. Pulse again, and then let the processor run for a good 30-60 seconds. Stop and scrape down the sides. The mixture will start to clump together and look a bit like dark, fragrant sand.
Step 4: Check the Consistency. This is the most crucial part. Pinch a small amount of the mixture between your fingers. Does it hold together firmly? If it feels dry and crumbly, add one tablespoon of water or maple syrup through the feed tube while the processor is running. Let it mix for another 30 seconds and test again. The trick is to add just enough liquid so it sticks, but not so much that it becomes a sticky paste.
Step 5: Press, Press, Press! Turn the mixture out into your prepared pan. Now, use your hands—or the flat bottom of a measuring cup—to press it down with serious conviction. You want to press it evenly and very firmly into every corner. The more compact it is now, the less likely your bars are to fall apart later. Get it as smooth and tight as you can.
Step 6: The Patient Part—Chilling. Place the pan, uncovered, into the refrigerator for at least one hour. This allows the ingredients to set and bind together, making the bars firm enough to slice. If you’re in a real hurry, 30 minutes in the freezer can work, but an hour in the fridge is ideal.
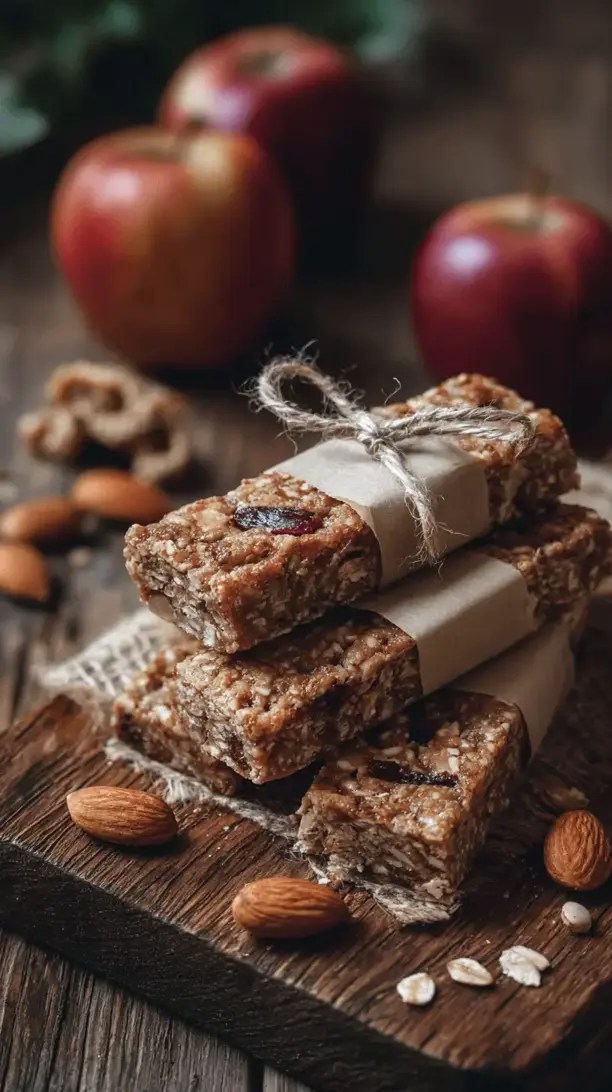
Step 7: Slice and Serve. Once fully chilled, use the parchment paper handles to lift the whole block out of the pan. Place it on a cutting board and use a sharp knife to slice it into 9 even bars (or 12 smaller ones). Wiping the knife clean between cuts helps get really neat edges. And there you have it—homemade energy bars, ready to fuel your day!
Serving Suggestions
Complementary Dishes
- A simple Greek yogurt parfait — Crumble a bar over a bowl of plain Greek yogurt and fresh berries for a breakfast that feels decadent but is packed with protein and fibre.
- Alongside a warm bowl of soup — The sweet and spiced notes of the bar are a lovely contrast to a savoury, creamy soup like butternut squash or lentil, making for a perfectly balanced light lunch.
Drinks
- A hot cup of chai tea — The warming spices in the chai mirror the cinnamon and nutmeg in the bars, creating a cozy and aromatic experience that’s perfect for a chilly afternoon.
- A cold glass of almond milk — Sometimes simplicity is best. The mild, nutty flavour of almond milk complements the bars without overpowering them, making for a classic and satisfying snack.
Something Sweet
- A small dish of vanilla bean ice cream — For a true dessert moment, crumble a bar over a scoop of high-quality vanilla ice cream. The contrast of temperatures and textures is honestly divine.
- A warm, spiced poached pear — If you’re entertaining, serving a bar alongside a elegantly poached pear feels sophisticated and ties the apple pie theme together in a beautiful way.
Top Mistakes to Avoid
- Mistake: Using old, hard dates. This is the number one reason bars don’t hold together. The dates are the glue! If they aren’t soft and sticky, the mixture will be crumbly and impossible to press into bars.
- Mistake: Not processing the mixture enough. You need to let the food processor run for a solid minute to really break everything down and allow the dates to create a cohesive “dough.” I’ve rushed this before and ended up with a granola-like mixture instead of bar material.
- Mistake: Pressing too gently. A timid press won’t cut it. You need to use some real muscle to compact the mixture firmly into the pan. This step is non-negotiable for getting bars that hold their shape when you pick them up.
- Mistake: Skipping the chill time. It’s tempting to slice into them right away, but patience is a virtue here. The chilling time is what allows the fats to firm up and the ingredients to fully bind, resulting in a clean cut and a solid bar.
Expert Tips
- Tip: Toast your oats and nuts. For a next-level flavour boost, spread the oats and almonds on a baking sheet and toast them in a 350°F (175°C) oven for 8-10 minutes until fragrant. Let them cool completely before adding to the food processor. It adds a wonderful depth and nuttiness.
- Tip: Get creative with add-ins. Once you’ve mastered the base recipe, the world is your oyster. Try stirring in 2 tablespoons of cacao nibs for a chocolate crunch, or a handful of unsweetened coconut flakes for a tropical twist after pulsing the main ingredients.
- Tip: For perfect portioning, score the bars before chilling. After you press the mixture into the pan, use your knife to lightly score the surface into bars. After chilling, the bars will break apart perfectly along these pre-made lines.
- Tip: For longer storage, freeze them. These bars freeze beautifully. Individually wrap them in parchment paper and store in a freezer bag for up to 3 months. They thaw in your lunchbox in a couple of hours, or you can eat them slightly frozen for a fun, firmer texture.
FAQs
Can I use a different type of nut?
Absolutely! Walnuts are a fantastic substitute for almonds and pair beautifully with the apple flavour. Pecans would also work wonderfully. If you need the recipe to be nut-free, you can replace the almonds with sunflower seeds or even more oats. Just keep the total volume roughly the same to maintain the right texture balance.
My mixture is too wet and sticky. What did I do wrong?
This usually happens if the dates were very fresh and moist, and perhaps a little too much liquid was added. Don’t worry! You can fix it by adding another tablespoon or two of rolled oats or almond flour and pulsing to combine. The mixture should be sticky, but not so much that it gums up the processor blade.
How long will these bars keep fresh?
Stored in an airtight container in the refrigerator, they will stay fresh and maintain their perfect texture for about 2 weeks. I don’t recommend storing them at room temperature for more than a day, as the moisture in the dates can cause them to soften too much.
Can I make these without a food processor?
It’s a challenge, but not impossible if you’re determined! You would need to very finely chop the dates and apples by hand, and then use a powerful mortar and pestle or a rolling pin to crush the oats and nuts. Then, you’d need to mix everything together with your hands, really kneading it to help the dates bind it. It’s a workout, but it can be done in a pinch!
Are these suitable for kids’ lunchboxes?
They are a fantastic lunchbox addition! They’re a whole-food snack that provides lasting energy. Because they are dense and contain nuts, always check your school’s policy. For a nut-free version, simply swap the almonds for seeds as mentioned above. They’re a much better option than most store-bought granola bars.


