
Why You’ll Love This Apple Peanut Butter Sandwiches
- Unbelievably Quick & Easy. Seriously, if you can slice an apple and spread peanut butter, you’ve basically mastered this recipe. It’s the perfect solution for those moments when hunger strikes and you need something delicious, fast.
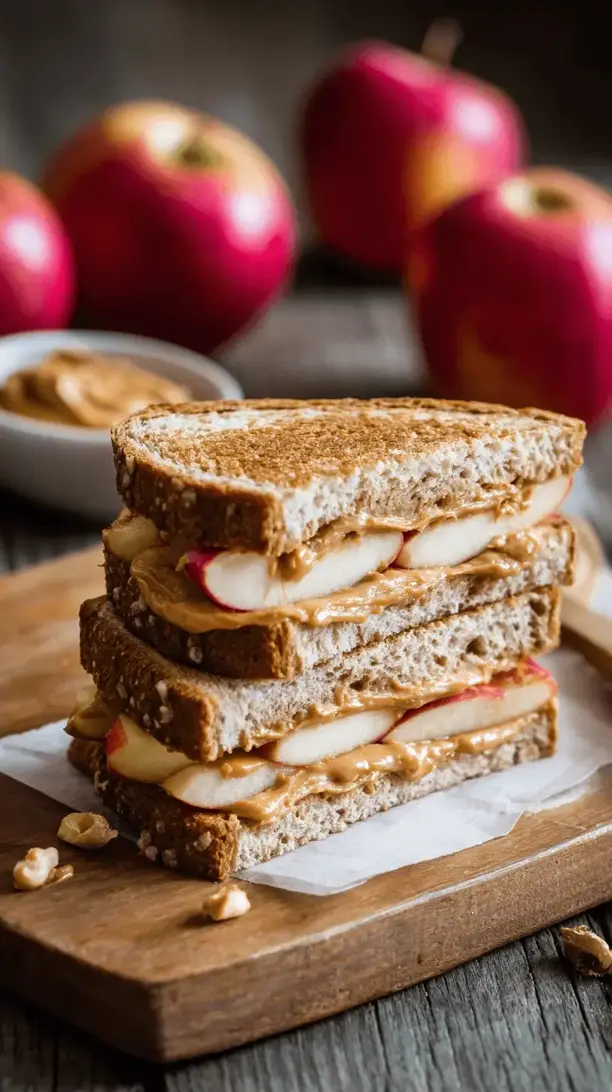
- The Perfect Texture Combo. You get the satisfying, crisp crunch from the fresh apple slices paired with the incredibly smooth and creamy peanut butter. It’s a contrast that never, ever gets old.
- Endlessly Customizable. This is your playground! You can keep it classic or add a drizzle of honey, a sprinkle of sea salt, some granola for extra crunch, or even a few dark chocolate chips. It’s a different experience every time.
- Naturally Wholesome. It’s a treat that feels genuinely good. You’re getting fruit, healthy fats, and a bit of protein all in one neat, handheld package. It’s energy you can feel good about.
Ingredients & Tools
- 2 large, crisp apples (like Honeycrisp, Fuji, or Granny Smith)
- 4 tablespoons creamy peanut butter (or any nut/seed butter you love)
- 1 teaspoon honey or maple syrup (optional, but lovely)
- 1/4 teaspoon ground cinnamon
- A pinch of flaky sea salt (optional, but highly recommended)
- 1 tablespoon mini chocolate chips or chopped nuts (optional, for topping)
Tools: A sharp knife, a cutting board, a small bowl for mixing (if adding honey to the PB), and a spoon for spreading.
The beauty here is in the quality of your core ingredients. A really crisp, sweet apple makes all the difference, and using a peanut butter with just peanuts and salt (no added oils or sugars) gives you the purest, most delicious flavor. But honestly, use what you have and love—this recipe is wonderfully forgiving.
Serves: 2 | Prep Time: 5 minutes | Cook Time: 0 minutes | Total Time: 5 minutes
Before You Start: Tips & Ingredient Notes
- Apple Selection is Key. You want an apple that’s firm and crisp, not soft or mealy. Honeycrisp and Fuji are my top picks for their perfect balance of sweetness and crunch. A tart Granny Smith is also fantastic for a sharper contrast to the sweet peanut butter.
- To Core or Not to Core? You have options! Slicing the apple into rounds (like little “bread” slices) and leaving the core in the center creates a cool star pattern, but you’ll have to eat around it. Slicing the apple vertically and removing the core first gives you neat, easy-to-eat half-moons. It’s purely an aesthetic choice!
- Peanut Butter Consistency. If your peanut butter is very thick and difficult to spread straight from the jar, you can warm it gently for 10-15 seconds in the microwave. This makes it beautifully pourable and easier to work with, especially if you’re drizzling it.
- The Power of a Pinch of Salt. Don’t skip the flaky sea salt at the end if you can help it. It’s not about making it salty; it’s about enhancing every single other flavor in the sandwich. It makes the apple taste sweeter and the peanut butter taste richer.
How to Make Apple Peanut Butter Sandwiches
Step 1: Prep Your Apples. First, give your apples a good wash and dry them thoroughly. Now, decide on your shape. For classic “sandwich” rounds, simply use a sharp knife to slice the apple horizontally into 1/4-inch thick rounds. You’ll get about 4-5 good slices from the center of a large apple. If you see the star-shaped core, you can leave it for presentation or carefully cut it out with a small knife. For half-moon shapes, slice the apple in half vertically from stem to base. Use a melon baller or a small spoon to scoop out the core, then slice each half into thin half-moons.
Step 2: Fluff Your Peanut Butter. If you’re using the honey and cinnamon, now’s the time to mix them in. Scoop your peanut butter into a small bowl. Add the honey and cinnamon, and give it a really good stir until everything is completely combined and smooth. You’ll notice the mixture becomes a little lighter in color and wonderfully aromatic. If you’re keeping it plain, you can just grab your jar and a spoon!
Step 3: Assemble the Sandwiches. Lay out half of your apple slices on your cutting board or a plate. These are your bases. Take a generous spoonful of the peanut butter mixture and spread it evenly over each base slice. The trick is to get it close to the edges but not quite spilling over—you want a good peanut butter-to-apple ratio in every bite.
Step 4: Add the Top and Garnish. Carefully place the remaining apple slices on top of the peanut butter-covered ones, pressing down gently to create your sandwich. Now for the fun part: the finishing touches. If you’re using them, sprinkle the mini chocolate chips or chopped nuts over the peanut butter that might be peeking out the sides. Then, finish with that all-important pinch of flaky sea salt. It’s these little details that take it from simple to sublime.
Step 5: Serve Immediately. This is crucial. Apples start to brown when they’re cut and exposed to air, and the moisture from the apple can make the peanut butter a bit soggy if left too long. So, assemble and enjoy right away for the ultimate crisp, fresh experience. Honestly, they’re so quick to make that there’s no need to prepare them ahead of time!
Serving Suggestions
Complementary Dishes
- A simple green salad — The fresh, crisp bitterness of arugula or spinach with a light lemon vinaigrette provides a lovely, palate-cleansing contrast to the rich, sweet sandwiches.
- A cup of carrot ginger soup — For a fuller lunch, the warm, spiced notes of the soup pair beautifully with the cool, crunchy apples and creamy peanut butter.
- A side of Greek yogurt with berries — This adds a tangy, protein-packed element that rounds out the meal perfectly, making it even more satisfying.
Drinks
- Ice-cold almond milk or oat milk — The creamy, slightly sweet flavor is a classic pairing that complements the peanut butter without overpowering the apple.
- A warm cup of chai tea — The spices in the chai—cinnamon, cardamom, cloves—echo the cinnamon in the sandwich and create a wonderfully cozy experience.
- Sparkling water with a squeeze of lime — The bubbles and citrus cut through the richness of the peanut butter, making each bite taste bright and new.
Something Sweet
- A small square of dark chocolate — Let it melt on your tongue after your last bite. It extends the indulgent feeling without being too heavy.
- A few fresh raspberries or strawberries — Their bright acidity and juiciness are a perfect, light follow-up to the sandwich.
- A dollop of coconut whipped cream — If you’re serving these as a dessert, a little cloud of lightly sweetened coconut cream feels decadent yet still light.
Top Mistakes to Avoid
- Mistake: Using a soft, mealy apple. This is the number one way to end up with a sad, mushy sandwich. The structural integrity and joyful crunch depend entirely on a firm, fresh apple.
- Mistake: Spreading the peanut butter too thick. While it’s tempting to load it on, an overly thick layer can be overwhelming and make the sandwich difficult to bite into without the peanut butter squishing out everywhere. A little goes a long way.
- Mistake: Preparing them too far in advance. I’ve made this error before, thinking I’d be clever and pack them for later. The apples oxidize (turn brown) and release water into the peanut butter, resulting in a less-than-ideal texture. Assemble and eat!
- Mistake: Skipping the salt. It might seem insignificant, but that pinch of salt is a flavor amplifier. It balances the sweetness and highlights the nuttiness, transforming the simple ingredients into something much greater than the sum of their parts.
Expert Tips
- Tip: Prevent browning for a short while. If you absolutely must prep the apple slices 10-15 minutes ahead, give them a very light toss in a little lemon juice mixed with water. This slows down the browning process without making the apples taste lemony.
- Tip: Get creative with your “bread”. Try using pear slices for a more floral note, or even sturdy cucumber rounds for a super refreshing, low-sugar version. It’s a fun way to play with the concept.
- Tip: Make a deconstructed “sandwich” bowl. If you’re taking this on the go, chop the apple into chunks, toss them with a squeeze of lemon juice, and pack the peanut butter separately. Assemble it in a bowl when you’re ready to eat to avoid sogginess.
- Tip: Add a crunch layer. Sprinkle some granola, crushed pretzels, or even hemp seeds between the peanut butter and the top apple slice. This adds an incredible extra dimension of texture that’s seriously addictive.
FAQs
Can I make these gluten-free or vegan?
They are naturally gluten-free! Just ensure your oat mix-ins (like granola) are certified gluten-free if you have an allergy. For a vegan version, simply use maple syrup instead of honey and choose vegan-friendly chocolate chips. It’s an incredibly adaptable recipe for almost any dietary need.
What’s the best peanut butter to use?
Honestly, it comes down to personal preference. I love using a natural peanut butter (just peanuts and salt) for its pure, robust flavor. However, if you prefer the sweeter, creamier texture of a conventional brand, that works perfectly too. The trick is to use one you genuinely enjoy eating by the spoonful.
My apple slices keep breaking. What can I do?
This usually means your slices are too thin, or the apple itself might be a bit on the softer side. Aim for slices that are about 1/4-inch thick—they’re sturdy enough to hold the filling but not so thick that they’re difficult to bite into. Using a very sharp knife also helps create clean cuts without crushing the apple.
Can I use a different nut or seed butter?
Absolutely! Almond butter, cashew butter, or sunflower seed butter are all fantastic alternatives. Each will bring its own unique flavor profile. Sunflower seed butter, in particular, turns a fun green color when it reacts with the apple, which kids usually love!
How can I pack these for a lunchbox?
The best method is to pack the components separately. Put the pre-sliced apple in an airtight container (maybe with a tiny sprinkle of lemon juice), and pack the peanut butter in a small separate container or reusable pouch. Your child (or you!) can assemble it at lunchtime for a crisp, fresh sandwich.
Apple Peanut Butter Sandwiches
Craving a sweet & salty treat? My 5-minute Apple Peanut Butter Sandwiches are a healthy, no-cook snack! Crisp apples, creamy peanut butter, & endless customizations.
Ingredients
Ingredients
-
2 large, crisp apples (like Honeycrisp, Fuji, or Granny Smith)
-
4 tablespoons creamy peanut butter (or any nut/seed butter you love)
-
1 teaspoon honey or maple syrup (optional, but lovely)
-
1/4 teaspoon ground cinnamon
-
A pinch flaky sea salt (optional, but highly recommended)
-
1 tablespoon mini chocolate chips or chopped nuts (optional, for topping)
Instructions
-
Wash and dry apples. Slice into 1/4-inch rounds (optionally core the centers) or halve, core, and slice into thin half-moons.01
-
If desired, mix peanut butter with honey and cinnamon in a small bowl until smooth.02
-
Lay out half of the apple slices as bases and spread a generous layer of peanut butter to near the edges.03
-
Top with remaining apple slices and gently press. Garnish exposed peanut butter with mini chocolate chips or chopped nuts, then sprinkle with flaky sea salt.04
-
Serve immediately to prevent browning and sogginess.05


