
Why You’ll Love These Apple Banana Oat Cookies
- They’re secretly wholesome. With a base of mashed banana and oats, these cookies feel like a treat but are packed with natural goodness. There’s no refined sugar if you don’t want it, and they’re easily adaptable to be vegan or gluten-free.
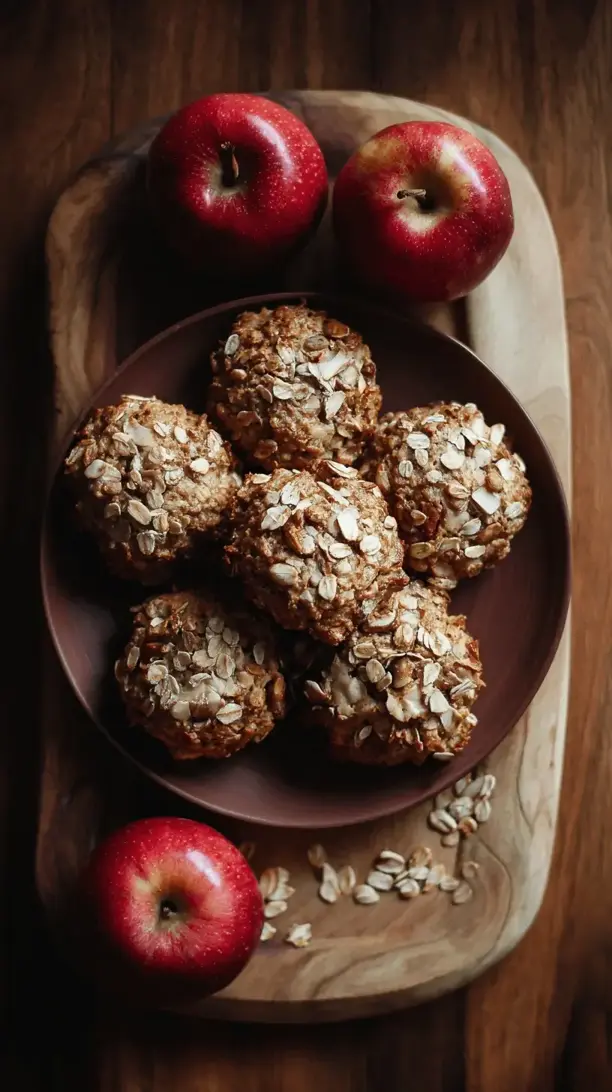
- The texture is pure comfort. Imagine the soft, chewy heartiness of a great oatmeal cookie, but with little bursts of tender, sweet apple in every single bite. They’re moist, dense, and incredibly satisfying.
- They come together in a flash. Seriously, you can go from craving to cookie in under 30 minutes. There’s no creaming butter and sugar, no chilling the dough—just mix, scoop, and bake. It’s the ultimate low-effort, high-reward recipe.
- They make your house smell incredible. The combination of baking bananas, cinnamon, and apple is honestly one of the best scents in the world. It’s like autumn and comfort all wrapped up in one warm, delicious package.
Ingredients & Tools
- 2 large, very ripe bananas (the spottier, the better!)
- 1 ½ cups old-fashioned rolled oats
- 1 medium apple, finely diced (about 1 cup)
- ¼ cup almond butter (or any nut or seed butter you love)
- 2 tablespoons maple syrup or honey (optional, for extra sweetness)
- 1 teaspoon vanilla extract
- 1 teaspoon ground cinnamon
- ¼ teaspoon salt
- ⅓ cup mix-ins like chopped walnuts, raisins, or dark chocolate chips
Tools: A mixing bowl, a fork or potato masher, a baking sheet, and parchment paper or a silicone baking mat.
The beauty here is in the simplicity. The bananas act as both a sweetener and a binder, which is why their ripeness is non-negotiable. The oats provide the structure and that wonderful chewy texture. And the apple? It adds little pockets of moisture and a fresh, sweet flavor that really makes these cookies special.
Serves: Makes 12 cookies | Prep Time: 10 minutes | Cook Time: 15-18 minutes | Total Time: About 30 minutes
Before You Start: Tips & Ingredient Notes
- Banana ripeness is key. Don’t even think about using yellow bananas! You need those deeply spotted, almost black ones. They are much sweeter and mash into a lovely, smooth puree much more easily.
- Which apple to choose? For the best result, go with a firm, sweet-tart apple like Honeycrisp, Pink Lady, or Fuji. They hold their shape well during baking and provide a nice flavor contrast. A Granny Smith will be very tart, which can be lovely if that’s your thing!
- To peel or not to peel the apple? Honestly, I usually leave the peel on. It adds a bit of color, extra fiber, and a nice subtle texture. But if you prefer a completely uniform cookie, feel free to peel it first.
- Rolled oats are a must. Avoid using instant or quick-cooking oats if you can. Old-fashioned rolled oats give the cookies a much better, heartier texture. For a gluten-free version, just make sure your oats are certified gluten-free.
How to Make Apple Banana Oat Cookies
Step 1: Prepare Your Ingredients. First, preheat your oven to 350°F (175°C). This is a fast recipe, so you want the oven ready to go. Line a baking sheet with parchment paper or a silicone mat—this prevents sticking and makes cleanup a dream. Now, peel your very ripe bananas and place them in your mixing bowl. Using a fork or a potato masher, mash them until they’re smooth and no large chunks remain. You’ll notice the bananas become almost liquidy, which is exactly what you want.
Step 2: Create the Cookie Dough. To the mashed banana, add the almond butter, maple syrup (if using), and vanilla extract. Stir everything together until it’s well combined and looks like a thick, lumpy sauce. Now, add the rolled oats, cinnamon, and salt directly into the wet mixture. Stir until the oats are fully coated. The dough will be quite wet and sticky—that’s normal! Finally, fold in your finely diced apple and any other mix-ins you’ve chosen. The trick is to mix just until everything is evenly distributed.
Step 3: Shape the Cookies. Using a tablespoon or a small cookie scoop, drop mounds of the dough onto your prepared baking sheet. You should get about 12 cookies. Because there’s no flour or rising agent, these cookies won’t spread much, so you can gently flatten each mound with the back of a spoon or your fingers to your desired cookie shape and thickness. Don’t worry if they look a little rustic; that’s part of their charm!
Step 4: Bake to Perfection. Slide the baking sheet into your preheated oven and bake for 15-18 minutes. You’re looking for the edges to be lightly golden brown and the tops to look set and dry to the touch. The apple pieces might peek through, looking soft and inviting. The smell in your kitchen will be your biggest clue that they’re almost done.
Step 5: Cool Completely (The Hardest Part!). Once they’re out of the oven, let the cookies cool on the baking sheet for at least 10 minutes. This is crucial—they are very soft straight from the oven and need this time to firm up. After that, you can transfer them to a wire rack to cool completely. They will firm up even more as they cool, achieving that perfect soft and chewy texture.
Serving Suggestions
Complementary Dishes
- A simple Greek yogurt parfait — The tangy, creamy yogurt contrasts beautifully with the sweet, spiced cookies, making it a fantastic breakfast or substantial snack.
- A bowl of warm soup — Enjoy one of these cookies alongside a bowl of butternut squash or lentil soup for a wonderfully balanced and comforting lunch.
Drinks
- A cold glass of milk or your favorite milk alternative — It’s a classic for a reason. The creaminess is the perfect partner for the hearty oats and soft fruit.
- A hot cup of chai tea — The warm spices in the chai will echo the cinnamon in the cookies, creating a deeply cozy experience, especially on a chilly day.
Something Sweet
- A small dish of vanilla bean ice cream — For a real dessert vibe, place a warm cookie underneath a scoop of ice cream. The contrast between warm and cold is simply divine.
- A drizzle of salted caramel sauce — If you’re feeling indulgent, a little drizzle over the top elevates these cookies into a truly decadent treat.
Top Mistakes to Avoid
- Mistake: Using underripe bananas. This is the number one error. Yellow bananas lack the sweetness and moistness needed to bind the cookies together. Your cookies will be bland and crumbly.
- Mistake: Not letting them cool. I know it’s tempting, but if you try to move or eat these cookies straight from the oven, they will fall apart. They need that cooling time on the pan to set their structure.
- Mistake: Dicing the apple too large. Large chunks of apple can make the cookies difficult to shape and can release too much water, leading to a soggy texture. A fine dice (about 1/4-inch) is perfect.
- Mistake: Overbaking. Because they’re so moist, it can be tricky to tell when they’re done. If you overbake them, they’ll become dry and tough. Take them out when the edges are just golden.
Expert Tips
- Tip: Let the dough rest for 5 minutes. After you’ve mixed everything together, let the bowl sit on the counter for about 5 minutes. This allows the oats to absorb some of the liquid, making the dough slightly easier to handle and resulting in a better texture.
- Tip: Get creative with mix-ins. The base recipe is a blank canvas. Try adding a pinch of nutmeg or cardamom along with the cinnamon. Swap walnuts for pecans, or use dried cranberries instead of raisins. A little orange zest is also a fantastic addition.
- Tip: For a crispier edge, flatten the cookies more. If you prefer a cookie with a bit more bite, press the dough mounds down quite thin before baking. They’ll be crisper around the edges while staying soft in the middle.
- Tip: Freeze your ripe bananas. If your bananas are ripening faster than you can use them, simply peel them, pop them in a freezer bag, and freeze. Thaw them at room temperature when you’re ready to bake—they’ll be perfectly mushy and ready to go.
FAQs
Can I make these cookies ahead of time?
Absolutely! These cookies are great for meal prep. Once completely cooled, store them in an airtight container at room temperature for 2-3 days. For longer storage, they freeze beautifully. Just layer them between parchment paper in a freezer-safe bag or container, and they’ll keep for up to 3 months. You can thaw them at room temperature or pop a frozen one straight into your lunchbox—it’ll be thawed by your snack time.
My cookies turned out a bit soft/mushy. What happened?
This usually happens for one of two reasons. First, the apple might have been a very juicy variety, releasing more water during baking. Next time, you can pat the diced apple dry with a paper towel before adding it. The second reason could be underbaking. Make sure the tops are completely set and not wet-looking. If it’s a humid day, they might just need an extra minute or two in the oven.
Can I use steel-cut oats instead?
I wouldn’t recommend it for this particular recipe. Steel-cut oats are much harder and haven’t been steamed like rolled oats, so they won’t soften properly during the relatively short baking time. You’d end up with very hard, crunchy cookies. Stick with old-fashioned rolled oats for the best texture.
Are these cookies suitable for babies?
They can be a great finger food for babies who are already eating solids, as they are soft and free of common allergens if you choose your ingredients carefully (e.g., use sunflower seed butter instead of nut butter). Always ensure the pieces are an appropriate size to prevent choking and consult with your pediatrician if you have any concerns.
Can I bake this as one big bar instead of individual cookies?
Yes, that works wonderfully! Simply press the entire mixture evenly into a parchment-lined 8×8 inch baking pan. You’ll need to bake it for a bit longer, probably around 20-25 minutes, until the edges are golden and the center is set. Let it cool completely in the pan before cutting into squares.
Apple Banana Oat Cookies
Whip up soft, chewy Apple Banana Oat Cookies in 30 minutes! This easy, one-bowl recipe uses ripe bananas & oats for a wholesome, guilt-free snack you can feel good about.
Ingredients
Ingredients
-
2 large, very ripe bananas (the spottier, the better!)
-
1 ½ cups old-fashioned rolled oats
-
1 medium apple (finely diced (about 1 cup))
-
¼ cup almond butter (or any nut or seed butter you love)
-
2 tablespoons maple syrup or honey (optional, for extra sweetness)
-
1 teaspoon vanilla extract
-
1 teaspoon ground cinnamon
-
¼ teaspoon salt
-
⅓ cup mix-ins like chopped walnuts, raisins, or dark chocolate chips
Instructions
-
Prepare Your Ingredients. First, preheat your oven to 350°F (175°C). This is a fast recipe, so you want the oven ready to go. Line a baking sheet with parchment paper or a silicone mat—this prevents sticking and makes cleanup a dream. Now, peel your very ripe bananas and place them in your mixing bowl. Using a fork or a potato masher, mash them until they're smooth and no large chunks remain. You'll notice the bananas become almost liquidy, which is exactly what you want.01
-
Create the Cookie Dough. To the mashed banana, add the almond butter, maple syrup (if using), and vanilla extract. Stir everything together until it's well combined and looks like a thick, lumpy sauce. Now, add the rolled oats, cinnamon, and salt directly into the wet mixture. Stir until the oats are fully coated. The dough will be quite wet and sticky—that's normal! Finally, fold in your finely diced apple and any other mix-ins you've chosen. The trick is to mix just until everything is evenly distributed.02
-
Shape the Cookies. Using a tablespoon or a small cookie scoop, drop mounds of the dough onto your prepared baking sheet. You should get about 12 cookies. Because there's no flour or rising agent, these cookies won't spread much, so you can gently flatten each mound with the back of a spoon or your fingers to your desired cookie shape and thickness. Don't worry if they look a little rustic; that's part of their charm!03
-
Bake to Perfection. Slide the baking sheet into your preheated oven and bake for 15-18 minutes. You're looking for the edges to be lightly golden brown and the tops to look set and dry to the touch. The apple pieces might peek through, looking soft and inviting. The smell in your kitchen will be your biggest clue that they're almost done.04
-
Cool Completely (The Hardest Part!). Once they're out of the oven, let the cookies cool on the baking sheet for at least 10 minutes. This is crucial—they are very soft straight from the oven and need this time to firm up. After that, you can transfer them to a wire rack to cool completely. They will firm up even more as they cool, achieving that perfect soft and chewy texture.05


