
Why You’ll Love This Almond Flour Brownie Bites
- Incredibly Fudgy Texture. The combination of almond flour and just the right amount of moisture creates a brownie bite that’s dense, moist, and deeply satisfying—no cakey texture here!
- Naturally Gluten-Free & Grain-Free. Thanks to almond flour being the star, these bites are a fantastic option for anyone avoiding traditional wheat flour, without any compromise on taste or texture.
- Perfectly Portable. Their bite-sized nature makes them the ultimate grab-and-go treat. Toss a few in a container for an afternoon pick-me-up or share them with friends without needing plates and forks.
- Surprisingly Simple to Make. You honestly don’t need any fancy equipment or complicated techniques. It’s essentially a one-bowl situation that comes together in minutes before baking.
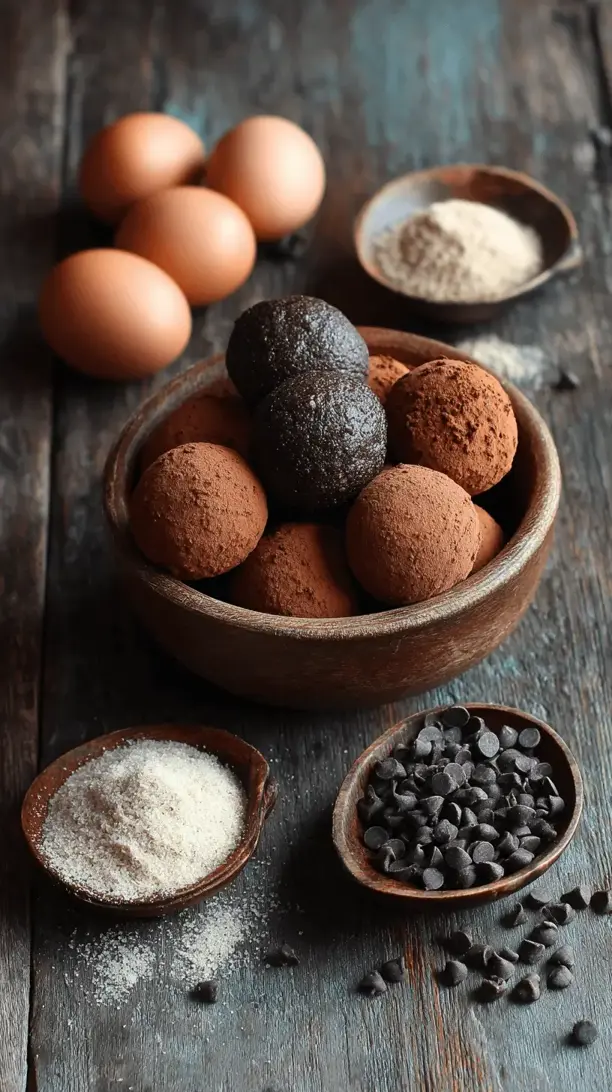
Ingredients & Tools
- 2 cups finely ground almond flour
- 1/2 cup unsweetened cocoa powder (Dutch-processed works great for a deeper flavor)
- 1/2 tsp baking soda
- 1/4 tsp fine sea salt
- 2 large eggs, at room temperature
- 1/2 cup maple syrup or honey
- 1/4 cup melted coconut oil (or unsalted butter)
- 1 tsp pure vanilla extract
- 1/2 cup dark chocolate chips (plus more for topping)
Tools: A standard 24-cup mini muffin pan, parchment paper liners (highly recommended!), two mixing bowls, a whisk, and a spatula.
The quality of your almond flour really matters here—look for a finely ground, blanched variety for the smoothest texture. And don’t skip the salt! It’s not just for flavor; it actually makes the chocolate taste more chocolatey, which is a win in my book.
Serves: 24 bites | Prep Time: 10 minutes | Cook Time: 12-15 minutes | Total Time: 25 minutes
Before You Start: Tips & Ingredient Notes
- Room Temperature Eggs are Key. If your eggs are cold, they can cause the melted coconut oil to solidify on contact, creating a lumpy batter. Just place your eggs in a bowl of warm water for 5-10 minutes to quickly bring them to room temp.
- Don’t Over-mix the Batter. Once you add the dry ingredients to the wet, mix just until everything is combined. Over-mixing can lead to a tougher texture because you’re working the proteins in the almond flour a bit too much.
- To Line or Not to Line? I am a huge advocate for using parchment paper liners. They guarantee easy removal and virtually no cleanup. If you grease the pan heavily, you can skip them, but liners are foolproof.
- A Note on Sweeteners. Maple syrup and honey will both work beautifully, but they impart slightly different flavors. Maple syrup keeps the chocolate flavor pure, while honey adds a subtle floral note. Both are delicious!
How to Make Almond Flour Brownie Bites
Step 1: First, preheat your oven to 350°F (175°C). This is crucial for even baking. While it’s heating up, line your mini muffin pan with those parchment paper liners. Trust me, this small step saves so much frustration later.
Step 2: In a medium bowl, whisk together your dry ingredients: the almond flour, cocoa powder, baking soda, and salt. You’ll want to whisk this really well to break up any lumps in the cocoa and almond flour, ensuring a perfectly smooth batter. Give it a good 30-second whisk until it’s one uniform, dark brown color.
Step 3: In a separate, larger bowl, combine the wet ingredients. Whisk the room-temperature eggs vigorously until they’re frothy and pale. Then, whisk in the maple syrup, melted coconut oil, and vanilla extract. The mixture should look glossy and well-emulsified—no separated oil floating on top.
Step 4: Now, pour the dry ingredients into the wet ingredients. Use a spatula to gently fold them together. You’ll notice the batter is quite thick, which is exactly what we want. Stop folding as soon as you no longer see streaks of dry flour. A few lumps are okay! Now, fold in the half-cup of chocolate chips.
Step 5: It’s time to fill the muffin cups! I like to use a small cookie scoop or two spoons for this. Fill each liner about 3/4 of the way full. Don’t be tempted to overfill them, as they will rise a little. For a bakery-style finish, press a few extra chocolate chips on top of each unbaked bite.
Step 6: Bake for 12 to 15 minutes. The trick is to look for set edges but a slightly soft center. A toothpick inserted should come out with a few moist crumbs attached, but not wet batter. They will continue to set as they cool. Over-baking is the enemy of fudginess!
Step 7: This is the hardest part: let them cool in the pan for at least 10 minutes before attempting to transfer them to a wire rack. They are very delicate when hot. If you try to remove them too early, they might break. Patience rewards you with perfect, intact brownie bites.
Serving Suggestions
Complementary Dishes
- A Scoop of Vanilla Bean Ice Cream — The classic hot-and-cold combination is unbeatable. The simplicity of vanilla lets the deep chocolate flavor of the brownie bites truly shine.
- Fresh Berries on the Side — A small bowl of raspberries or strawberries cuts through the richness beautifully, adding a bright, tart contrast that feels a little more balanced.
- A Dollop of Whipped Coconut Cream — For a dairy-free option that feels incredibly luxurious, a spoonful of lightly sweetened coconut cream is just divine.
Drinks
- A Cold Glass of Milk — It’s a classic for a reason. The creaminess is the perfect partner to a rich, fudgy chocolate bite.
- A Bold Cup of Coffee — The bitterness of a good espresso or dark roast coffee enhances the chocolate notes and makes for a sophisticated afternoon treat.
- A Glass of Cabernet Sauvignon — For a grown-up dessert moment, the dark fruit notes in a Cabernet pair wonderfully with the dark chocolate.
Something Sweet
- A Simple Berry Sorbet — If you’ve already indulged in the brownie bites, a light, fruity sorbet provides a sweet finish without feeling too heavy.
- A Few Orange Segments — Chocolate and orange are a match made in heaven. The citrusy freshness cleanses the palate and is a surprisingly elegant way to end a meal.
- A Dusting of Powdered Sugar — Just before serving, a light snow of powdered sugar over the bites makes them look professionally made and adds a subtle extra sweetness.
Top Mistakes to Avoid
- Mistake: Using coarse almond meal. This will result in a gritty, less-than-ideal texture. Finely ground, blanched almond flour is essential for that smooth, fudgy crumb we’re after.
- Mistake: Over-baking the bites. I’ve messed this up before too, thinking they needed more time. Remember, they continue to cook from residual heat as they cool. Take them out when the centers are still a tiny bit soft.
- Mistake: Skipping the cooling time. It’s so tempting to eat them straight from the oven, but they need that time to set. Trying to remove them early will lead to a crumbly mess.
- Mistake: Packing the almond flour. When measuring, spoon the flour into the measuring cup and level it off. Don’t scoop directly from the bag, as this packs it down and can lead to a dry, dense final product.
Expert Tips
- Tip: Add a pinch of espresso powder. You won’t taste coffee, I promise. But adding about 1/2 teaspoon of instant espresso powder to the dry ingredients will deepen and intensify the chocolate flavor exponentially.
- Tip: Experiment with mix-ins. Once you’ve mastered the basic recipe, try folding in a 1/4 cup of chopped walnuts, pecans, or even a swirl of peanut butter for a fun variation.
- Tip: For an ultra-gooey center, slightly under-bake. If you’re a fan of a very fudgy, almost molten center, lean towards the 12-minute bake time and don’t wait for the toothpick to come out clean—just crumbly.
- Tip: Freeze them for a cold treat. These brownie bites freeze exceptionally well. Pop them in a freezer bag once cooled, and you can have a frozen chocolate treat ready whenever a craving strikes.
FAQs
Can I use a different type of flour?
Almond flour is pretty essential here for both structure and moisture. Substituting with coconut flour won’t work at all, as it absorbs liquid completely differently—you’d end up with a dry brick. A gluten-free 1:1 baking flour might work, but the texture will be more cake-like and less fudgy. Honestly, I’d stick with almond flour for the best results.
My brownie bites are oily. What happened?
This usually happens if the eggs were too cold when mixed with the melted oil, causing the fat to separate. Another possibility is that your almond flour has a higher oil content. Next time, ensure your eggs are room temperature, and if the problem persists, you could try reducing the coconut oil by a tablespoon.
How should I store these, and how long do they last?
Store them in an airtight container at room temperature for up to 3 days. For longer storage, they freeze beautifully for up to 3 months. Just let them thaw at room temperature for an hour or so before eating. You can even eat them straight from the freezer for a fun, firm texture.
Can I make these vegan?
It’s a bit tricky because the eggs provide necessary structure. You could try a “flax egg” (1 tbsp ground flaxseed mixed with 3 tbsp water per egg), but the texture will be much denser and may not rise as well. They’ll still taste deliciously chocolatey, but just be aware the texture will be different.
Can I bake this as one large brownie?
Absolutely! Pour the batter into an 8×8 inch parchment-lined baking pan and bake at the same temperature for 20-25 minutes, or until the center is set. You’ll lose the cute “bite” factor, but you’ll gain the ability to cut yourself a big, classic brownie square!
Almond Flour Brownie Bites
Craving fudgy brownies? Try these easy Almond Flour Brownie Bites! Gluten-free, perfectly portioned & ready in 25 mins. The ultimate healthy-ish chocolate treat.
Ingredients
Ingredients
-
2 cups finely ground almond flour
-
1/2 cup unsweetened cocoa powder (Dutch-processed works great for a deeper flavor)
-
1/2 tsp baking soda
-
1/4 tsp fine sea salt
-
2 large eggs (at room temperature)
-
1/2 cup maple syrup or honey
-
1/4 cup melted coconut oil (or unsalted butter)
-
1 tsp pure vanilla extract
-
1/2 cup dark chocolate chips (plus more for topping)
Instructions
-
First, preheat your oven to 350°F (175°C). This is crucial for even baking. While it's heating up, line your mini muffin pan with those parchment paper liners. Trust me, this small step saves so much frustration later.01
-
In a medium bowl, whisk together your dry ingredients: the almond flour, cocoa powder, baking soda, and salt. You'll want to whisk this really well to break up any lumps in the cocoa and almond flour, ensuring a perfectly smooth batter. Give it a good 30-second whisk until it's one uniform, dark brown color.02
-
In a separate, larger bowl, combine the wet ingredients. Whisk the room-temperature eggs vigorously until they're frothy and pale. Then, whisk in the maple syrup, melted coconut oil, and vanilla extract. The mixture should look glossy and well-emulsified—no separated oil floating on top.03
-
Now, pour the dry ingredients into the wet ingredients. Use a spatula to gently fold them together. You'll notice the batter is quite thick, which is exactly what we want. Stop folding as soon as you no longer see streaks of dry flour. A few lumps are okay! Now, fold in the half-cup of chocolate chips.04
-
It's time to fill the muffin cups! I like to use a small cookie scoop or two spoons for this. Fill each liner about 3/4 of the way full. Don't be tempted to overfill them, as they will rise a little. For a bakery-style finish, press a few extra chocolate chips on top of each unbaked bite.05
-
Bake for 12 to 15 minutes. The trick is to look for set edges but a slightly soft center. A toothpick inserted should come out with a few moist crumbs attached, but not wet batter. They will continue to set as they cool. Over-baking is the enemy of fudginess!06
-
This is the hardest part: let them cool in the pan for at least 10 minutes before attempting to transfer them to a wire rack. They are very delicate when hot. If you try to remove them too early, they might break. Patience rewards you with perfect, intact brownie bites.07


