
Why You’ll Love This Almond Butter Cookie Bars
- Unbelievably Easy. We’re talking one bowl, no mixer required, and the dough comes together in about five minutes flat. There’s no rolling or cutting involved, which means less cleanup and more time enjoying your creation.
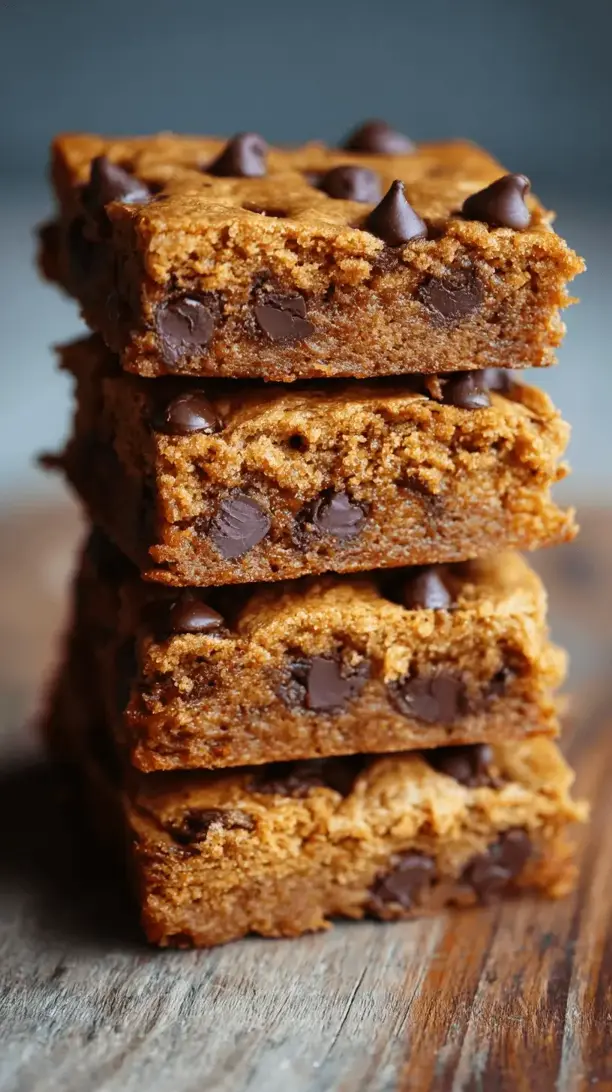
- The Perfect Texture. The magic here is in the chew. These bars bake up with slightly crisp edges and a fabulously soft, almost fudgy center that’s incredibly satisfying. They’re sturdy enough to hold but tender enough to feel like a real indulgence.
- Deep, Toasty Flavor. Using a good-quality almond butter really makes these bars sing. It adds a rich, nutty complexity that’s so much more interesting than your average cookie bar. A hint of vanilla and a sprinkle of sea salt on top elevate everything beautifully.
- Incredibly Versatile. This recipe is a fantastic base for all sorts of add-ins. Feel like chocolate chips? Go for it. A handful of chopped dried cherries or a swirl of raspberry jam? Absolutely. You can customize these to your heart’s content.
Ingredients & Tools
- 1 cup (250 g) creamy almond butter (see notes below!)
- ⅔ cup (130 g) light brown sugar, packed
- 1 large egg, at room temperature
- 1 tsp vanilla extract
- ½ tsp baking soda
- ¼ tsp fine sea salt
- ½ cup (85 g) dark chocolate chips or chunks (optional, but highly recommended)
- Flaky sea salt, for sprinkling on top
Tools: 1 medium mixing bowl, 1 whisk or spatula, 1 8×8-inch baking pan, parchment paper
The star here is, of course, the almond butter. You’ll want to use a natural, drippy kind where the oil separates—the kind you have to stir. This ensures the bars stay moist and aren’t dry or crumbly. The brown sugar isn’t just for sweetness; its molasses content is key for that chewy texture and deep caramel note.
Serves: 9 generous bars | Prep Time: 10 minutes | Cook Time: 20-22 minutes | Total Time: 35 minutes (plus cooling)
Before You Start: Tips & Ingredient Notes
- Your Almond Butter Matters. Seriously, this is the most important part. Avoid using the shelf-stable, no-stir almond butter that has added hydrogenated oils. They can make the bars greasy or oddly textured. Go for the natural, stirred-well kind for the best results.
- Why Room Temperature Egg? A cold egg can cause the almond butter to seize up and become difficult to mix, leading to a less uniform batter. Taking five minutes to let your egg sit on the counter makes the whole process smoother—literally.
- Don’t Over-Bake! The trick with bar cookies is that they continue to set up as they cool in the pan. You want to pull them out when the edges are golden and the center still looks a tiny bit soft and underdone. It’s the secret to that fudgy center.
- Line That Pan. Don’t skip the parchment paper! A little overhang on two sides creates “handles” that make it incredibly easy to lift the entire slab of bars out of the pan for clean, mess-free cutting.
How to Make Almond Butter Cookie Bars
Step 1: First, preheat your oven to 350°F (175°C). Grab your 8×8-inch baking pan and line it with parchment paper, leaving some overhang on two opposite sides. This little step is a game-changer for clean removal later. Give the pan a very light spray with cooking spray to help the parchment stick in place.
Step 2: In your medium mixing bowl, combine the almond butter, packed brown sugar, room temperature egg, and vanilla extract. Use a sturdy spatula or a whisk to mix everything together until it’s completely smooth and well-blended. You’ll notice the mixture will thicken slightly and become glossy. This should only take a minute or two—no need to over-mix here.
Step 3: Now, sprinkle the baking soda and fine sea salt over the wet ingredients. Mix again until you can’t see any white streaks from the baking soda. The dough will be quite thick and sticky, which is exactly what you want. If you’re using chocolate chips, now’s the time to fold them in gently until they’re evenly distributed.
Step 4: Transfer the cookie dough to your prepared pan. Use your spatula or lightly wet fingers to press the dough into an even layer, making sure to get it into all the corners. The layer will be relatively thin, but it will puff up beautifully in the oven. For that professional finish, sprinkle the top with a little flaky sea salt.
Step 5: Bake for 20-22 minutes. You’re looking for golden brown edges and a top that looks set. The center might still look a little soft and puffy—that’s perfect! Remember, it will firm up as it cools. A toothpick inserted near the center should come out with a few moist crumbs, but not wet batter.
Step 6: This is the hardest part: let the pan cool completely on a wire rack. I know it’s tempting, but cutting into warm bars will result in a gooey mess. Letting them cool fully is non-negotiable for getting those clean, sharp cuts. Once cool, use the parchment paper handles to lift the whole slab onto a cutting board before slicing.
Serving Suggestions
Complementary Dishes
- A simple fruit salad with mint — The bright, fresh acidity of berries or citrus cuts through the richness of the bars beautifully, making the whole dessert feel balanced.
- A scoop of vanilla bean ice cream — Serve a warm bar (gently reheated) à la mode for the ultimate decadent treat. The contrast between warm, chewy bar and cold, creamy ice cream is just magic.
- With your afternoon coffee or tea — These bars aren’t overly sweet, making them the perfect companion to a bitter espresso or a strong cup of Earl Grey tea.
Drinks
- A glass of cold oat milk — The creamy, slightly sweet flavor of oat milk is a fantastic dairy-free pairing that complements the nuttiness of the almond butter.
- A rich hot chocolate — Double down on the cozy chocolate vibes if you’ve added chocolate chips. It’s like a hug in a mug with a cookie bar on the side.
- A dessert wine like a Muscat — For a truly special occasion, the honeyed, floral notes of a Muscat wine echo the sweetness of the bars without overpowering them.
Something Sweet
- Fresh raspberries on the side — Their tart pop provides a lovely little surprise with each bite and adds a gorgeous burst of color to the plate.
- A drizzle of melted dark chocolate — For the chocoholics, an extra zigzag of chocolate on top right before serving makes these feel extra luxurious.
- A dollop of coconut whipped cream — Light, fluffy, and not too sweet, it adds a cloud-like texture that contrasts wonderfully with the dense bar.
Top Mistakes to Avoid
- Mistake: Using the wrong almond butter. This is the number one reason recipes fail. The stabilized kind (with palm oil or other hydrogenated oils) will give you a greasy, oddly textured bar that doesn’t set properly. Always opt for natural.
- Mistake: Over-baking the bars. I’ve messed this up before too—it’s so easy to think they need more time because the center looks soft. But trust the process! They set up as they cool. Over-baking leads to dry, crumbly bars instead of soft and chewy ones.
- Mistake: Skipping the parchment paper. Trying to cut these directly in the pan is a recipe for scratched pans and messy, broken bars. The parchment sling is your best friend for presentation.
- Mistake: Cutting while warm. Your kitchen will smell amazing, and the urge to dive in is real. But patience is key. Cutting too soon causes them to fall apart. Let them cool completely for perfect squares.
Expert Tips
- Tip: Brown your butter for the almond butter. If you’re feeling adventurous, replace the almond butter with brown butter you’ve cooled slightly. It adds an incredible nutty, caramel depth that takes these bars to a whole new level of flavor.
- Tip: Add a texture twist. For a bit of crunch, fold in ¼ cup of chopped toasted almonds or pecans along with the chocolate chips. The contrast between the chewy bar and the crunchy nut is fantastic.
- Tip: Make them fancy with a swirl. Before baking, drop small spoonfuls of raspberry or apricot jam onto the dough and use a knife to swirl it gently into the top layer. You get little pockets of fruity sweetness in every bite.
- Tip: For super clean cuts, chill them. If you want absolutely pristine, sharp-edged bars for a party, pop the fully cooled slab (once cut) into the refrigerator for 20-30 minutes before serving. This firms them up perfectly for slicing.
FAQs
Can I use a different nut butter?
Absolutely! This recipe is very adaptable. Creamy peanut butter will give you a classic peanut butter blondie vibe. Cashew butter will result in a milder, incredibly buttery bar. Just make sure whatever you use is the natural, stir-able kind. The consistency needs to be similar to a runny almond butter for the ratios to work correctly.
Can I make these gluten-free or vegan?
They are naturally gluten-free, which is a great bonus! For a vegan version, you can try using a “flax egg” (1 tbsp ground flaxseed mixed with 3 tbsp water, let sit for 5 minutes). I’ve had good results, but the texture can be slightly more fragile. A commercial egg replacer might also work well for binding.
How should I store these bars?
Keep them in an airtight container at room temperature for up to 3 days. For longer storage, they freeze beautifully! Wrap individual bars in plastic wrap and place them in a freezer bag. They’ll keep for up to 3 months. Just thaw at room temperature for an hour or pop one in the microwave for 15 seconds.
My batter seems really thick and oily. Is that normal?
Yes, it can seem a bit different from traditional cookie dough. Because there’s no flour, the texture is more like a thick, fudgy paste. As long as you used the right almond butter and mixed it well, it’s perfectly normal. It will bake up into that wonderful dense-yet-soft texture we’re after.
Can I double this recipe?
You sure can! Simply double all the ingredients and press the dough into a 9×13-inch baking pan. You’ll likely need to add a few minutes to the baking time—start checking around the 25-minute mark for those golden edges and a set center.
Almond Butter Cookie Bars
One-bowl Almond Butter Cookie Bars with chewy edges & fudgy centers! Easy no-mixer recipe ready in 35 mins. Perfect gluten-free dessert with pro tips from a Chicago home cook.
Ingredients
Ingredients
-
1 cup creamy almond butter ((250 g) (see notes below!))
-
⅔ cup light brown sugar ((130 g) packed)
-
1 large egg (at room temperature)
-
1 tsp vanilla extract
-
½ tsp baking soda
-
¼ tsp fine sea salt
-
½ cup dark chocolate chips or chunks ((85 g) (optional, but highly recommended))
-
Flaky sea salt (for sprinkling on top)
Instructions
-
First, preheat your oven to 350°F (175°C). Grab your 8x8-inch baking pan and line it with parchment paper, leaving some overhang on two opposite sides. This little step is a game-changer for clean removal later. Give the pan a very light spray with cooking spray to help the parchment stick in place.01
-
In your medium mixing bowl, combine the almond butter, packed brown sugar, room temperature egg, and vanilla extract. Use a sturdy spatula or a whisk to mix everything together until it's completely smooth and well-blended. You'll notice the mixture will thicken slightly and become glossy. This should only take a minute or two—no need to over-mix here.02
-
Now, sprinkle the baking soda and fine sea salt over the wet ingredients. Mix again until you can't see any white streaks from the baking soda. The dough will be quite thick and sticky, which is exactly what you want. If you're using chocolate chips, now's the time to fold them in gently until they're evenly distributed.03
-
Transfer the cookie dough to your prepared pan. Use your spatula or lightly wet fingers to press the dough into an even layer, making sure to get it into all the corners. The layer will be relatively thin, but it will puff up beautifully in the oven. For that professional finish, sprinkle the top with a little flaky sea salt.04
-
Bake for 20-22 minutes. You're looking for golden brown edges and a top that looks set. The center might still look a little soft and puffy—that's perfect! Remember, it will firm up as it cools. A toothpick inserted near the center should come out with a few moist crumbs, but not wet batter.05
-
This is the hardest part: let the pan cool completely on a wire rack. I know it's tempting, but cutting into warm bars will result in a gooey mess. Letting them cool fully is non-negotiable for getting those clean, sharp cuts. Once cool, use the parchment paper handles to lift the whole slab onto a cutting board before slicing.06


