
Why You’ll Love This Almond Butter Chocolate Truffles
- Unbelievably Simple. You really only need a handful of ingredients and zero special equipment. If you can stir things together in a bowl, you can absolutely master these.
- The Perfect Texture. We’re aiming for a firm-but-creamy center that melts on your tongue, contrasted with that satisfying snap from the dark chocolate shell. It’s a little bit of textural heaven.
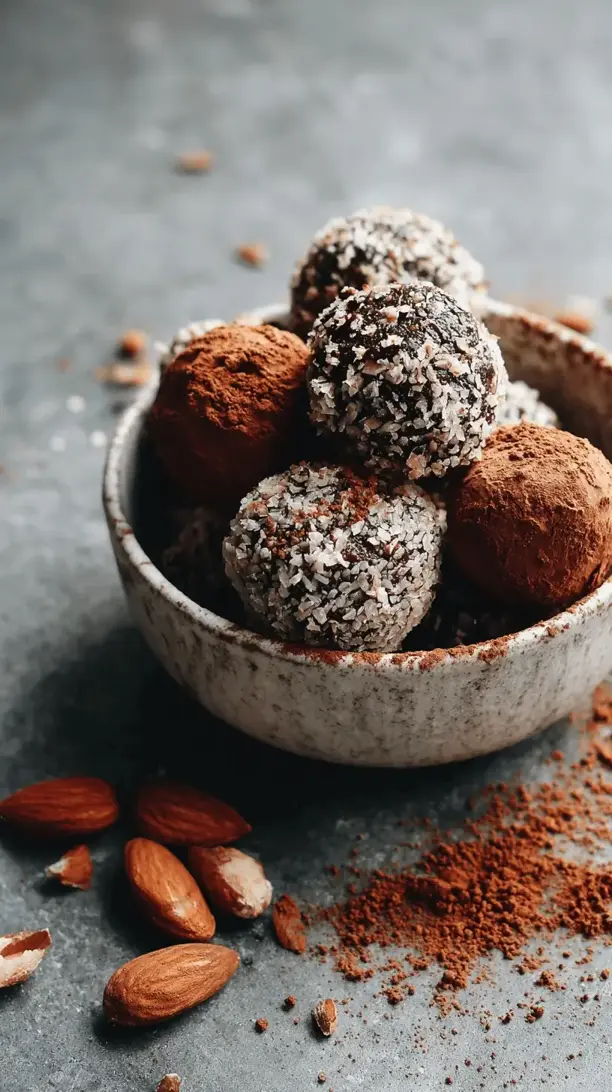
- Endlessly Customizable. Once you’ve got the basic recipe down, you can roll them in crushed nuts, a dusting of cocoa powder, or even a pinch of flaky sea salt. They’re your truffles to play with.
- They Feel Fancy. Honestly, presenting a plate of these to friends or family gives off serious pastry chef vibes, but the secret is how effortlessly they come together. A little goes a long way for impressing people.
Ingredients & Tools
- 1 cup smooth, runny almond butter (see notes below!)
- 1/4 cup maple syrup
- 1/4 cup almond flour
- 1/2 tsp vanilla extract
- 1/4 tsp fine sea salt
- 200 g good-quality dark chocolate (around 70%), chopped
- 1 tsp coconut oil (optional, but makes the shell shinier)
Tools: Medium mixing bowl, small bowl, baking sheet, parchment paper, fork or dipping tool, spoon.
The quality of your almond butter is key here—you want the natural, drippy kind, not the stiff, separated-at-the-bottom-of-the-jar variety. It makes all the difference for achieving that smooth, pliable texture. And for the chocolate, honestly, just use a bar you’d enjoy eating on its own. It really is the star of the show.
Serves: Makes about 15 truffles | Prep Time: 20 minutes | Chill Time: 1 hour | Total Time: 1 hour 20 minutes
Before You Start: Tips & Ingredient Notes
- Almond Butter Matters. This is the heart of the truffle. Use a natural, well-stirred, runny almond butter. If it’s too thick and dry, the mixture will be crumbly and hard to roll. If you only have thick butter, gently warm it to make it more pourable.
- Why Almond Flour? This is our secret for getting the perfect fudgy-but-rollable texture. It soaks up just enough of the almond butter’s natural oils without making the center cakey. Don’t be tempted to skip it!
- Chop Your Own Chocolate. I know chocolate chips are convenient, but they contain stabilizers that prevent them from melting as smoothly. Chopping a bar of chocolate gives you a much silkier, more professional-looking coating.
- Patience is a Virtue. The chilling steps are non-negotiable. If the centers aren’t firm enough, they’ll fall apart when you dip them. If the chocolate isn’t set, you’ll have a mess. Trust the process and the fridge!
How to Make Almond Butter Chocolate Truffles
Step 1: Make the Truffle Center. In your medium bowl, combine the almond butter, maple syrup, almond flour, vanilla extract, and sea salt. Stir everything together with a spoon until it’s completely smooth and well-combined. You’ll notice it will thicken up slightly as you mix. The mixture should be soft but not overly sticky. If it feels too wet, you can add another tablespoon of almond flour.
Step 2: Chill the Mixture. This is the crucial first chill! Cover the bowl with cling film or a lid and pop it into the refrigerator for at least 30 minutes. You want it to be firm enough to handle. It shouldn’t be rock solid, but it should hold its shape when you press it.
Step 3: Roll the Centers. Line a baking sheet with parchment paper. Using a small spoon or a measuring spoon (a half-tablespoon is perfect), scoop out portions of the chilled mixture. Quickly roll each portion between your palms to form a smooth ball. If your hands get too sticky, lightly dampen them with water. Place each ball back on the parchment-lined tray.
Step 4: The Second Chill. Once all the centers are rolled, place the entire tray back into the fridge for another 15-20 minutes. This second chill ensures they are really firm and won’t melt when they hit the warm chocolate later. This step is a game-changer for neat dipping.
Step 5: Melt the Chocolate. While the centers are chilling, melt your chocolate. You can do this in a double boiler or, my lazy method, in the microwave. Place the chopped chocolate and the coconut oil (if using) in a small, microwave-safe bowl. Heat in 20-second bursts, stirring well after each burst, until the chocolate is just melted and smooth. Be careful not to overheat it!
Step 6: Dip the Truffles. Now for the fun part! Remove the truffle centers from the fridge. Using a fork or a specialty dipping tool, drop one ball into the melted chocolate. Gently roll it around to coat it completely. Lift it out, let the excess chocolate drip off, and then carefully place it back on the parchment paper. Repeat with all the truffle centers.
Step 7: Set and Serve. If you’d like to add a topping like flaky salt or crushed almonds, do it now before the chocolate sets. Leave the tray of finished truffles at room temperature (if it’s not too warm) or in the fridge for about 15 minutes, until the chocolate shell is completely firm. And then… try to wait at least five minutes before you devour one.
Serving Suggestions
Complementary Dishes
- A Fresh Fruit Platter — The bright, juicy acidity of berries or orange slices cuts through the richness of the chocolate beautifully, creating a lovely balance on the palate.
- A Cheese Board — A few of these truffles nestled next to a sharp aged cheddar or a creamy blue cheese can be a surprisingly sophisticated and delicious combination.
Drinks
- A Bold Red Wine — A glass of Cabernet Sauvignon or Zinfandel has the body and dark fruit notes to stand up to the deep chocolate and nutty flavors.
- Black Coffee or Espresso — Honestly, this is my personal favorite. The bitterness of a strong coffee is the perfect counterpoint to the sweet, creamy truffle.
Something Sweet
- Vanilla Bean Ice Cream — Place a truffle on top of a scoop of really good vanilla ice cream for an instant, decadent sundae. The warmth of the truffle will slightly melt into the ice cream… it’s magic.
- Orange & Cardamom Biscotti — The citrus and spice notes in a crunchy biscotti provide a wonderful textural and flavor contrast to the soft, rich truffles.
Top Mistakes to Avoid
- Mistake: Using the wrong almond butter. This is the number one reason truffle centers fail. A thick, dry almond butter will give you a crumbly mixture that’s impossible to roll. I’ve messed this up before too—it’s frustrating! Always opt for natural, runny almond butter.
- Mistake: Skipping the chilling steps. I know, I know, you want to get to the eating part. But if your centers are too soft, they’ll just dissolve into the melted chocolate. The double chill is your best friend for perfect, round truffles.
- Mistake: Overheating the chocolate. If you blast the chocolate in the microwave for too long, it can seize up and become a grainy, clumpy mess. Low and slow is the way to go, with plenty of stirring in between.
- Mistake: Dipping with warm hands. If you handle the chilled centers for too long, the heat from your hands will start to soften them. Work quickly, and if you need to, pop the tray back in the fridge for a few minutes halfway through dipping.
Expert Tips
- Tip: Use a fork for dipping. A simple dinner fork is a fantastic tool. Slide the truffle onto the tines, dip it, lift it out, and gently tap the fork on the edge of the bowl to remove excess chocolate. Then, use a toothpick or a second fork to gently push the truffle onto the parchment paper.
- Tip: Add a flavor twist to the center. Once you’ve mastered the basic recipe, try adding a pinch of cinnamon, a dash of espresso powder, or even a tiny bit of orange zest to the almond butter mixture for a whole new experience.
- Tip: Create a swirled effect. For a pretty finish, after dipping a truffle, drizzle a little extra melted chocolate over the top in a zig-zag pattern using a spoon. It looks professional with minimal effort.
- Tip: For a super-shiny shell. The teaspoon of coconut oil in the melting chocolate isn’t just for ease—it also gives the finished truffles a gorgeous, professional-looking shine and a slightly thinner, crispier shell.
FAQs
Can I use a different nut butter?
Absolutely! This recipe is very adaptable. Creamy, runny peanut butter or cashew butter would work wonderfully. Just make sure it’s the natural kind without added sugars or hydrogenated oils, as those can alter the texture. The flavor will change, of course, but it’ll be just as delicious. Sunflower seed butter is a great nut-free option, though it may give the centers a slightly greener color.
How should I store these truffles and how long do they last?
Store them in an airtight container in the refrigerator for up to two weeks. They also freeze beautifully for up to three months. Just layer them between sheets of parchment paper in a freezer-safe container. Let them thaw in the fridge for a few hours before serving. You’ll notice the texture remains perfectly creamy.
My chocolate coating is too thick. What did I do wrong?
This usually happens if the chocolate has started to cool and thicken while you’re dipping. You can gently re-warm it for a few seconds to thin it out again. Also, adding that teaspoon of coconut oil will naturally give you a thinner, more fluid coating that’s easier to work with.
Can I make these without any refined sugar?
Yes, the recipe as written uses maple syrup as the sweetener, so it’s naturally refined sugar-free. Just be sure to choose a dark chocolate that is also sweetened with a natural alternative, like a coconut sugar-sweetened chocolate bar, to keep the entire recipe free of refined sugars.
The centers are too soft to roll, even after chilling. What can I do?
Don’t panic! This means your almond butter was particularly oily or the mixture just needs a bit more structure. Pop the bowl back in the fridge for another 15-20 minutes. If it’s still too soft, you can mix in another tablespoon or two of almond flour until the consistency is firmer and more manageable.
Almond Butter Chocolate Truffles
Whip up decadent Almond Butter Chocolate Truffles in 30 mins! My easy, no-fuss recipe features a creamy almond butter center & a rich dark chocolate shell. Perfect for homemade gifts or a sweet treat.
Ingredients
Ingredients
-
1 cup smooth, runny almond butter (see notes below!)
-
1/4 cup maple syrup
-
1/4 cup almond flour
-
1/2 tsp vanilla extract
-
1/4 tsp fine sea salt
-
200 g good-quality dark chocolate (around 70%), chopped
-
1 tsp coconut oil (optional, but makes the shell shinier)
Instructions
-
Make the Truffle Center. In your medium bowl, combine the almond butter, maple syrup, almond flour, vanilla extract, and sea salt. Stir everything together with a spoon until it's completely smooth and well-combined. You'll notice it will thicken up slightly as you mix. The mixture should be soft but not overly sticky. If it feels too wet, you can add another tablespoon of almond flour.01
-
Chill the Mixture. This is the crucial first chill! Cover the bowl with cling film or a lid and pop it into the refrigerator for at least 30 minutes. You want it to be firm enough to handle. It shouldn't be rock solid, but it should hold its shape when you press it.02
-
Roll the Centers. Line a baking sheet with parchment paper. Using a small spoon or a measuring spoon (a half-tablespoon is perfect), scoop out portions of the chilled mixture. Quickly roll each portion between your palms to form a smooth ball. If your hands get too sticky, lightly dampen them with water. Place each ball back on the parchment-lined tray.03
-
The Second Chill. Once all the centers are rolled, place the entire tray back into the fridge for another 15-20 minutes. This second chill ensures they are really firm and won't melt when they hit the warm chocolate later. This step is a game-changer for neat dipping.04
-
Melt the Chocolate. While the centers are chilling, melt your chocolate. You can do this in a double boiler or, my lazy method, in the microwave. Place the chopped chocolate and the coconut oil (if using) in a small, microwave-safe bowl. Heat in 20-second bursts, stirring well after each burst, until the chocolate is just melted and smooth. Be careful not to overheat it!05
-
Dip the Truffles. Now for the fun part! Remove the truffle centers from the fridge. Using a fork or a specialty dipping tool, drop one ball into the melted chocolate. Gently roll it around to coat it completely. Lift it out, let the excess chocolate drip off, and then carefully place it back on the parchment paper. Repeat with all the truffle centers.06
-
Set and Serve. If you'd like to add a topping like flaky salt or crushed almonds, do it now before the chocolate sets. Leave the tray of finished truffles at room temperature (if it's not too warm) or in the fridge for about 15 minutes, until the chocolate shell is completely firm. And then... try to wait at least five minutes before you devour one.07


