Why You’ll Love This Almond Butter Chocolate Chip Cookie Cups
- Perfectly portable and portioned. The muffin tin does all the work for you, creating individual servings that are easy to grab and go. No messy slicing or crumbling—just perfect little cookie cups every single time.
- An incredible, chewy texture. The combination of almond butter and oats creates a wonderfully dense and satisfying bite. They’re soft in the center with just a hint of crispness around the edges—it’s a textural dream.
- So simple to make. Honestly, this is a one-bowl situation. You just mix the wet ingredients, stir in the dry, and you’re done. There’s no need for a mixer, and the cleanup is an absolute breeze.
- They feel fancy but are secretly easy. Swirling that extra almond butter on top and sprinkling with flaky salt makes them look like they came from a bakery. It’s a little trick that delivers maximum visual impact for almost zero extra effort.
Ingredients & Tools
- 1 cup creamy, unsalted almond butter
- 2/3 cup coconut sugar or light brown sugar
- 2 large eggs, at room temperature
- 1 tsp vanilla extract
- 1 cup old-fashioned rolled oats (certified gluten-free if needed)
- 1 tsp baking soda
- 1/4 tsp fine sea salt
- 3/4 cup dark chocolate chips or chunks
- 2 tbsp extra almond butter, for swirling
- A pinch of flaky sea salt, for finishing
Tools: 1 large mixing bowl, a standard 12-cup muffin tin, muffin liners (highly recommended!), and a whisk or spatula.
Using a good-quality, runny almond butter is key here—the kind where the oil separates a little. It makes for a much better texture than the super-stiff, dry kinds. And for the chocolate, I really prefer a dark chocolate chip around 60-70% cacao—it balances the sweetness of the cookie base beautifully.
Nutrition (per serving)
- Calories: 245 kcal
- Protein: 7 g
- Fat: 16 g
- Carbohydrates: 21 g
- Fiber: 3 g
Serves: 12 | Prep Time: 10 minutes | Cook Time: 12-14 minutes | Total Time: 25 minutes
Before You Start: Tips & Ingredient Notes
- Your almond butter matters. For the best results, use a natural, drippy almond butter. If yours is very stiff, you can gently warm it for 10-15 seconds in the microwave to make it easier to mix. Avoid brands with lots of added sugar or hydrogenated oils.
- Don’t skip the muffin liners. I know it’s tempting to just grease the pan, but these cookies are sticky. Liners guarantee a perfect, clean release every single time and make cleanup a total non-issue.
- Room temperature eggs are non-negotiable. Cold eggs can cause the almond butter to seize up and become clumpy, which makes it really hard to get a smooth, homogenous batter. If you forgot, just place your eggs in a bowl of warm water for 5 minutes.
- Resist the urge to overmix. Once you add the oats and chocolate chips, just stir until everything is combined. Overmixing can lead to a tougher cookie. A few streaks of almond butter are totally fine—they create those lovely swirls.
How to Make Almond Butter Chocolate Chip Cookie Cups
Step 1: First, preheat your oven to 350°F (175°C). This is a quick-baking recipe, so you want that oven nice and hot when your batter is ready. Line your muffin tin with paper liners—this is the best trick for easy removal later. Give the liners a very light spritz with cooking spray if you’re worried about sticking, but I usually find it’s not necessary.
Step 2: In your large mixing bowl, combine the 1 cup of almond butter, coconut sugar, room temperature eggs, and vanilla extract. Whisk it all together until it’s completely smooth and well-blended. You’ll notice the mixture will thicken slightly and become a lovely pale brown color. If you see any little lumps of almond butter, just keep whisking—they should dissolve.
Step 3: Now, sprinkle the rolled oats, baking soda, and fine sea salt right over the wet ingredients. Use a spatula to fold everything together. The trick is to mix just until you no longer see dry spots. The batter will be quite thick and sticky—that’s exactly what you want! It means your cookie cups will be wonderfully chewy.
Step 4: Gently fold in the dark chocolate chips. Save a small handful to press on top later for a bakery-style look. Again, don’t overdo the mixing—just a few folds to distribute them evenly throughout the thick batter.
Step 5: Using a cookie scoop or two spoons, divide the batter evenly among the 12 prepared muffin cups. You’ll want to fill them about 3/4 of the way full. They don’t spread a huge amount, so it’s okay if they’re mounded a little. Now, take the back of a spoon and gently press down on the center of each one to create a slight indentation.
Step 6: Here’s the fun, fancy part! Take that extra 2 tablespoons of almond butter and dollop a tiny bit into the center of each cookie cup. Use a toothpick or the tip of a knife to swirl it gently into the top of the batter. You don’t want to mix it in completely—just pretty marbled patterns. Press the reserved chocolate chips on top.
Step 7: Pop the muffin tin into your preheated oven and bake for 12 to 14 minutes. The tops should look set and be lightly golden around the edges, but the centers might still look a tiny bit soft. That softness is the key to a chewy, not-cakey, texture. A little gooeyness in the middle is perfect.
Step 8: As soon as you pull them from the oven, sprinkle each one with a tiny pinch of flaky sea salt. This enhances all the flavors and cuts through the richness. Let the cookie cups cool in the muffin tin for at least 15-20 minutes. They’ll be very soft and fragile when hot, but they firm up beautifully as they cool.
Serving Suggestions
Complementary Dishes
- A scoop of vanilla bean ice cream — Placing a small scoop right into the warm, indented cookie cup creates the ultimate dessert. The hot-and-cold contrast is simply divine.
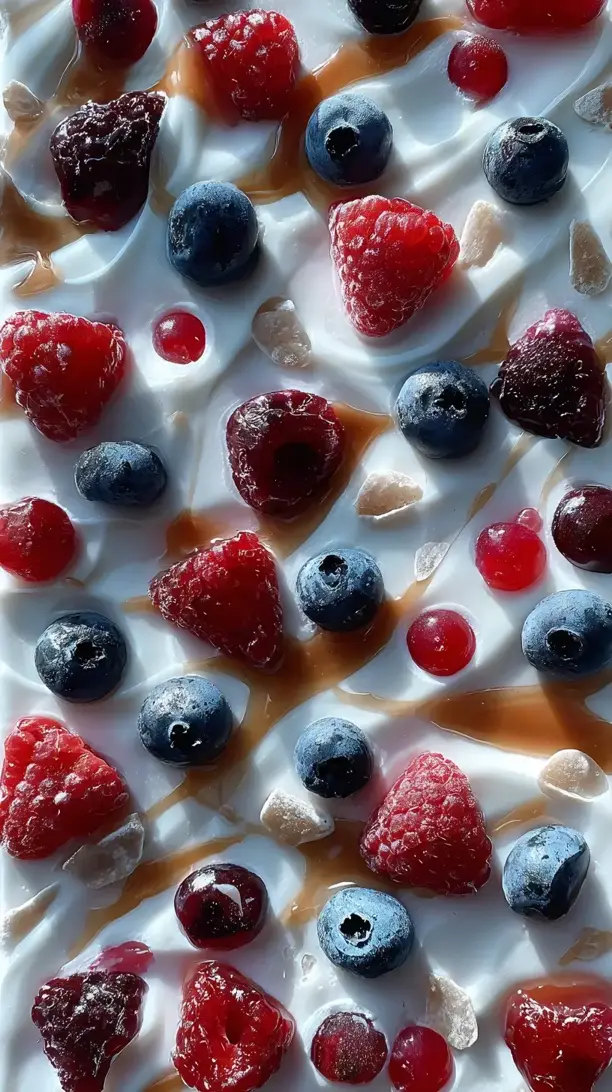
- A bowl of fresh mixed berries — The bright, tart acidity of raspberries or strawberries provides a lovely counterpoint to the rich, nutty sweetness of the cookie cups.
- A dollop of coconut whipped cream — For a dairy-free option, this adds a light, fluffy cloud of sweetness that melts beautifully into the warm chocolate.
Drinks
- A glass of cold oat milk — Its creamy, neutral flavor complements the almond butter without overpowering it, making for a wonderfully cozy pairing.
- A hot cup of coffee — The bitterness of a good, strong brew is the perfect match for the sweet and salty notes of the cookie, creating a classic coffee-and-dessert moment.
- Chilled almond milk latte — This keeps the almond theme going and the cool, creamy latte is a dream with the soft, chewy texture of the cookie cup.
Something Sweet
- A small square of dark chocolate — For the true chocoholic, a piece of high-cacao chocolate on the side intensifies the entire experience.
- A few dried apricots or figs — Their concentrated fruity sweetness and chewy texture play wonderfully against the nutty, chocolatey base.
- A drizzle of salted caramel sauce — Honestly, this is gilding the lily, but it’s a spectacularly decadent choice for a special occasion.
Top Mistakes to Avoid
- Using cold eggs. This is the number one reason batter gets clumpy. Cold eggs don’t incorporate smoothly into the dense almond butter, leading to an uneven texture in your baked cookie cups.
- Overbaking. It’s so easy to do because they might look underdone, but they continue to set as they cool. If you wait for them to look fully firm in the center, you’ll end up with dry, crumbly cookies instead of fudgy, chewy ones.
- Skipping the liners. Even with a well-greased pan, these have a tendency to stick. You’ll lose that beautiful, clean shape and probably half the cookie when you try to pry it out. Liners are your best friend here.
- Not letting them cool. I know it’s hard to wait, but if you try to remove them from the tin immediately, they will fall apart. They need that 15-20 minutes to set up and become sturdy enough to handle.
Expert Tips
- Tip: Toast your oats. Spread the rolled oats on a baking sheet and toast them in a 350°F oven for 5-7 minutes before using. Let them cool slightly. This deepens their nutty flavor and gives the cookie cups an even more complex, toasty taste.
- Tip: Make them nut-free. You can easily substitute sunflower seed butter for the almond butter. Just be aware that it can sometimes react with the baking soda and turn the baked goods a slight green color—it’s perfectly safe to eat, just a little surprising!
- Tip: Create a filled center. Before baking, press a small, extra chocolate chunk deep into the center of each portion of batter. It will create a molten, surprise chocolate core that is absolutely incredible.
- Tip: Freeze for later. These cookie cups freeze beautifully. Once completely cooled, place them in a single layer on a baking sheet to freeze solid, then transfer to a zip-top bag. You can enjoy a perfect, single-serving treat straight from the freezer—they thaw in minutes.
FAQs
Can I use a different nut butter?
Absolutely! Creamy peanut butter or cashew butter would work wonderfully here. Just make sure it’s the natural, stir-in kind for the right consistency. The flavor will change, of course—peanut butter will give you more of a classic peanut butter cup vibe, which is also delicious. The key is to avoid the super-processed, no-stir varieties as they can make the batter too dry.
My batter seems really thick and dry. What happened?
This usually means your almond butter was too thick to begin with. Different brands have different consistencies. If your batter isn’t coming together and looks crumbly, add a tablespoon of milk (dairy or non-dairy) at a time until it becomes a scoopable, thick cookie dough consistency. A little goes a long way!
Can I make these without eggs?
I’ve had mixed results with egg substitutes in this particular recipe because the eggs provide a lot of the structure. If you want to try, a “flax egg” (1 tbsp ground flaxseed mixed with 3 tbsp water, left to gel for 5 minutes) can work, but the texture will be much more dense and fudgy, and they might not hold their cup shape as well.
How should I store these, and how long do they last?
Store them in an airtight container at room temperature for up to 4 days. They’re best enjoyed within the first 2-3 days for maximum chewiness. You can also store them in the fridge if your kitchen is warm, which will make them a bit firmer. For longer storage, the freezer is your best bet.
Can I use quick oats instead of old-fashioned rolled oats?
You can, but the texture will be different. Quick oats are more finely cut and absorb more moisture, which can result in a denser, less chewy cookie cup with a more cake-like crumb. Old-fashioned oats give that wonderful, substantial chew that makes these so special, so I’d really recommend sticking with them if you can.
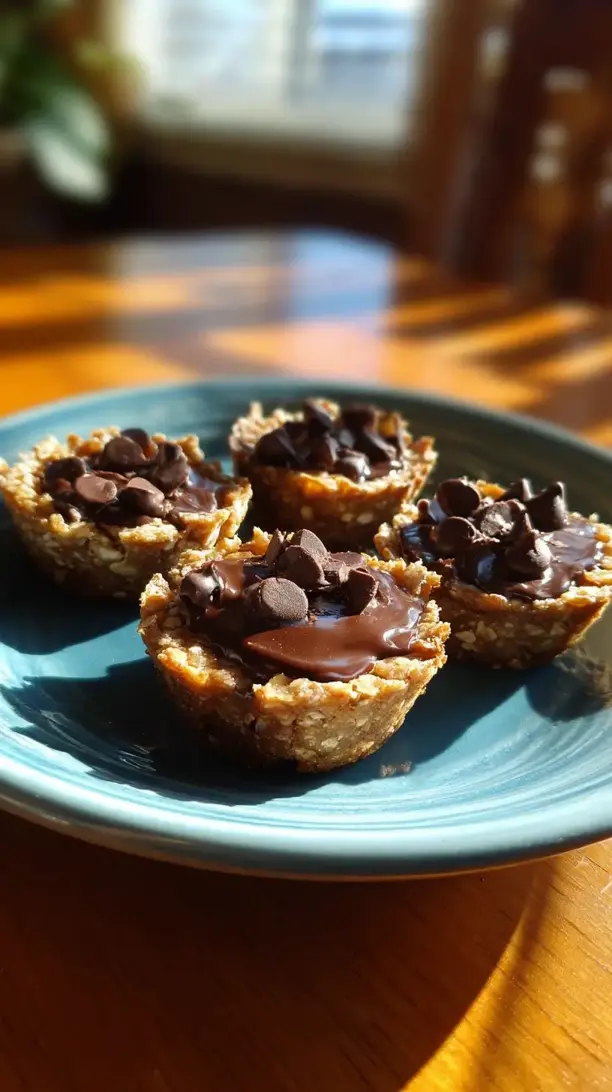
Almond Butter Chocolate Chip Cookie Cups
Make these easy Almond Butter Chocolate Chip Cookie Cups for a chewy, gluten-free treat. Ready in 25 minutes with simple ingredients. Get the recipe now!
Ingredients
For the Ingredients
-
1 cup creamy, unsalted almond butter
-
2/3 cup coconut sugar or light brown sugar
-
2 large eggs (at room temperature)
-
1 tsp vanilla extract
-
1 cup old-fashioned rolled oats (certified gluten-free if needed)
-
1 tsp baking soda
-
1/4 tsp fine sea salt
-
3/4 cup dark chocolate chips or chunks
-
2 tbsp extra almond butter (for swirling)
-
flaky sea salt (a pinch, for finishing)
Instructions
-
First, preheat your oven to 350°F (175°C). This is a quick-baking recipe, so you want that oven nice and hot when your batter is ready. Line your muffin tin with paper liners—this is the best trick for easy removal later. Give the liners a very light spritz with cooking spray if you’re worried about sticking, but I usually find it’s not necessary.01
-
In your large mixing bowl, combine the 1 cup of almond butter, coconut sugar, room temperature eggs, and vanilla extract. Whisk it all together until it’s completely smooth and well-blended. You’ll notice the mixture will thicken slightly and become a lovely pale brown color. If you see any little lumps of almond butter, just keep whisking—they should dissolve.02
-
Now, sprinkle the rolled oats, baking soda, and fine sea salt right over the wet ingredients. Use a spatula to fold everything together. The trick is to mix just until you no longer see dry spots. The batter will be quite thick and sticky—that’s exactly what you want! It means your cookie cups will be wonderfully chewy.03
-
Gently fold in the dark chocolate chips. Save a small handful to press on top later for a bakery-style look. Again, don’t overdo the mixing—just a few folds to distribute them evenly throughout the thick batter.04
-
Using a cookie scoop or two spoons, divide the batter evenly among the 12 prepared muffin cups. You’ll want to fill them about 3/4 of the way full. They don’t spread a huge amount, so it’s okay if they’re mounded a little. Now, take the back of a spoon and gently press down on the center of each one to create a slight indentation.05
-
Here’s the fun, fancy part! Take that extra 2 tablespoons of almond butter and dollop a tiny bit into the center of each cookie cup. Use a toothpick or the tip of a knife to swirl it gently into the top of the batter. You don’t want to mix it in completely—just pretty marbled patterns. Press the reserved chocolate chips on top.06
-
Pop the muffin tin into your preheated oven and bake for 12 to 14 minutes. The tops should look set and be lightly golden around the edges, but the centers might still look a tiny bit soft. That softness is the key to a chewy, not-cakey, texture. A little gooeyness in the middle is perfect.07
-
As soon as you pull them from the oven, sprinkle each one with a tiny pinch of flaky sea salt. This enhances all the flavors and cuts through the richness. Let the cookie cups cool in the muffin tin for at least 15-20 minutes. They’ll be very soft and fragile when hot, but they firm up beautifully as they cool.08