Why You’ll Love This Almond Butter Blossoms
- Incredibly Soft & Chewy Texture. The combination of almond butter and just the right amount of brown sugar creates a cookie that stays wonderfully soft for days. It’s like a little pillow for that chocolate kiss.
- A Deep, Toasty Almond Flavor. This isn’t just a peanut butter cookie imposter. Using a good-quality almond butter really lets that nutty, sophisticated flavor shine through, making it a perfect pairing for the chocolate.
- They Look Absolutely Stunning. Let’s be honest, we eat with our eyes first. These cookies, with their cracked tops and shiny chocolate centers, look like they came from a professional bakery with almost zero effort.
- The Dough is Forgiving and Freezer-Friendly. If your dough is a little too sticky or you need to bake in batches, it’s no problem. This recipe is very adaptable, and you can even freeze the dough balls for a fresh-baked cookie anytime the mood strikes.
Ingredients & Tools
- 1 cup creamy almond butter (see notes below!)
- 3/4 cup light brown sugar, packed
- 1/2 cup granulated sugar, plus extra for rolling
- 1 large egg, at room temperature
- 1 tsp vanilla extract
- 1/2 tsp baking soda
- 1/4 tsp salt
- 36 milk chocolate kisses, unwrapped
Tools: A stand mixer or hand mixer, a medium bowl, a baking sheet, and parchment paper.
The quality of your almond butter is key here — you’ll want one that’s well-stirred and doesn’t have a lot of added oil or sugar. The simplicity of the ingredient list means every component plays a starring role, so using a fresh, room-temperature egg and real vanilla will make a noticeable difference in the final flavor.
Nutrition (per serving)
- Calories: 128 kcal
- Protein: 3 g
- Fat: 7 g
- Carbohydrates: 15 g
- Fiber: 1 g
Serves: 36 cookies | Prep Time: 15 minutes | Cook Time: 8 minutes | Total Time: 23 minutes
Before You Start: Tips & Ingredient Notes
- Your Almond Butter Matters. For the best texture, use a “no-stir” or well-stirred creamy almond butter. If it’s super oily, give it a good stir and maybe even blot a little oil off the top. A dry, crumbly almond butter can make the dough too stiff.
- Room Temperature Egg is Non-Negotiable. I know it’s a small step, but a cold egg won’t incorporate as well into the dense almond butter and sugar mixture, which can affect the cookie’s spread and texture. Just let it sit out for 30 minutes!
- Unwrap All Your Chocolate Kisses Now. Seriously, do this first. The cookies bake quickly, and you need to press the chocolate in the second they come out of the oven. Fumbling with wrappers is a recipe for burnt fingers and over-baked cookies.
- Don’t Skip the Sugar Rolling. Rolling the dough balls in granulated sugar before baking isn’t just for looks. It creates a delicate, slightly crisp exterior that contrasts beautifully with the soft, chewy interior and gives them that classic sparkle.
How to Make Almond Butter Blossoms
Step 1: First, preheat your oven to 350°F (175°C) and line your baking sheets with parchment paper. This is a crucial step because these cookies can stick without it, and the parchment makes cleanup an absolute dream. Get all your ingredients measured and your chocolate kisses unwrapped — trust me, you’ll thank yourself later when things move quickly.
Step 2: In a medium bowl, combine the almond butter, packed brown sugar, and 1/2 cup of granulated sugar. Use a hand mixer or stand mixer fitted with the paddle attachment to beat them together on medium speed. You’ll notice it will look a bit crumbly and thick at first — that’s perfectly normal. Just keep mixing for about 2 minutes until it’s well combined.
Step 3: Now, add the room-temperature egg, vanilla extract, baking soda, and salt. Beat this mixture on medium speed for another 1-2 minutes. The dough will transform, becoming smoother, slightly glossy, and will pull away from the sides of the bowl. It should be soft and a little sticky, but easy to handle. If it feels too sticky, you can pop it in the fridge for 15 minutes to firm up.
Step 4: Place your extra granulated sugar (about 1/4 cup) in a small bowl. Scoop out heaping teaspoons of dough and roll them between your palms to form 1-inch balls. Roll each ball generously in the sugar until it’s completely coated. This creates that lovely crackled, sparkly look on the baked cookie.
Step 5: Place the sugar-coated dough balls about 2 inches apart on your prepared baking sheet. They don’t spread a huge amount, but they do need a little room to breathe. Bake for 7-9 minutes. The trick is to pull them out when the edges are just set and the tops are puffed and covered in cracks. They will look underdone in the middle — this is exactly what you want for a soft cookie!
Step 6: As soon as you pull the baking sheet from the oven, work quickly but carefully. Gently press a chocolate kiss into the center of each warm cookie. You’ll see the cookie crack a bit more around the edges of the chocolate, which is part of the charm. The residual heat will start to melt the chocolate base, securing it in place.
Step 7: Let the cookies cool on the baking sheet for at least 5 minutes before attempting to move them. They are incredibly soft and fragile straight from the oven. After 5 minutes, you can transfer them to a wire rack to cool completely. The chocolate will set back up as it cools, but it will remain a little soft.
Serving Suggestions
Complementary Dishes
- A simple fruit platter with oranges and berries — The bright, acidic fruit cuts through the richness of the cookies and almond butter beautifully, cleansing the palate.
- A scoop of vanilla bean ice cream — For the ultimate indulgence, sandwich a slightly warm cookie around a small scoop of ice cream. The contrast of temperatures and textures is sublime.
- A cheese board with soft brie and crisp apples — Serve these as the sweet component on a dessert board; the salty cheese and sweet cookie is a surprisingly elegant pairing.
Drinks
- A glass of cold milk — It’s a classic for a reason. The creaminess of the milk is the perfect partner to the nutty, chocolatey cookie.
- A cup of black coffee or espresso — The bitterness of a good, strong coffee highlights the deep, toasty notes of the almond butter and balances the sweetness.
- A frothy chai latte — The warm spices in chai—cinnamon, cardamom, clove—create a wonderfully cozy and aromatic experience alongside the cookies.
Something Sweet
- Lemon bars — The sharp, zesty lemon provides a fantastic counterpoint to the rich, nutty sweetness of the blossoms, making for a well-rounded dessert spread.
- Mini fruit tarts — For a more elaborate presentation, the fresh, creamy fruit tarts offer a different texture and a lighter flavor that complements rather than competes.
- Dark chocolate-covered almonds — Double down on the flavor theme! These are an easy, no-bake option that reinforces the almond-chocolate harmony.
Top Mistakes to Avoid
- Over-baking the cookies. This is the number one mistake. They continue to cook on the hot baking sheet after you take them out. If they look fully set in the oven, they’ll be hard and crunchy once cooled. You want them to look a little under-baked.
- Using cold ingredients. A cold egg or super stiff, cold almond butter won’t emulsify properly with the sugars, leading to a greasy, crumbly dough that doesn’t hold its shape well. I’ve messed this up before, and the texture just isn’t the same.
- Pressing the chocolate in too hard. You want to gently press just until the cookie holds the kiss. If you press too hard, you can smash the cookie’s structure and it might break apart when you try to move it after cooling.
- Not using parchment paper. Almond butter cookies have a higher fat content and can stick to an unlined pan, resulting in a broken cookie and a frustrating cleanup. The parchment is your best friend here.
Expert Tips
- Tip: Make uniform dough balls using a small cookie scoop. This isn’t just for neatness; it ensures all your cookies bake at the same rate. A #60 scoop (about 1 tablespoon) is the perfect size for this recipe.
- Tip: Chill your dough if your kitchen is warm. If the dough feels too soft after mixing, a 15-20 minute chill in the fridge will make it much easier to roll and will help prevent over-spreading in the oven.
- Tip: Experiment with different chocolate. While milk chocolate kisses are classic, don’t be afraid to try dark chocolate kisses, or even a Rolo for a caramel surprise in the center. The recipe is a perfect canvas for your favorite chocolate.
- Tip: Re-soften a hardened cookie. If your cookies have been in an airtight container for a few days and have firmed up, pop one in the microwave for 5-8 seconds. It will come out warm and soft, as if it was just baked.
FAQs
Can I use crunchy almond butter instead of creamy?
You absolutely can! It will add a lovely little textural crunch to the cookie. Just be aware that the dough might be a tiny bit more difficult to roll into perfectly smooth balls, but the end result is just as delicious. I sometimes use half creamy and half crunchy for the best of both worlds.
My dough is too crumbly and won’t hold together. What did I do wrong?
This usually happens if your almond butter was particularly dry or if you accidentally packed the brown sugar too loosely. The fix is simple: add a teaspoon of neutral oil (like avocado or vegetable oil) or even a teaspoon of milk at a time, mixing until the dough comes together. A little goes a long way!
Can I make these cookies ahead of time and freeze them?
Yes, and I do this all the time! You can freeze the unbaked dough balls on a tray, then transfer them to a freezer bag. Bake straight from frozen, adding 1-2 minutes to the baking time. You can also freeze the fully baked and cooled cookies in a single layer.
Why did my chocolate kisses melt completely and lose their shape?
This means your cookies were too hot when you pressed the chocolate in, or your oven runs hot. The cookies should be just out of the oven, but not scalding. If this keeps happening, let the cookies cool on the sheet for 1 minute before adding the chocolate. The cookie will be firm enough to support the kiss without melting it into a puddle.
Can I substitute peanut butter for the almond butter?
Technically, yes, and you’ll get a delicious peanut butter blossom cookie. However, the flavor profile will be completely different—more robust and less floral/nutty. The texture might also be slightly different, as almond butter often has a different oil content than peanut butter.
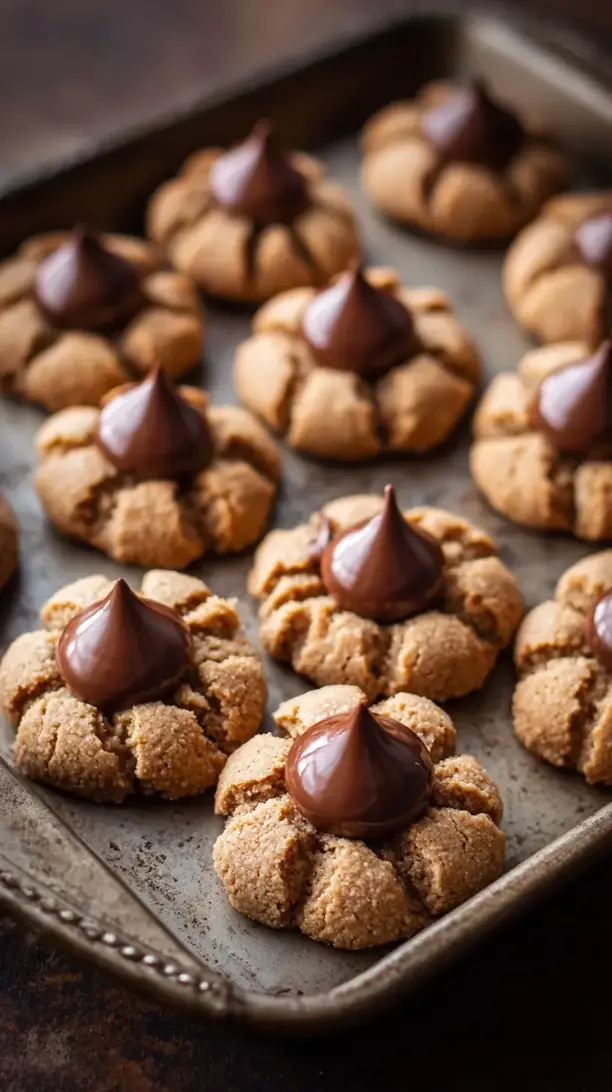
Almond Butter Blossoms
Make the best soft & chewy Almond Butter Blossoms with this easy recipe. Perfect for holidays or a sweet treat. Get the simple steps now!
Ingredients
For the Cookies:
-
1 cup creamy almond butter
-
3/4 cup light brown sugar (packed)
-
1/2 cup granulated sugar
-
1 large egg
-
1 tsp vanilla extract
-
1/2 tsp baking soda
-
1/4 tsp salt
-
36 milk chocolate kisses
Instructions
-
First, preheat your oven to 350°F (175°C) and line your baking sheets with parchment paper.01
-
In a medium bowl, combine the almond butter, packed brown sugar, and 1/2 cup of granulated sugar. Use a hand mixer or stand mixer fitted with the paddle attachment to beat them together on medium speed for about 2 minutes until it’s well combined.02
-
Add the room-temperature egg, vanilla extract, baking soda, and salt. Beat this mixture on medium speed for another 1-2 minutes until the dough becomes smoother, slightly glossy, and pulls away from the sides of the bowl.03
-
Place your extra granulated sugar (about 1/4 cup) in a small bowl. Scoop out heaping teaspoons of dough and roll them between your palms to form 1-inch balls. Roll each ball generously in the sugar until it’s completely coated.04
-
Place the sugar-coated dough balls about 2 inches apart on your prepared baking sheet. Bake for 7-9 minutes until the edges are just set and the tops are puffed and covered in cracks.05
-
As soon as you pull the baking sheet from the oven, work quickly but carefully. Gently press a chocolate kiss into the center of each warm cookie.06
-
Let the cookies cool on the baking sheet for at least 5 minutes before attempting to move them. After 5 minutes, transfer them to a wire rack to cool completely.07