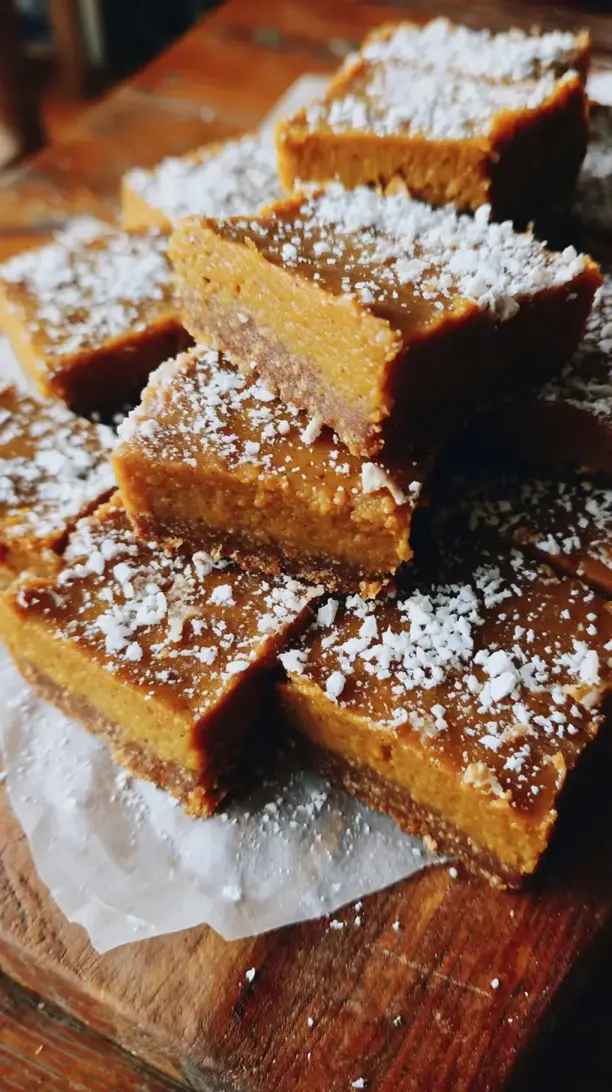
Why You’ll Love This Protein Chocolate Truffles
- Incredibly Simple to Make. Honestly, if you can press a button on a food processor, you can make these. There’s no baking, no complicated techniques—just blend, roll, and chill.
- Deep, Decadent Chocolate Flavor. We’re using a combination of cocoa powder and dark chocolate here, which gives you a really complex, almost grown-up chocolate taste that isn’t overly sweet.
- Satisfyingly Fudgy Texture. The texture is what gets me every time. They’re dense, slightly chewy, and they melt so slowly on your tongue. It’s a truly luxurious experience.
- Perfect for Meal Prep. These truffles keep beautifully in the fridge or freezer, making them the ultimate grab-and-go snack. Having a batch ready means you’re always prepared for a craving.
Ingredients & Tools
- 1 cup (about 120g) almond flour
- 1/2 cup chocolate or vanilla protein powder
- 1/4 cup unsweetened cocoa powder, plus extra for dusting
- 1/4 cup pure maple syrup
- 3 tbsp smooth almond butter (or any nut/seed butter)
- 2 tbsp melted coconut oil
- 1 tsp pure vanilla extract
- 1/4 tsp fine sea salt
- 2-3 tbsp milk of choice, as needed
- 50g dark chocolate (70%), finely chopped (for coating, optional)
Tools: Food processor, small baking sheet or plate, parchment paper, small bowl for melting chocolate (if coating)
The almond flour and protein powder create the base structure, while the maple syrup and almond butter provide the binding sweetness and fat. The melted coconut oil is the real hero—it gives that signature meltaway quality once the truffles chill. Don’t skip the salt; it makes the chocolate flavor pop.
Nutrition (per serving)
- Calories: 125 kcal
- Protein: 6 g
- Fat: 8 g
- Carbohydrates: 9 g
- Fiber: 2 g
Serves: 12 | Prep Time: 20 min | Cook Time: 0 min | Total Time: 20 min (plus chilling)
Before You Start: Tips & Ingredient Notes
- Your Protein Powder Matters. The flavor and sweetness of your protein powder will directly influence the final taste. I find a vanilla or unflavored whey or plant-based blend works best, as it lets the cocoa shine. Avoid powders with a strong, artificial aftertaste.
- Nut Butter Consistency is Key. You want your almond butter to be drippy and at room temperature. If it’s cold and solidified, gently warm it for a few seconds to make it easier to mix. This ensures a smooth, homogenous dough.
- Don’t Fear the Coconut Oil. It might seem like a small amount, but it’s crucial for that firm-yet-melty texture once chilled. If you’re not a fan of a slight coconut flavor, use refined (odorless) coconut oil.
- Patience is a Virtue. The chilling step is non-negotiable. It transforms the soft, sticky mixture into a rollable dough. Rushing this will only lead to frustration and messy hands.
How to Make Protein Chocolate Truffles
Step 1: Combine your dry ingredients. In the bowl of your food processor, add the almond flour, protein powder, cocoa powder, and sea salt. Pulse this about 5-6 times until everything is well combined and any little lumps from the almond flour are broken up. You’ll notice it starts to look like a very dark, uniform powder. This initial mixing helps prevent overworking the dough later.
Step 2: Add the wet ingredients. Now, pour in the maple syrup, almond butter, melted coconut oil, and vanilla extract. Secure the lid and process on high until the mixture starts to clump together. It should look like dark, crumbly sand that holds together when you pinch it between your fingers. If it seems too dry and isn’t clumping, this is where you add the milk, one tablespoon at a time, pulsing after each addition.
Step 3: Check the dough consistency. Stop the processor and test the dough. It should be moist and hold its shape easily when pressed, but not be overly sticky. If it’s too wet, add another tablespoon of almond flour. If it’s too dry, add another splash of milk. The perfect texture is like a firm, fudgy Play-Doh.
Step 4: Chill the mixture. Transfer the dough to a small bowl, cover it with plastic wrap, and press the wrap directly onto the surface. This prevents it from drying out. Refrigerate for at least 30 minutes, or up to an hour. You’ll know it’s ready when it’s firm to the touch and much easier to handle.
Step 5: Roll the truffles. Line a small baking sheet or plate with parchment paper. Using a tablespoon or a small cookie scoop, portion out the dough. Roll each portion between your palms to form a smooth, round ball. If the dough starts to get too soft and sticky, just pop it back in the fridge for 10 minutes. Place each finished ball on the prepared sheet.
Step 6: Choose your coating (optional). Now for the fun part! You can leave them plain, roll them in extra cocoa powder for a classic, bitter finish, or coat them in chocolate. For a chocolate shell, melt the chopped dark chocolate in a double boiler or in short bursts in the microwave, stirring until smooth. Using a fork or two spoons, dip each truffle, let the excess drip off, and return it to the parchment paper.
Step 7: The final set. Once all the truffles are shaped and coated, place the entire tray back in the refrigerator for a final 15-20 minutes to set completely. This is especially important for the chocolate-coated ones, as it gives the shell that satisfying snap.
Serving Suggestions
Complementary Dishes
- A small bowl of fresh berries — The bright, tart acidity of raspberries or strawberries cuts through the rich chocolate beautifully, creating a perfect bite.
- A cup of Greek yogurt with a drizzle of honey — Enjoying a truffle alongside some creamy yogurt makes it feel like a more complete, satisfying snack or light dessert.
- A small handful of salty roasted nuts — The saltiness enhances the chocolate flavor, and the different texture provides a lovely contrast.
Drinks
- A strong cup of black coffee — There’s no better pairing for dark chocolate. The bitterness of the coffee makes the truffle taste even sweeter and more complex.
- A glass of cold almond milk — It’s a classic, comforting combo that feels like a treat but keeps things light and simple.
- A peppermint or chai tea — The warm spices or cool mint play wonderfully with the deep cocoa notes, making it a cozy experience.
Something Sweet
- A small square of salty dark chocolate — For the ultimate chocolate lover, enjoy a truffle with a piece of high-quality, flaky sea salt-topped chocolate for a double hit of decadence.
- A few slices of orange or a clementine — The classic chocolate-orange combination is a winner for a reason; the citrus fragrance is just divine.
- A dollop of coconut whipped cream — If you’re really leaning into the indulgence, a little cloud of lightly sweetened coconut cream turns one truffle into a proper dessert.
Top Mistakes to Avoid
- Mistake: Skipping the chill time. I know, I know, you want to eat them now. But if you try to roll the dough right after mixing, it will be a sticky, frustrating mess. The chill firms up the fats, making the dough pliable and easy to work with.
- Mistake: Using a clumpy protein powder. If your protein powder has been sitting in the pantry and has hardened, sift it! Little clumps won’t break down fully and you’ll end up with gritty truffles instead of smooth, fudgy ones.
- Mistake> Over-measuring the almond flour. When measuring almond flour, spoon it into the measuring cup and level it off. Don’t scoop directly from the bag, as this packs it down and can lead to a dry, crumbly dough that’s hard to roll.
- Mistake: Melting chocolate on too high heat. If you’re coating them, be patient with the chocolate. High heat can cause it to “seize,” turning it into a grainy, solid mass. Low and slow is the way to go for a glossy, smooth finish.
Expert Tips
- Tip: Use a cookie scoop for uniformity. A small (1-tablespoon) cookie scoop isn’t just for cookies! It makes portioning the dough incredibly fast and ensures all your truffles are the same size, which means they’ll set at the same rate.
- Tip> Wet your hands slightly. If you find the dough is still a tiny bit sticky when rolling, dampen your palms with a little water. This creates a thin barrier that prevents sticking without adding extra moisture to the truffles themselves.
- Tip: Get creative with coatings. Don’t stop at cocoa powder! Try rolling them in crushed freeze-dried raspberries, finely chopped nuts, desiccated coconut, or even a dusting of matcha powder for a stunning and flavorful variety.
- Tip: Freeze for a firmer, longer-lasting treat. These truffles freeze exceptionally well. Layer them in an airtight container with parchment paper between layers. They’ll keep for up to 3 months, and you can grab one straight from the freezer—it’s like a frozen fudge bite!
FAQs
Can I use a different type of flour?
You can, but the results will vary. Almond flour works best because of its high fat content, which contributes to the fudgy texture. Sunflower seed flour is a good nut-free alternative. I wouldn’t recommend coconut flour, as it’s incredibly absorbent and would throw off the liquid ratios completely, making the truffles very dry.
My dough is too wet/crumbly. How can I fix it?
Don’t worry, this is easily fixed! If it’s too wet and sticky, add a tablespoon of almond flour and pulse to combine. If it’s too dry and crumbly, add liquid one teaspoon at a time—either more maple syrup, almond butter, or milk. The goal is a dough that holds together firmly when squeezed.
How long do these truffles last?
Stored in an airtight container in the refrigerator, they’ll stay fresh and delicious for up to two weeks. They also freeze beautifully for up to three months. Because of the coconut oil, I don’t recommend leaving them at room temperature for more than an hour or two, especially on a warm day.
Can I make these without a food processor?
You can, but it requires a bit more elbow grease. Whisk the dry ingredients together in a medium bowl. In a separate bowl, whisk the wet ingredients until smooth and emulsified. Then, pour the wet into the dry and use a spatula to mix, eventually switching to your hands to knead it into a uniform dough. It might take a minute or two to come together fully.
Why is my melted chocolate coating not smooth?
This usually happens if a tiny bit of water or steam gets into the chocolate, causing it to “seize.” Always ensure your bowls and utensils are completely dry. Also, if you’re coating truffles that are too cold, condensation can form on them, so let them sit at room temp for just a minute before dipping. If it seizes, sadly, it’s hard to fix—it’s best to start over with new chocolate.

Protein Chocolate Truffles
Make these easy Protein Chocolate Truffles in 20 minutes! A healthy, no-bake snack with rich chocolate flavor. Get the simple recipe and satisfy your cravings.
Ingredients
For the truffles:
-
1 cup almond flour (about 120g)
-
1/2 cup chocolate or vanilla protein powder
-
1/4 cup unsweetened cocoa powder (plus extra for dusting)
-
1/4 cup pure maple syrup
-
3 tbsp smooth almond butter (or any nut/seed butter)
-
2 tbsp melted coconut oil
-
1 tsp pure vanilla extract
-
1/4 tsp fine sea salt
-
2-3 tbsp milk of choice (as needed)
-
50 g dark chocolate (70%, finely chopped (for coating, optional))
Instructions
-
Combine your dry ingredients. In the bowl of your food processor, add the almond flour, protein powder, cocoa powder, and sea salt. Pulse this about 5-6 times until everything is well combined and any little lumps from the almond flour are broken up.01
-
Add the wet ingredients. Now, pour in the maple syrup, almond butter, melted coconut oil, and vanilla extract. Secure the lid and process on high until the mixture starts to clump together. It should look like dark, crumbly sand that holds together when you pinch it between your fingers. If it seems too dry and isn't clumping, this is where you add the milk, one tablespoon at a time, pulsing after each addition.02
-
Check the dough consistency. Stop the processor and test the dough. It should be moist and hold its shape easily when pressed, but not be overly sticky. If it’s too wet, add another tablespoon of almond flour. If it’s too dry, add another splash of milk. The perfect texture is like a firm, fudgy Play-Doh.03
-
Chill the mixture. Transfer the dough to a small bowl, cover it with plastic wrap, and press the wrap directly onto the surface. Refrigerate for at least 30 minutes, or up to an hour.04
-
Roll the truffles. Line a small baking sheet or plate with parchment paper. Using a tablespoon or a small cookie scoop, portion out the dough. Roll each portion between your palms to form a smooth, round ball. If the dough starts to get too soft and sticky, just pop it back in the fridge for 10 minutes. Place each finished ball on the prepared sheet.05
-
Choose your coating (optional). You can leave them plain, roll them in extra cocoa powder for a classic, bitter finish, or coat them in chocolate. For a chocolate shell, melt the chopped dark chocolate in a double boiler or in short bursts in the microwave, stirring until smooth. Using a fork or two spoons, dip each truffle, let the excess drip off, and return it to the parchment paper.06
-
The final set. Once all the truffles are shaped and coated, place the entire tray back in the refrigerator for a final 15-20 minutes to set completely.07