Why You’ll Love This Peppermint Chocolate Protein Bars
- They’re incredibly satisfying. The combination of protein powder and nut butter creates a bar that’s dense, fudgy, and genuinely fills you up, unlike many store-bought options that leave you wanting more.
- The flavor is a festive classic, anytime. Chocolate and peppermint isn’t just for the holidays—it’s a refreshing, mood-lifting combo that feels like a real treat, any day of the year.
- They come together in minutes. Honestly, the hardest part is waiting for them to set in the fridge. You just mix, press, and chill. It’s the perfect recipe for when you need a quick win in the kitchen.
- You have full control over the ingredients. You can choose your favorite protein powder, use maple syrup or honey, and pick a nut butter you love. It’s a completely customizable snack made with real food.
Ingredients & Tools
- 1 cup oat flour (you can make your own by blending rolled oats!)
- ½ cup vanilla or chocolate protein powder
- ¼ cup cocoa powder
- ½ cup creamy almond butter (or any nut/seed butter you prefer)
- ⅓ cup pure maple syrup
- 2-3 tablespoons milk of choice (to help it bind)
- 1 teaspoon peppermint extract
- A pinch of sea salt
- ¼ cup dark chocolate chips, for melting
- 2 tablespoons crushed candy canes or peppermint candies, for topping
Tools: 8×8 inch baking pan, parchment paper, medium mixing bowl, small saucepan or microwave-safe bowl
The quality of your protein powder and nut butter really makes a difference here—they form the base of the flavor. And don’t skip the salt! It makes the chocolate taste even richer and balances the sweetness perfectly.
Nutrition (per serving)
- Calories: 210 kcal
- Protein: 10 g
- Fat: 9 g
- Carbohydrates: 24 g
- Fiber: 3 g
Serves: 9 | Prep Time: 15 minutes | Chill Time: 1 hour | Total Time: 1 hour 15 minutes
Before You Start: Tips & Ingredient Notes
- Get your protein powder right. A whey/casein blend or a plant-based blend like brown rice and pea tends to work best for texture. Pure whey isolate can sometimes make bars a bit chalky, so keep that in mind.
- Peppermint extract is potent. A little truly goes a long way. Start with ¾ of a teaspoon and taste the mixture before adding the full amount—you can always add more, but you can’t take it out!
- Why oat flour? It gives a lovely, soft, and chewy texture that holds together well. If you’re gluten-free, just make sure your oats are certified GF. You can swap it for almond flour, but the bars will be more crumbly.
- The nut butter should be drippy. If your almond butter is stiff and dry, gently warm it up before measuring. This ensures it mixes in evenly and helps bind everything together beautifully.
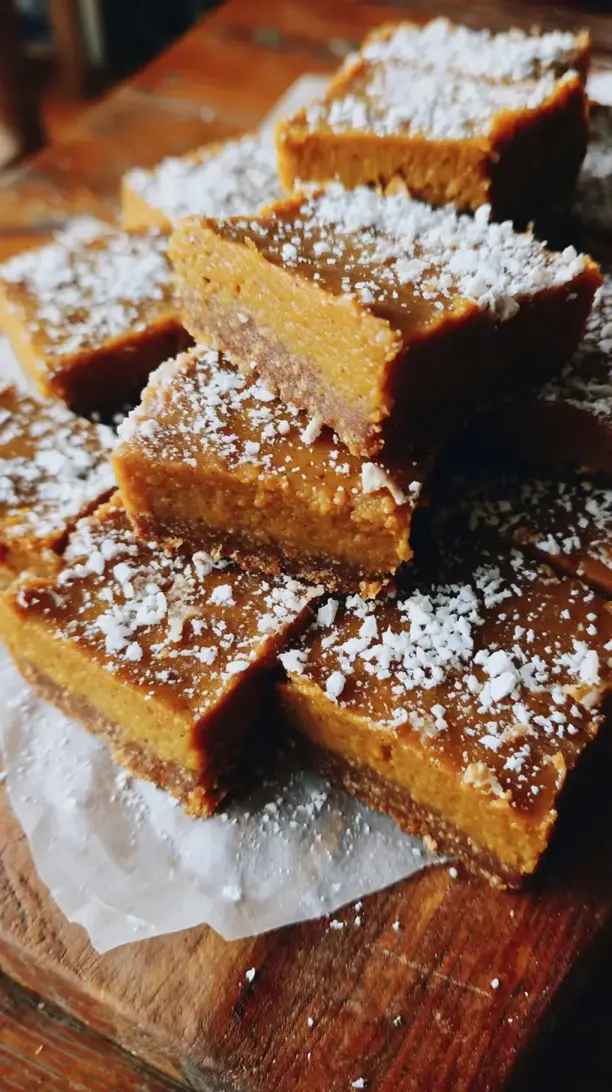
How to Make Peppermint Chocolate Protein Bars
Step 1: First, line your 8×8 inch pan with parchment paper, leaving some overhang on two sides. This is your lifesaver for lifting the whole slab of bars out later—trust me, you don’t want to skip this. Give the paper a light spritz with cooking spray to help it stick to the pan if it’s being fussy.
Step 2: In your mixing bowl, combine the oat flour, protein powder, cocoa powder, and that all-important pinch of sea salt. Whisk it all together until you have a uniform, dark brown mixture and there are no clumps of cocoa powder left. You’ll notice the aroma already starting to smell like brownie batter.
Step 3: Now, add in the creamy almond butter and maple syrup. This is where the magic starts. Use a sturdy spatula to mix everything. It will be thick and look a bit crumbly at first—that’s totally normal. This is the base of your fudgy bar.
Step 4: Add the peppermint extract. Start with ¾ teaspoon, mix it in, and then taste a tiny bit. Does it have that cool minty kick you’re after? If not, add the rest. Now, stream in the milk, one tablespoon at a time, mixing after each addition. Stop when the mixture holds together when you press it between your fingers—it should feel like a stiff, moldable dough.
Step 5: Transfer the dough into your prepared pan. Using slightly damp hands, press it down firmly and evenly into every corner. The trick is to press really, really hard—this is what gives you those dense, satisfying bars that don’t fall apart. Smooth the top with the back of a spoon or a small flat-bottomed glass.
Step 6: Time for the chocolate topping! Melt your dark chocolate chips gently. You can do this in a double boiler or in the microwave in 20-second bursts, stirring well each time. Once it’s smooth and glossy, pour it over the pressed base and spread it into a thin, even layer with a spatula.
Step 7: Immediately sprinkle the crushed peppermint candies all over the wet chocolate. Don’t wait, or the chocolate will start to set and the candy won’t stick. Be as generous as you like—the crunch is fantastic.
Step 8: Carefully transfer the pan to the refrigerator. You need to let it chill for at least an hour, until the chocolate topping is completely firm to the touch. I know it’s tempting, but this patience is key for clean slices.
Step 9: Once set, use the parchment paper overhang to lift the entire block out of the pan. Place it on a cutting board and use a sharp knife to slice it into 9 even bars. For super clean cuts, you can run the knife under hot water and wipe it dry between slices.
Serving Suggestions
Complementary Dishes
- A warm cup of coffee — The bitterness of the coffee cuts through the sweetness of the bar and enhances the dark chocolate notes perfectly.
- A small bowl of Greek yogurt with berries — The tangy, creamy yogurt provides a lovely contrast to the rich, minty chocolate, making it feel like a more complete snack.
- A green smoothie — Pairing it with something light and refreshing keeps things balanced, especially if you’re having a bar for a quick breakfast on the go.
Drinks
- Cold brew coffee — Its smooth, low-acidity profile is a fantastic partner for the mint and chocolate without overpowering it.
- A glass of unsweetened almond milk — It’s simple, but it really complements the flavors and makes the whole experience feel even more cozy.
- Peppermint tea — Double down on the minty freshness! A caffeine-free herbal tea makes this a perfect evening treat.
Something Sweet
- A small scoop of vanilla bean ice cream — For a truly decadent moment, place a warmed bar on top of ice cream for an epic protein-packed sundae.
- A few fresh raspberries — Their bright, tart pop is a wonderful surprise against the deep chocolate and cool mint.
- A drizzle of salted caramel — If you’re feeling extra, a little caramel adds a buttery, salty dimension that takes these bars to the next level.
Top Mistakes to Avoid
- Mistake: Using a protein powder that’s too dry. Some protein powders are very absorbent and can suck all the moisture out of your mixture. If your dough seems excessively dry and won’t hold together, add more milk, a teaspoon at a time, until it does.
- Mistake: Not pressing the base firmly enough. I’ve messed this up before too—a light press leads to crumbly bars that fall apart when you pick them up. Really put your weight into it to compact the mixture.
- Mistake> Overheating the chocolate. If you blast the chocolate in the microwave for too long, it can seize up and become grainy. Low and slow is the way to go, with plenty of stirring.
- Mistake: Skipping the chill time. It might seem like a long wait, but if you try to cut the bars before the chocolate is fully set, you’ll have a messy, smeared topping and the base might be too soft.
Expert Tips
- Tip: Toast your oat flour for a deeper flavor. Spread your oat flour on a baking sheet and toast it in a 350°F (175°C) oven for 5-7 minutes until fragrant. Let it cool completely before using. It adds a lovely, nutty background note.
- Tip: Add a textural surprise inside. Fold in 2 tablespoons of cacao nibs along with the dry ingredients. They provide little bursts of intense chocolate crunch that contrast beautifully with the fudgy base.
- Tip: Use a pizza cutter for slicing. For perfectly even bars with a smooth top, a pizza cutter glides through the chocolate layer much more cleanly than a knife can.
- Tip: Make them into bites for a party. Instead of pressing the mixture into a pan, roll it into small, one-inch balls. Dip them halfway into the melted chocolate and then roll in crushed candy. Instant protein truffles!
FAQs
Can I use a different nut butter?
Absolutely! I’ve had great success with cashew butter for a milder flavor, and peanut butter for a “peppermint patty” vibe. Sunflower seed butter works well for a nut-free version, though it may give the bars a slightly greener tint (it’s a harmless reaction with the baking soda). The key is that whatever you use should be natural and drippy, not the stiff, separated-at-the-bottom kind.
How should I store these bars?
They are best kept in an airtight container in the refrigerator for up to two weeks. The cool temperature keeps the texture firm and fudgy. You can also freeze them for up to three months! Just layer them between parchment paper in a freezer bag. Thaw in the fridge or for a few minutes on the counter before eating.
My mixture is too wet/sticky. What do I do?
If it’s too wet, it’s usually because the nut butter was very oily or you added a bit too much milk. Don’t panic! Just add another tablespoon of oat flour at a time until the dough is firm enough to press into the pan. It’s a very forgiving recipe, so you can easily adjust the consistency.
Can I make these without protein powder?
You can, but the texture and nutritional profile will be quite different. To replace the protein powder, you could use an additional ½ cup of oat flour and maybe a tablespoon of ground flaxseed. They’ll be more like a traditional no-bake snack bar, still delicious, but less focused on protein content.
Why did my chocolate topping turn white?
That’s called “bloom,” and it’s completely harmless! It happens when chocolate is tempered incorrectly or experiences temperature changes. It might look a little less pretty, but it doesn’t affect the taste or safety at all. To minimize it, make sure you’re melting the chocolate gently and allowing the bars to set in the fridge, not the freezer.

Peppermint Chocolate Protein Bars
Make these easy, no-bake Peppermint Chocolate Protein Bars for a healthy, protein-packed snack. Perfect for post-workout or a sweet treat. Get the recipe!
Ingredients
For the Bars:
-
1 cup oat flour
-
1/2 cup vanilla or chocolate protein powder
-
1/4 cup cocoa powder
-
1/2 cup creamy almond butter
-
1/3 cup pure maple syrup
-
2-3 tablespoons milk of choice
-
1 teaspoon peppermint extract
-
1 pinch sea salt
For the Topping:
-
1/4 cup dark chocolate chips
-
2 tablespoons crushed candy canes or peppermint candies
Instructions
-
First, line your 8x8 inch pan with parchment paper, leaving some overhang on two sides. Give the paper a light spritz with cooking spray to help it stick to the pan if it's being fussy.01
-
In your mixing bowl, combine the oat flour, protein powder, cocoa powder, and that all-important pinch of sea salt. Whisk it all together until you have a uniform, dark brown mixture and there are no clumps of cocoa powder left.02
-
Now, add in the creamy almond butter and maple syrup. Use a sturdy spatula to mix everything. It will be thick and look a bit crumbly at first—that’s totally normal.03
-
Add the peppermint extract. Start with ¾ teaspoon, mix it in, and then taste a tiny bit. Does it have that cool minty kick you’re after? If not, add the rest. Now, stream in the milk, one tablespoon at a time, mixing after each addition. Stop when the mixture holds together when you press it between your fingers—it should feel like a stiff, moldable dough.04
-
Transfer the dough into your prepared pan. Using slightly damp hands, press it down firmly and evenly into every corner. The trick is to press really, really hard—this is what gives you those dense, satisfying bars that don’t fall apart. Smooth the top with the back of a spoon or a small flat-bottomed glass.05
-
Time for the chocolate topping! Melt your dark chocolate chips gently. You can do this in a double boiler or in the microwave in 20-second bursts, stirring well each time. Once it’s smooth and glossy, pour it over the pressed base and spread it into a thin, even layer with a spatula.06
-
Immediately sprinkle the crushed peppermint candies all over the wet chocolate. Don't wait, or the chocolate will start to set and the candy won't stick.07
-
Carefully transfer the pan to the refrigerator. You need to let it chill for at least an hour, until the chocolate topping is completely firm to the touch.08
-
Once set, use the parchment paper overhang to lift the entire block out of the pan. Place it on a cutting board and use a sharp knife to slice it into 9 even bars. For super clean cuts, you can run the knife under hot water and wipe it dry between slices.09