Why You’ll Love This Holiday Fruit and Nut Bark
- It’s impossibly easy. Seriously, if you can melt chocolate and sprinkle things, you’ve got this. There’s no baking, no fancy equipment, and the whole thing comes together in about 15 minutes of active time.
- The customization is endless. This is your canvas. Not a fan of pistachios? Use almonds. Love a bit of spice? A sprinkle of flaky sea salt or chili powder takes it to another level. You can truly make it your own.
- It makes a gorgeous, thoughtful gift. Break it into shards, pile them into a pretty cellophane bag or tin, and you have a homemade present that looks professional and tastes incredible. It’s a real crowd-pleaser.
- The texture is a full-on symphony. You get the crisp snap of the chocolate, the chewy give from the fruit, and the satisfying crunch from the nuts all in one bite. It’s a sensory experience that’s far more exciting than a standard candy bar.
Ingredients & Tools
- 400 g high-quality dark chocolate (around 60-70% cocoa), chopped, or high-quality dark chocolate chips
- 60 g dried cranberries
- 60 g shelled pistachios, roughly chopped
- 40 g roasted, salted almonds, roughly chopped
- 30 g dried apricots, finely chopped
- 1/2 tsp flaky sea salt (like Maldon), plus more for finishing
- 1/4 tsp ground cinnamon (optional)
Tools: A medium-sized baking sheet, parchment paper, a heatproof bowl that fits snugly over a saucepan (for a double boiler), or a microwave-safe bowl, a spatula.
The quality of your chocolate really is the star here, so don’t skimp. A good dark chocolate provides a robust base that isn’t overly sweet, allowing the fruit and nuts to shine. And using a mix of roasted, salted nuts is my little secret—that hit of saltiness against the sweet fruit and rich chocolate is what makes this bark so dangerously addictive.
Nutrition (per serving)
- Calories: 180 kcal
- Protein: 3 g
- Fat: 11 g
- Carbohydrates: 18 g
- Fiber: 3 g
Serves: 12 | Prep Time: 15 minutes | Cook Time: 5 minutes (melting) | Total Time: 1 hour 20 minutes (includes setting)
Before You Start: Tips & Ingredient Notes
- Chocolate choice is crucial. Look for chocolate labeled as “couverture” or just a good-quality bar you’d enjoy eating on its own. Cheap chocolate chips often contain stabilizers that can make tempering tricky and the final texture waxy.
- Why chop your own chocolate? Pre-chipped chocolate is convenient, but bars you chop yourself melt more evenly. The smaller, uniform pieces respond better to gentle heat, reducing the risk of seizing.
- Get your toppings ready to go. Have all your fruits, nuts, and salt measured and placed in little bowls before you even start melting the chocolate. Once the chocolate is melted, you need to work quickly before it starts to set, so a “mise en place” is your best friend here.
- Parchment paper is non-negotiable. Do not try to use wax paper or grease the pan. The bark will stick to wax paper and a greased pan can give the chocolate a weird oily texture. Parchment guarantees a clean release.
How to Make Holiday Fruit and Nut Bark
Step 1: First, line your baking sheet with parchment paper. Smooth it out so there aren’t any major wrinkles, as these can create weak points in your bark later. Set this prepared sheet aside. Now, get your double boiler ready. Fill a saucepan with about an inch of water and bring it to a very gentle simmer. Place your heatproof bowl on top, making sure the bottom of the bowl isn’t touching the water. This indirect heat is the key to melting chocolate smoothly without burning it.
Step 2: Add all of your chopped chocolate to the bowl. Using a spatula, stir almost continuously. You’ll notice the chocolate will first look solid, then begin to glisten and slowly collapse into a smooth, glossy pool. This should take about 3-5 minutes. The moment it’s fully melted and there are no more solid lumps, take the bowl off the heat. If using the microwave, heat in 20-second bursts on medium power, stirring thoroughly between each burst.
Step 3: Carefully pour the melted chocolate onto the center of your prepared parchment paper. Use your spatula to spread it into a rough rectangle or oval, about 1/4-inch thick. You don’t want it too thin, or it will be fragile, nor too thick, or it becomes a challenge to bite into. A little rustic unevenness at the edges is part of the charm, so don’t stress about making it perfect.
Step 4: Now for the fun part—the artistry! Immediately, while the chocolate is still wet and molten, start scattering your toppings. I like to sprinkle the nuts first for a good base crunch, then follow with the chewy cranberries and apricots. Finally, dust the whole thing with the flaky sea salt and that optional pinch of cinnamon. The trick is to be generous but not overcrowd it; you still want to see the chocolate peeking through.
Step 5: Gently press the toppings down with your fingertips or the back of a spoon. This isn’t just for looks—it helps embed everything into the chocolate so they don’t fall off when you break the bark later. You’re just giving them a light nudge to adhere, not submerging them completely.
Step 6: Time for patience. Carefully transfer the entire baking sheet to a cool, dry spot in your kitchen and let it set completely. This can take about 1 to 2 hours at room temperature. You can speed this up by placing it in the refrigerator for 20-30 minutes, but I find a slow set at room temp gives the chocolate a better snap and sheen.
Step 7: Once the bark is fully firm to the touch and doesn’t give when you press it, it’s ready. Lift the entire parchment sheet off the baking tray. Place it on a cutting board and, using your hands, break it into rustic, irregular shards. Don’t use a knife—the cracking and snapping is part of the process and creates those beautiful, natural shapes that make this treat so visually appealing.
Serving Suggestions
Complementary Dishes
- A festive cheese board — The sharpness of a good aged cheddar or the creaminess of a brie creates a fantastic savory contrast to the sweet and salty bark.
- Spiced nuts or popcorn — Serve a bowl alongside for a textural party. The warm spices will echo the cinnamon in the bark beautifully.
- Orange and pomegranate salad — A bright, citrusy, and refreshing salad cuts through the richness of the chocolate and cleanses the palate.
Drinks
- Peppermint tea or hot chocolate — The cool mint or rich cocoa enhances the chocolate experience, making for a cozy, comforting pairing.
- A bold, spicy red wine — Like a Zinfandel or Shiraz, whose berry notes and peppery finish stand up beautifully to the dark chocolate and nuts.
- Espresso or a strong black coffee — The bitterness is a classic partner for dark chocolate, highlighting its deep, complex flavors.
Something Sweet
- Vanilla bean ice cream — Place a shard of bark on top of a scoop for an instant, decadent sundae. The cold creaminess is a dream with the crunchy bark.
- Clementines or mandarins — Their juicy, bright acidity provides a perfect, refreshing counterpoint after a rich piece of chocolate.
- Simple shortbread cookies — The buttery, crumbly texture of shortbread is a lovely, simple companion that doesn’t compete with the bark’s flavor profile.
Top Mistakes to Avoid
- Getting water in your chocolate. Even a single drop of water can cause the chocolate to “seize,” turning it from smooth and liquid to a grainy, thick paste. Always ensure your bowls, spoons, and hands are completely dry.
- Using high heat to melt the chocolate. Chocolate is delicate and burns easily. Always use low, gentle heat, whether on the stovetop or in the microwave. If it burns, it becomes bitter and grainy, and there’s no saving it.
- Adding toppings too late. If you wait until the chocolate has started to set, your beautiful toppings will just sit on top and fall right off. You have a brief window right after spreading to get everything on there and gently pressed in.
- Storing it in the fridge long-term. While the fridge is great for speeding up the set, storing it there can cause condensation and “bloom”—those white streaks that are harmless but don’t look as pretty. An airtight container in a cool, dark cupboard is best.
Expert Tips
- Tip: For a truly professional look, drizzle with a contrasting chocolate. Once your main bark is fully set, melt a small amount of white chocolate and use a fork or a piping bag to zigzag fine lines over the top. It adds another layer of texture and visual appeal.
- Tip: Toast your nuts beforehand. Even if they’re already roasted, giving them a quick 5-7 minutes in a 350°F (175°C) oven will deepen their flavor and make them extra crunchy, which is a game-changer in the final bark.
- Tip: Add a surprise element. Think outside the box with a tiny sprinkle of crushed freeze-dried raspberries for tang, a pinch of cayenne pepper for heat, or even some mini pretzel pieces for a sweet-and-salty punch.
- Tip: If your chocolate does seize, don’t panic. You can sometimes save it by immediately stirring in a teaspoon of neutral oil (like vegetable or coconut) per ounce of chocolate. It won’t be perfect for tempering, but it will be salvageable for baking or sauces.
FAQs
Can I use milk or white chocolate instead?
Absolutely! The method is exactly the same. Just know that milk and white chocolate are more sensitive to heat and can burn even more easily than dark chocolate, so be extra vigilant with your low heat. White chocolate, in particular, pairs wonderfully with macadamia nuts and dried pineapple for a tropical twist.
How far in advance can I make this?
This bark is a fantastic make-ahead treat. Stored properly in an airtight container at cool room temperature, it will keep beautifully for up to two weeks. In fact, I think the flavors meld and improve after a day or two. Just avoid humid environments.
My bark is sticky and won’t snap. What happened?
This usually means it didn’t set completely, often due to a warm or humid kitchen. Pop it in the refrigerator for another 20-30 minutes to firm up. If it’s still soft, the chocolate may not have been in temper, but it will still taste delicious—it just might have a softer chew.
Can I make this vegan?
Easily! Just ensure you’re using a high-quality dark chocolate that is certified vegan (many are, but some contain milk solids). All the other ingredients—fruits, nuts, salt—are naturally plant-based, so it’s a very simple swap.
What’s the best way to gift this?
I love piling the shards into clear cellophane bags tied with a festive ribbon, or layering them in a decorative tin between sheets of parchment paper. You can even stack a few large pieces in a gift box. Add a little tag with storage instructions, and you have a truly personal and impressive homemade gift.
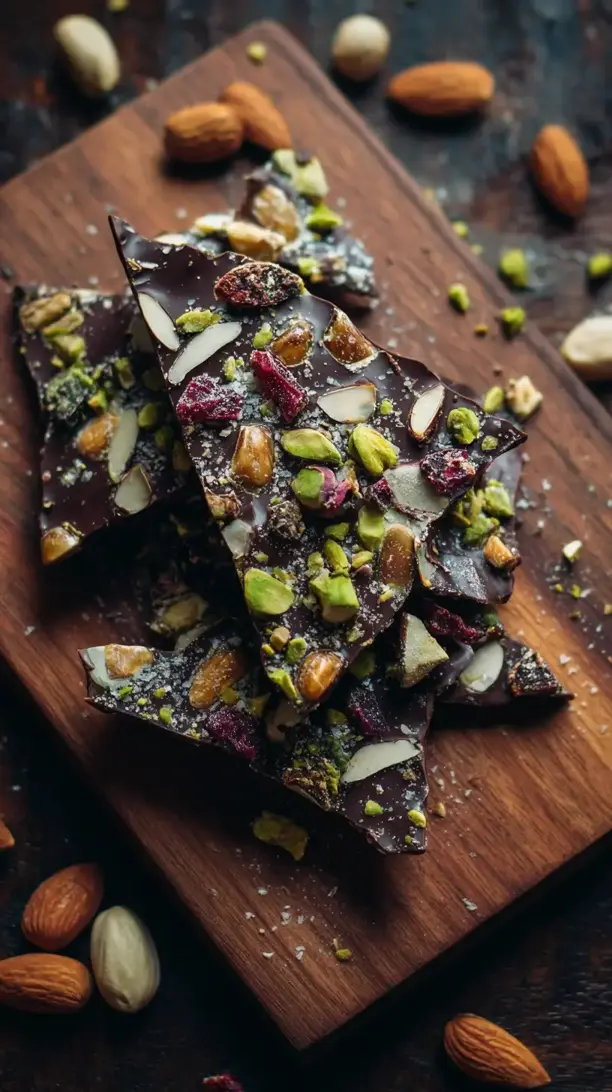
Holiday Fruit And Nut Bark
Make easy, no-bake Holiday Fruit and Nut Bark for gifts or snacking. This festive treat is ready in minutes! Get the simple recipe here.
Ingredients
For the bark:
-
400 g high-quality dark chocolate (around 60-70% cocoa, chopped, or high-quality dark chocolate chips)
-
60 g dried cranberries
-
60 g shelled pistachios (roughly chopped)
-
40 g roasted, salted almonds (roughly chopped)
-
30 g dried apricots (finily chopped)
-
1/2 tsp flaky sea salt (like Maldon, plus more for finishing)
-
1/4 tsp ground cinnamon (optional)
Instructions
-
First, line your baking sheet with parchment paper. Smooth it out so there aren't any major wrinkles, as these can create weak points in your bark later. Set this prepared sheet aside. Now, get your double boiler ready. Fill a saucepan with about an inch of water and bring it to a very gentle simmer. Place your heatproof bowl on top, making sure the bottom of the bowl isn't touching the water. This indirect heat is the key to melting chocolate smoothly without burning it.01
-
Add all of your chopped chocolate to the bowl. Using a spatula, stir almost continuously. You'll notice the chocolate will first look solid, then begin to glisten and slowly collapse into a smooth, glossy pool. This should take about 3-5 minutes. The moment it's fully melted and there are no more solid lumps, take the bowl off the heat. If using the microwave, heat in 20-second bursts on medium power, stirring thoroughly between each burst.02
-
Carefully pour the melted chocolate onto the center of your prepared parchment paper. Use your spatula to spread it into a rough rectangle or oval, about 1/4-inch thick. You don't want it too thin, or it will be fragile, nor too thick, or it becomes a challenge to bite into. A little rustic unevenness at the edges is part of the charm, so don't stress about making it perfect.03
-
Now for the fun part—the artistry! Immediately, while the chocolate is still wet and molten, start scattering your toppings. I like to sprinkle the nuts first for a good base crunch, then follow with the chewy cranberries and apricots. Finally, dust the whole thing with the flaky sea salt and that optional pinch of cinnamon. The trick is to be generous but not overcrowd it; you still want to see the chocolate peeking through.04
-
Gently press the toppings down with your fingertips or the back of a spoon. This isn't just for looks—it helps embed everything into the chocolate so they don't fall off when you break the bark later. You're just giving them a light nudge to adhere, not submerging them completely.05
-
Time for patience. Carefully transfer the entire baking sheet to a cool, dry spot in your kitchen and let it set completely. This can take about 1 to 2 hours at room temperature. You can speed this up by placing it in the refrigerator for 20-30 minutes, but I find a slow set at room temp gives the chocolate a better snap and sheen.06
-
Once the bark is fully firm to the touch and doesn't give when you press it, it's ready. Lift the entire parchment sheet off the baking tray. Place it on a cutting board and, using your hands, break it into rustic, irregular shards. Don't use a knife—the cracking and snapping is part of the process and creates those beautiful, natural shapes that make this treat so visually appealing.07