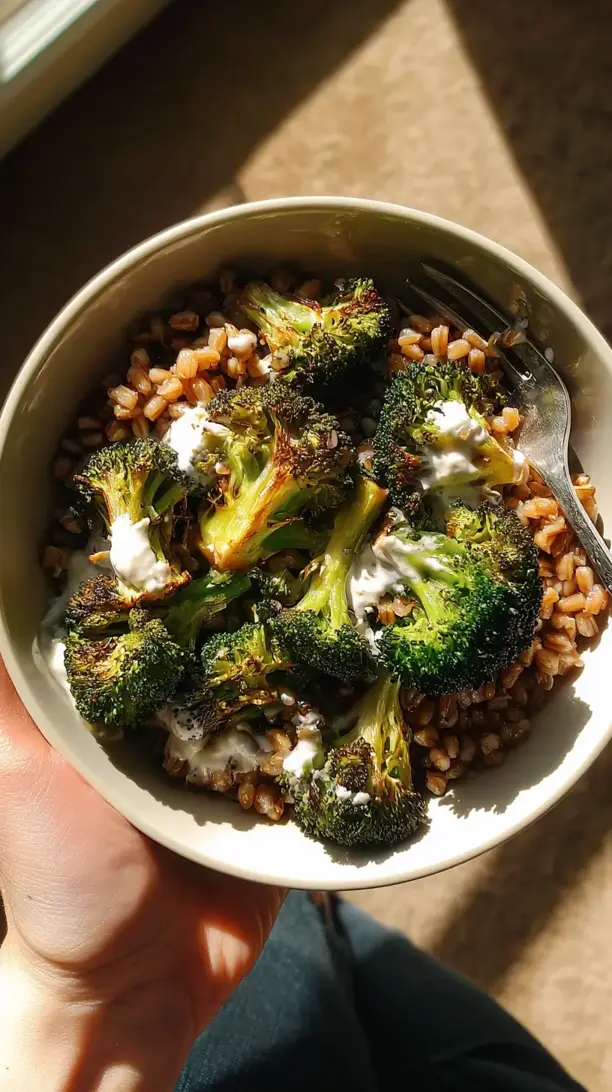
Why You’ll Love This Roasted Broccoli and Farro Bowls
- It’s a masterclass in textures. You get the crispy, almost caramelized edges of the roasted broccoli against the wonderfully chewy, substantial farro. Then there’s the creamy sauce and the crunch from your chosen toppings—it’s a party in every single bite.
- The lemon-tahini sauce is a game-changer. It’s so simple—just a few ingredients whizzed together—but it ties the whole bowl together with its bright, tangy, and subtly rich flavor. You’ll want to put this sauce on everything, I promise.
- It’s incredibly versatile and forgiving. Don’t have farro? Use quinoa or brown rice. Out of broccoli? Cauliflower works beautifully. This recipe is a fantastic template for cleaning out the veggie drawer, making it a practical weeknight hero.
- It makes fantastic leftovers. The components hold up beautifully in the fridge for a few days, making your future lunches a total breeze. The farro doesn’t get mushy, and the broccoli, while it softens, is still utterly delicious.
Ingredients & Tools
- 1 cup semi-pearled farro, rinsed
- 2 large heads broccoli, cut into florets (don’t discard the stalks—peel and chop them too!)
- 3 tablespoons extra-virgin olive oil, divided
- 4 cloves garlic, minced
- 1 teaspoon smoked paprika
- ½ teaspoon red pepper flakes (optional, for a little heat)
- ½ cup tahini, well-stirred
- 1 large lemon, juiced (about ¼ cup)
- 2-4 tablespoons warm water
- For serving: toasted pine nuts or slivered almonds, fresh parsley or dill, crumbled feta or avocado (optional but highly recommended)
Tools: A large baking sheet, a medium saucepan, a small bowl or jar for the sauce
A couple of ingredient notes right off the bat: using semi-pearled farro means it cooks a bit faster while retaining that wonderful chew. And for the broccoli, cutting the florets into similar sizes is the secret to even roasting—you want them all to get crispy at the same time.
Nutrition (per serving)
- Calories: 480 kcal
- Protein: 16 g
- Fat: 22 g
- Carbohydrates: 60 g
- Fiber: 13 g
Serves: 4 | Prep Time: 15 minutes | Cook Time: 30 minutes | Total Time: 45 minutes
Before You Start: Tips & Ingredient Notes
- Don’t overcrowd the pan. This is the golden rule of roasting. If you pile all the broccoli onto one sheet, it will steam instead of roast. Use two sheets if necessary, or roast in batches for the crispiest results.
- Get your tahini ready. Tahini loves to separate, with the oil rising to the top. Give it a really good stir in the jar before you measure it out—this ensures a smooth, creamy sauce instead of a grainy one.
- Rinse your farro. Giving the farro a quick rinse under cold water in a fine-mesh strainer removes any dusty starch on the surface. This helps prevent it from becoming gummy and keeps the grains distinct and pleasantly chewy.
- Embrace the broccoli stalks. They’re perfectly edible and delicious! Just use a vegetable peeler to remove the tough outer skin, then slice the tender inner core into bite-sized pieces. They roast up wonderfully and reduce food waste.
How to Make Roasted Broccoli and Farro Bowls
Step 1: Start by cooking the farro, as it can hang out once it’s done. Bring a medium saucepan of well-salted water to a boil—it should taste like the sea. Add the rinsed farro, give it a stir, and let it simmer uncovered for about 25-30 minutes. You’re looking for the grains to be tender but still have a definite bite to them. Once it’s done, drain it well in a strainer and let it steam dry for a minute.
Step 2: While the farro is bubbling away, preheat your oven to 425°F (220°C). This high heat is key for getting those beautifully browned, crispy edges on the broccoli. Take your large baking sheet—you can line it with parchment for easier cleanup if you like.
Step 3: Now, for the main event: the broccoli. Pile the florets and chopped stalks onto the baking sheet. Drizzle with 2 tablespoons of the olive oil, and add the minced garlic, smoked paprika, red pepper flakes (if using), and a generous amount of salt and black pepper. Toss everything together with your hands, making sure every nook and cranny is coated in that flavorful oil. Spread the broccoli out in a single layer, giving each piece some personal space.
Step 4: Roast the broccoli for 20-25 minutes. You’ll know it’s ready when the edges are dark brown and crispy, and the stems are tender when pierced with a fork. Don’t be afraid of a little char—that’s where the deep, savory flavor comes from. I like to give the pan a shake about halfway through to promote even cooking.
Step 5: While the broccoli roasts and the farro cooks, whip up that magical sauce. In a small bowl, combine the tahini, lemon juice, remaining 1 tablespoon of olive oil, and a big pinch of salt. Whisk it together—it will initially look thick and almost seized, but don’t panic! This is normal.
Step 6: Now, slowly whisk in the warm water, one tablespoon at a time. You’ll see the sauce relax, thin out, and become beautifully creamy and pale. Keep adding water until it reaches a drizzle-able consistency, like a thin pancake batter. Taste it and adjust with more salt or lemon juice if needed.
Step 7: Time to assemble your bowls! Divide the warm, fluffy farro among four bowls. Top generously with the roasted broccoli, making sure to get all those crispy bits and garlicky bits from the pan. Drizzle lavishly with the lemon-tahini sauce.
Step 8: Finish with your chosen toppings. A sprinkle of toasted nuts for crunch, some fresh herbs for brightness, and maybe a little crumbled feta for a salty tang or some creamy avocado slices. Serve immediately while everything is warm and inviting.
Serving Suggestions
Complementary Dishes
- A simple arugula salad with a lemon vinaigrette — The peppery arugula provides a fresh, sharp contrast to the earthy, roasted flavors in the bowl, cleansing the palate between bites.
- Pan-seared halloumi or crispy chickpeas — Adding a protein like salty, squeaky halloumi or some extra-crispy chickpeas makes the meal even more substantial and satisfying for a heartier dinner.
- Grilled or roasted asparagus — When in season, asparagus roasted with a little olive oil and salt is a fantastic side that continues the theme of vibrant, roasted green vegetables.
Drinks
- A crisp Sauvignon Blanc or Pinot Grigio — The bright, citrusy notes in these wines mirror the lemon in the tahini sauce perfectly, cutting through the richness and elevating the whole meal.
- A sparkling water with lemon and mint — For a non-alcoholic option, this is incredibly refreshing and lets the clean, savory flavors of the bowl really shine without any competition.
- A light, citrusy pale ale — The hoppy, grapefruit-like bitterness in a good pale ale stands up nicely to the smoky paprika and the hearty farro without overwhelming the dish.
Something Sweet
- Lemon bars or a lemon tart — Continuing the citrus theme feels so right here; the sweet, tangy curd is a delightful way to end the meal on a bright, cheerful note.
- Dark chocolate-covered almonds — A few pieces of this simple treat offer a satisfying, not-too-sweet finish with a nice crunch that echoes the nuts in the bowl.
- A small bowl of mixed berries with a dollop of yogurt — It’s light, fresh, and just sweet enough to feel like a proper dessert without undoing the wholesome feeling of the main course.
Top Mistakes to Avoid
- Mistake: Steaming the broccoli instead of roasting it. This happens when you overcrowd the baking sheet. If the broccoli pieces are touching, they release moisture and steam each other. Give them space for dry heat to circulate and work its crispy magic.
- Mistake: Underseasoning the farro cooking water. This is your one big chance to get flavor right into the grain itself. If the water isn’t salty enough, the farro will taste bland no matter what you put on it. Be generous with the salt in the pot.
- Mistake: Adding cold water to the tahini sauce. Using warm water is a little pro-trick. It incorporates much more easily into the thick tahini paste, helping you achieve a smooth, emulsified, and creamy sauce without any lumps or grainy texture.
- Mistake: Skipping the rest time for the farro. Draining it and letting it sit for a minute in the colander allows excess steam to evaporate. This prevents the farro from becoming soggy and helps each grain stay separate and perfectly chewy.
Expert Tips
- Tip: Massage your kale (if using). If you decide to add some raw kale to your bowls, chop it and give it a minute-long massage with a tiny bit of olive oil and lemon juice. This breaks down the tough fibers, making it tender, sweeter, and much more enjoyable to eat.
- Tip: Toast your farro for a nuttier flavor. Before boiling, you can toast the rinsed and drained farro in the dry saucepan for a few minutes until it smells fragrant. This deepens its flavor profile beautifully, adding another layer of complexity.
- Tip: Make the sauce ahead. The lemon-tahini sauce actually improves after sitting for an hour or so, allowing the flavors to meld. You can make it a day in advance and just give it a stir and a tiny splash of water to loosen it up before serving.
- Tip: Use the residual heat from the baking sheet. After you pull the broccoli out, you can scatter some nuts (like pine nuts or slivered almonds) directly onto the hot pan. They’ll toast perfectly in just a minute from the pan’s ambient heat, saving you from dirtying another dish.
FAQs
Can I use a different grain instead of farro?
Absolutely! This bowl is wonderfully adaptable. Quinoa, brown rice, or even freekeh would be excellent substitutes. Just adjust the cooking method and time according to the grain you choose. The key is to have a hearty, chewy base that can stand up to the robust broccoli and creamy sauce. For example, quinoa will cook much faster, in about 15 minutes, so you’d want to start it later than the farro to have everything ready at the same time.
My tahini sauce is too thick/too thin. How can I fix it?
Don’t worry, this is easily adjustable! If it’s too thick and pasty, just keep whisking in warm water, a tablespoon at a time, until it reaches a pourable consistency. If you’ve accidentally gone too far and it’s too thin, you can whisk in a bit more tahini to thicken it back up. The goal is a smooth, creamy sauce that ribbons off your whisk.
How should I store leftovers, and do they reheat well?
Store the components separately in airtight containers in the fridge for up to 3 days. The farro and sauce keep beautifully. The broccoli will soften but is still tasty. To reheat, I recommend warming the farro and broccoli gently in the microwave or a skillet, and then adding the cold sauce fresh. This keeps the sauce’s texture perfect.
Is there a way to make this recipe faster for a busy weeknight?
Yes! You can cook the farro ahead of time—it keeps for 3-4 days in the fridge. You can also whisk the sauce together a day or two in advance. On the night of, all you have to do is roast the broccoli (about 25 minutes), and then you’re just assembling the bowls with your pre-made components. It turns a 45-minute meal into a 25-minute one.
Can I make this bowl vegan?
It’s naturally vegan as written! Just be mindful of your toppings. Skip the feta cheese and opt for creamy avocado, toasted seeds, or a sprinkle of nutritional yeast for a cheesy flavor. The lemon-tahini sauce is completely plant-based and provides plenty of richness on its own.
Roasted Broccoli And Farro Bowls
Make these easy Roasted Broccoli and Farro Bowls for a healthy, delicious dinner. Crispy broccoli, nutty farro & creamy lemon-tahini sauce. Get the recipe now!
Ingredients
For the main ingredients:
-
1 cup semi-pearled farro (rinsed)
-
2 large heads broccoli (cut into florets (don’t discard the stalks—peel and chop them too!))
-
3 tablespoons extra-virgin olive oil (divided)
-
4 cloves garlic (minced)
-
1 teaspoon smoked paprika
-
½ teaspoon red pepper flakes (optional, for a little heat)
-
½ cup tahini (well-stirred)
-
1 large lemon (juiced (about ¼ cup))
-
2-4 tablespoons warm water
For serving:
-
toasted pine nuts or slivered almonds, fresh parsley or dill, crumbled feta or avocado (optional but highly recommended)
Instructions
-
Start by cooking the farro, as it can hang out once it's done. Bring a medium saucepan of well-salted water to a boil—it should taste like the sea. Add the rinsed farro, give it a stir, and let it simmer uncovered for about 25-30 minutes. You’re looking for the grains to be tender but still have a definite bite to them. Once it’s done, drain it well in a strainer and let it steam dry for a minute.01
-
While the farro is bubbling away, preheat your oven to 425°F (220°C). This high heat is key for getting those beautifully browned, crispy edges on the broccoli. Take your large baking sheet—you can line it with parchment for easier cleanup if you like.02
-
Now, for the main event: the broccoli. Pile the florets and chopped stalks onto the baking sheet. Drizzle with 2 tablespoons of the olive oil, and add the minced garlic, smoked paprika, red pepper flakes (if using), and a generous amount of salt and black pepper. Toss everything together with your hands, making sure every nook and cranny is coated in that flavorful oil. Spread the broccoli out in a single layer, giving each piece some personal space.03
-
Roast the broccoli for 20-25 minutes. You’ll know it’s ready when the edges are dark brown and crispy, and the stems are tender when pierced with a fork. Don’t be afraid of a little char—that’s where the deep, savory flavor comes from. I like to give the pan a shake about halfway through to promote even cooking.04
-
While the broccoli roasts and the farro cooks, whip up that magical sauce. In a small bowl, combine the tahini, lemon juice, remaining 1 tablespoon of olive oil, and a big pinch of salt. Whisk it together—it will initially look thick and almost seized, but don’t panic! This is normal.05
-
Now, slowly whisk in the warm water, one tablespoon at a time. You’ll see the sauce relax, thin out, and become beautifully creamy and pale. Keep adding water until it reaches a drizzle-able consistency, like a thin pancake batter. Taste it and adjust with more salt or lemon juice if needed.06
-
Time to assemble your bowls! Divide the warm, fluffy farro among four bowls. Top generously with the roasted broccoli, making sure to get all those crispy bits and garlicky bits from the pan. Drizzle lavishly with the lemon-tahini sauce.07
-
Finish with your chosen toppings. A sprinkle of toasted nuts for crunch, some fresh herbs for brightness, and maybe a little crumbled feta for a salty tang or some creamy avocado slices. Serve immediately while everything is warm and inviting.08