Why You’ll Love This Garlic Shrimp and Cauliflower Rice
- It’s a true one-pan wonder. Everything cooks in a single skillet, which means maximum flavor and minimal cleanup. You’ll love how the cauliflower rice soaks up all the delicious garlicky, buttery juices from the shrimp.
- It’s ready in under 30 minutes. Honestly, from fridge to table in less time than it takes to decide on takeout. It’s the perfect solution for those “I’m hungry now” moments without any compromise on taste.
- The texture is absolutely perfect. You get tender, succulent shrimp paired with cauliflower rice that’s fluffy, not mushy. A little squeeze of fresh lemon at the end brightens everything up and makes the flavors pop.
- It’s incredibly versatile. This dish is a fantastic base. Feel like some heat? Add a pinch of red pepper flakes. Want more greens? Toss in a handful of spinach at the end. It’s your canvas.
Ingredients & Tools
- 1 lb (450 g) large raw shrimp, peeled and deveined
- 1 large head of cauliflower, riced (or 4 cups pre-riced)
- 4 cloves garlic, minced
- 3 tbsp olive oil, divided
- 2 tbsp unsalted butter
- 1 fresh lemon
- 1/4 cup fresh parsley, chopped
- 1/2 tsp paprika (optional, for color)
- To taste: salt and freshly ground black pepper
Tools: A large skillet (12-inch is ideal), a box grater or food processor if making your own cauliflower rice, a microplane or fine grater for lemon zest.
Don’t be shy with the garlic here—it’s the star of the show. Using fresh, not jarred, minced garlic makes a world of difference in aroma and flavor. And that pat of butter at the end? It’s not strictly necessary, but it adds a lovely richness that makes the sauce cling to every grain of cauliflower rice.
Nutrition (per serving)
- Calories: 320 kcal
- Protein: 28 g
- Fat: 18 g
- Carbohydrates: 12 g
- Fiber: 5 g
Serves: 3 | Prep Time: 15 mins | Cook Time: 12 mins | Total Time: 27 mins
Before You Start: Tips & Ingredient Notes
- Pat your shrimp completely dry. This is the single most important step for getting a good sear instead of steaming them. Use paper towels and really press to remove all surface moisture.
- To rice your own cauliflower or buy pre-riced? I often buy pre-riced to save time, but if you’re using a whole head, just chop the florets and pulse in a food processor until it looks like coarse crumbs. Avoid over-processing into a paste!
- Have all your ingredients prepped and ready. This recipe cooks fast, so you won’t have time to mince garlic while the shrimp is in the pan. Having your “mise en place” makes the process smooth and stress-free.
- Don’t forget to season in layers. A little salt on the shrimp, a little more when you add the cauliflower rice… it builds a foundation of flavor in every single component.
How to Make Garlic Shrimp and Cauliflower Rice
Step 1: Start by preparing your shrimp. Make sure they are thoroughly patted dry with paper towels, then season them generously with salt, black pepper, and the paprika if you’re using it. Toss them gently to coat evenly. This initial seasoning is what will give the shrimp a beautiful, flavorful crust.
Step 2: Heat 2 tablespoons of the olive oil in your large skillet over medium-high heat. Once the oil is shimmering and hot, add the shrimp in a single layer. You should hear a satisfying sizzle. Cook for just 1-2 minutes per side, until they’re pink and opaque. They cook quickly, so don’t walk away! Remove them to a clean plate immediately; they will finish cooking later.
Step 3: Reduce the heat to medium and add the remaining 1 tablespoon of olive oil to the same skillet. Add the minced garlic and sauté for about 30-60 seconds, just until it becomes incredibly fragrant. You have to watch it closely—burnt garlic tastes bitter, and we want that lovely, aromatic flavor.
Step 4: Now, add the cauliflower rice to the skillet. Stir it well to coat it in the garlicky oil. Cook, stirring occasionally, for 5-7 minutes. You’ll notice it will soften and become more tender, but you want to keep a little bite to it—it shouldn’t be mushy. This is when you season the cauliflower with another good pinch of salt and pepper.
Step 5: Return the cooked shrimp (and any accumulated juices on the plate) back to the skillet with the cauliflower rice. Add the butter and stir everything together until the butter melts and creates a light, glossy sauce that coats everything. The trick is to just warm the shrimp through without overcooking them.
Step 6: Take the skillet off the heat. This is where you add the freshness! Stir in most of the chopped parsley, a big squeeze of fresh lemon juice, and if you’re feeling fancy, a little bit of lemon zest. Give it one final toss, taste, and adjust seasoning if needed.
Serving Suggestions
Complementary Dishes
- A simple arugula salad — The peppery bite of arugula dressed with just lemon juice and olive oil provides a crisp, refreshing contrast to the rich, garlicky main dish.
- Roasted asparagus — Toss asparagus spears with oil, salt, and pepper and roast until tender-crisp. Their earthy flavor is a perfect companion for the shrimp.
- Crusty, warm bread — For those who want to indulge, a slice of good sourdough or a baguette is perfect for mopping up every last bit of the delicious sauce left in the skillet.
Drinks
- A crisp Sauvignon Blanc — Its citrusy and herbal notes mirror the lemon and parsley in the dish, creating a really harmonious pairing that cleanses the palate.
- Sparkling water with lemon — For a non-alcoholic option, the bubbles and citrus are incredibly refreshing and help balance the richness of the garlic and butter.
- Iced green tea — The slight bitterness and clean finish of green tea cuts through the dish’s richness beautifully without overpowering the delicate shrimp flavor.
Something Sweet
- Lemon sorbet — A scoop of bright, tart lemon sorbet continues the citrus theme and acts as a perfect, light palate cleanser after the savory meal.
- Fresh berries with a dollop of whipped cream — Simple, sweet, and requires no baking. The natural sweetness of the berries is a lovely, simple way to end the meal.
- Dark chocolate squares — Just a piece or two of high-quality dark chocolate provides a rich, bittersweet finish that contrasts nicely with the preceding flavors.
Top Mistakes to Avoid
- Overcooking the shrimp. Shrimp go from perfectly tender to rubbery and tough in a matter of seconds. They cook in just 2-4 minutes total, so keep a close eye on them and remove them from the heat as soon as they turn pink and opaque.
- Crowding the skillet. If you add too many shrimp at once, they’ll steam instead of sear. Cook in batches if your pan isn’t large enough to hold them in a single layer. A good sear equals big flavor.
- Using frozen cauliflower rice without thawing and drying it. Frozen riced cauliflower contains a lot of water. If you use it straight from the bag, you’ll end up with a soggy, steamed mess. Thaw it completely and squeeze it dry in a clean kitchen towel first.
- Burning the garlic. Garlic burns easily and becomes bitter. Add it to the pan only after you’ve reduced the heat, and stir constantly for just 30-60 seconds until fragrant, not brown.
Expert Tips
- Tip: Use frozen shrimp the smart way. If using frozen shrimp, thaw them overnight in the fridge in a colander set over a bowl. This is the gentlest method and helps them retain their texture much better than quick-thawing in water.
- Tip: Get more flavor from your lemon. Before you juice the lemon, use a microplane to zest it. Stir the zest in at the very end with the parsley. The oils in the zest pack an incredible aromatic punch that elevates the entire dish.
- Tip: Let the skillet get properly hot. To get that perfect sear on your shrimp, wait until the oil is shimmering and you see a slight wisp of smoke. A hot pan is non-negotiable for a good crust.
- Tip: Add a pinch of red pepper flakes. For a subtle kick of heat, add a pinch of red pepper flakes to the garlic when you sauté it. It infuses the oil with a gentle warmth that builds with each bite.
FAQs
Can I use frozen pre-cooked shrimp instead of raw?
You can, but the texture and flavor won’t be quite as good. Pre-cooked shrimp are often already a bit rubbery and can become overcooked very easily. If you must use them, add them at the very end, just to warm through in the sauce. Honestly, raw shrimp are worth seeking out for this recipe—they soak up the seasoning and stay much more tender.
My cauliflower rice turned out watery. What happened?
This is almost always due to excess moisture. If you’re using frozen riced cauliflower, it’s crucial to thaw it and then wring it out in a clean kitchen towel to remove as much water as possible. If you’re using fresh, make sure you don’t cover the skillet while it cooks, as that traps steam. Cooking it over a steady medium heat allows the water to evaporate.
Can I make this dish ahead of time?
It’s best enjoyed fresh, as the cauliflower rice can release more water upon sitting and the shrimp can become tough when reheated. However, you can do all the prep ahead—rice the cauliflower, mince the garlic, chop the parsley, and clean the shrimp. Having everything ready makes the actual cooking process a 10-minute breeze.
What can I use instead of butter to keep it dairy-free?
Absolutely! Just omit the butter, or add an extra tablespoon of a good, flavorful olive oil at the end to create the sauce. The dish will still be delicious, though you’ll lose a little of that rich, rounded flavor that the butter provides. A tiny splash of vegetable broth can also help create a saucier consistency.
How can I add more vegetables to this?
This recipe is a fantastic veggie canvas! Try adding a handful of chopped spinach or kale in the last 2 minutes of cooking the cauliflower rice. Diced bell peppers or cherry tomatoes can be sautéed with the garlic. Thinly sliced zucchini is another great addition—just cook it with the cauliflower rice until tender.
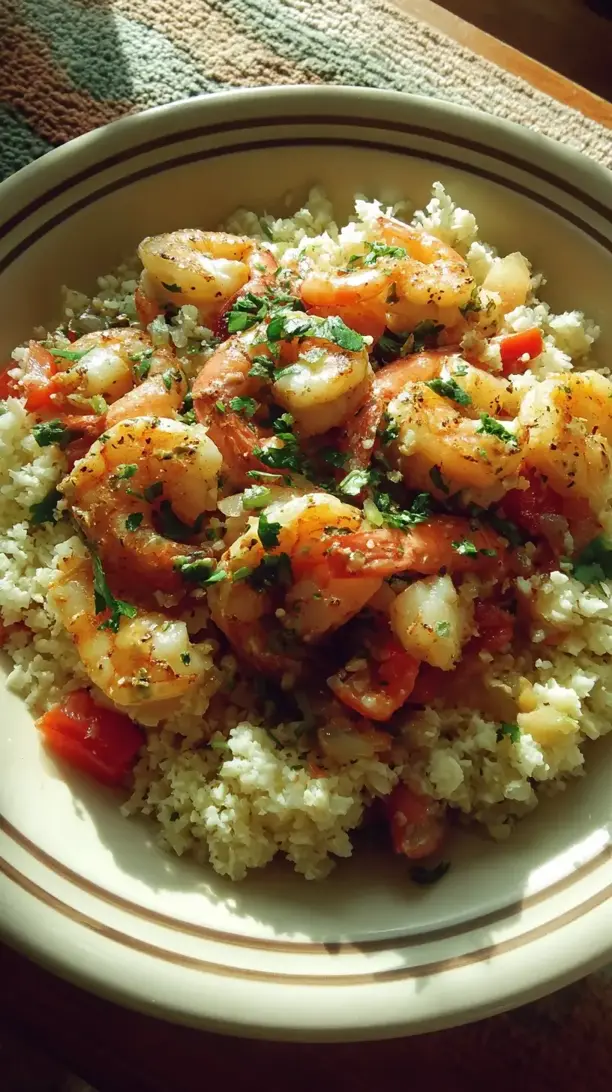
Garlic Shrimp And Cauliflower Rice
Make this easy Garlic Shrimp and Cauliflower Rice in under 30 minutes! A healthy, one-pan meal packed with flavor. Get the simple recipe and cook it tonight!
Ingredients
For the main ingredients
-
1 lb large raw shrimp (peeled and deveined)
-
1 large head cauliflower (riced (or 4 cups pre-riced))
-
4 cloves garlic (minced)
-
3 tbsp olive oil (divided)
-
2 tbsp unsalted butter
-
1 fresh lemon
-
1/4 cup fresh parsley (chopped)
-
1/2 tsp paprika (optional, for color)
-
salt and freshly ground black pepper (to taste)
Instructions
-
Start by preparing your shrimp. Make sure they are thoroughly patted dry with paper towels, then season them generously with salt, black pepper, and the paprika if you're using it. Toss them gently to coat evenly. This initial seasoning is what will give the shrimp a beautiful, flavorful crust.01
-
Heat 2 tablespoons of the olive oil in your large skillet over medium-high heat. Once the oil is shimmering and hot, add the shrimp in a single layer. You should hear a satisfying sizzle. Cook for just 1-2 minutes per side, until they're pink and opaque. They cook quickly, so don't walk away! Remove them to a clean plate immediately; they will finish cooking later.02
-
Reduce the heat to medium and add the remaining 1 tablespoon of olive oil to the same skillet. Add the minced garlic and sauté for about 30-60 seconds, just until it becomes incredibly fragrant. You have to watch it closely—burnt garlic tastes bitter, and we want that lovely, aromatic flavor.03
-
Now, add the cauliflower rice to the skillet. Stir it well to coat it in the garlicky oil. Cook, stirring occasionally, for 5-7 minutes. You'll notice it will soften and become more tender, but you want to keep a little bite to it—it shouldn't be mushy. This is when you season the cauliflower with another good pinch of salt and pepper.04
-
Return the cooked shrimp (and any accumulated juices on the plate) back to the skillet with the cauliflower rice. Add the butter and stir everything together until the butter melts and creates a light, glossy sauce that coats everything. The trick is to just warm the shrimp through without overcooking them.05
-
Take the skillet off the heat. This is where you add the freshness! Stir in most of the chopped parsley, a big squeeze of fresh lemon juice, and if you're feeling fancy, a little bit of lemon zest. Give it one final toss, taste, and adjust seasoning if needed.06