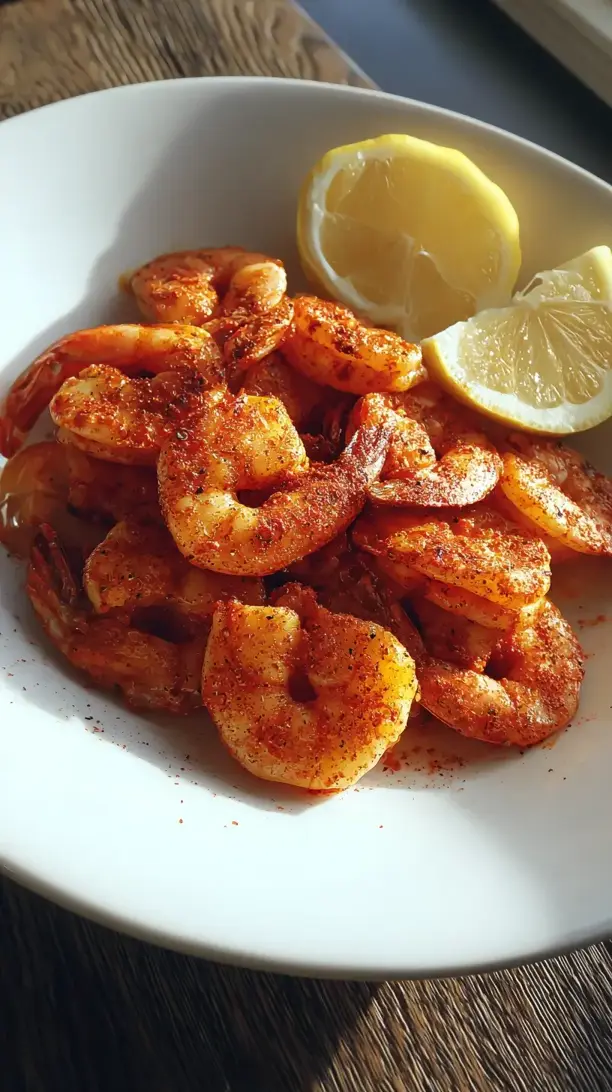
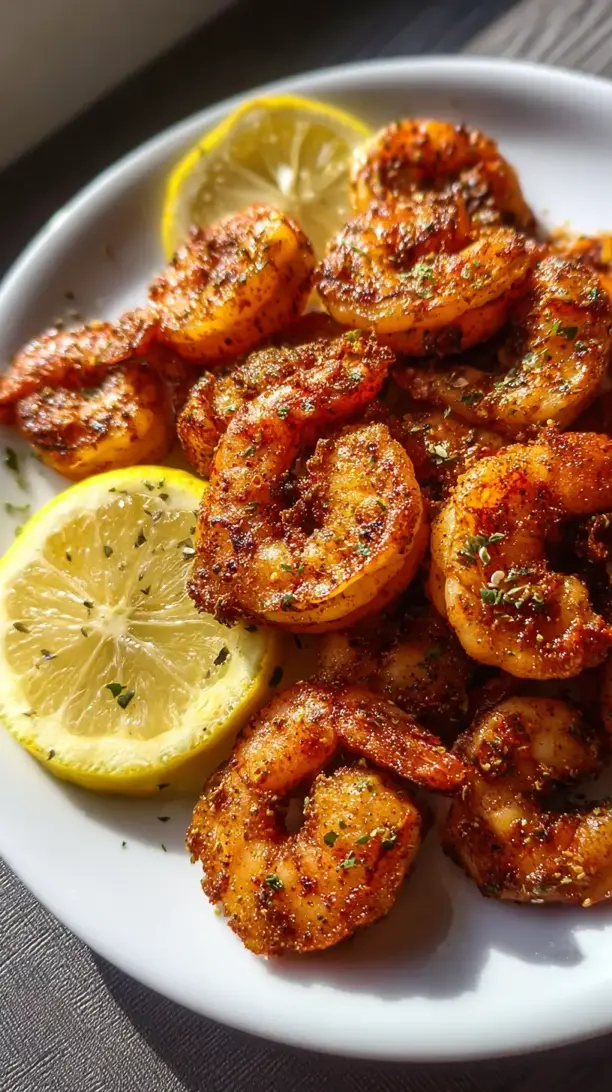
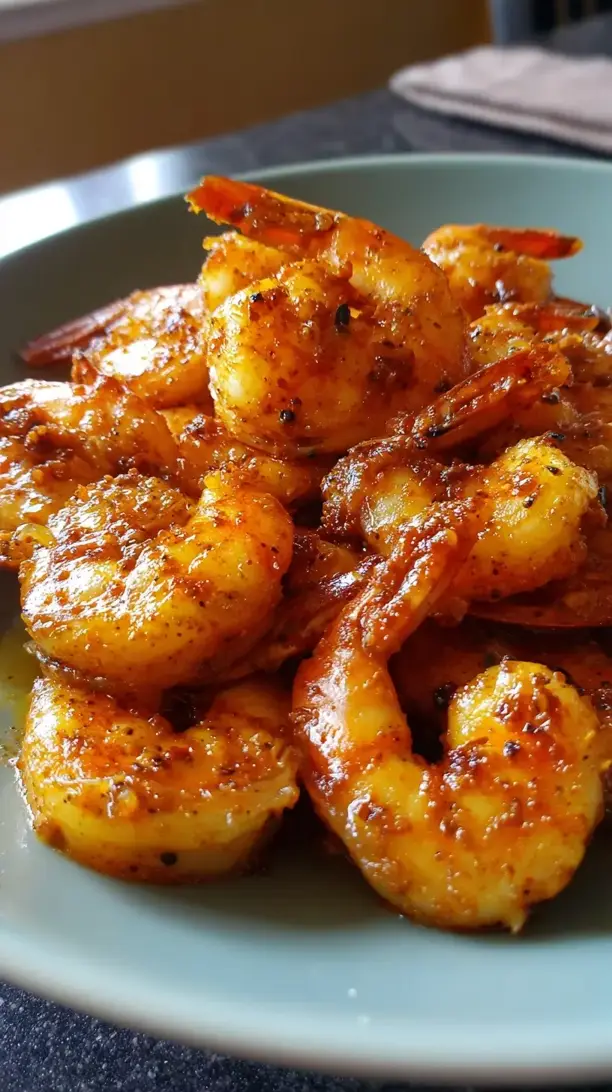
This Old Bay Shrimp recipe delivers plump, juicy shrimp coated in that iconic blend of celery salt, paprika, and warm spices. It comes together in minutes and is perfect for a quick dinner or summer gathering. The aroma alone will transport you straight to the coast.
Why You’ll Love This Old Bay Shrimp
- Fast & foolproof: Ready in about 15 minutes with minimal effort.
- Complex flavor, minimal effort: Old Bay seasoning does all the heavy lifting.
- Versatile centerpiece: Great for pasta, tacos, salads, or as an appetizer.
- Affordable luxury: Feels restaurant-quality without the high cost.
Ingredients & Tools
- 450 g large raw shrimp, peeled and deveined
- 2 tbsp olive oil or unsalted butter
- 2–3 tbsp Old Bay seasoning
- 3 garlic cloves, minced
- 1 lemon, juiced (about 2 tbsp), plus extra wedges for serving
- 2 tbsp fresh parsley, chopped
- A pinch of salt (taste first, as Old Bay is salty)
- Optional: A dash of hot sauce or a pinch of red pepper flakes
Tools: A large skillet (cast iron is ideal), tongs, a small bowl for mixing.
Notes: Use high-quality fresh or thawed frozen shrimp. Don’t be shy with the Old Bay—a generous coating creates the iconic flavor and color. The fresh lemon juice at the end is non-negotiable for brightness.
Nutrition (per serving)
| Calories: | 190 kcal |
| Protein: | 24 g |
| Fat: | 9 g |
| Carbs: | 4 g |
| Fiber: | 1 g |
Serves: 3 | Prep Time: 10 minutes | Cook Time: 5 minutes | Total Time: 15 minutes
Before You Start: Tips & Ingredient Notes
- What kind of shrimp should I buy? I recommend large (21/25 count) raw shrimp, either fresh or frozen. If frozen, thaw them overnight in the fridge or in a bowl of cold water for about 30 minutes. Pat them completely dry with paper towels—this is crucial for getting a good sear instead of a steam.
- Can I adjust the spice level? Absolutely. Old Bay has a mild heat. If you like it spicy, add a pinch of cayenne pepper or a few dashes of your favorite hot sauce along with the Old Bay. For a milder version, just use the seasoning as is.
- Butter or oil? You can’t go wrong. Butter gives a richer, more decadent flavor and helps the spices cling to the shrimp. Olive oil offers a cleaner taste and a higher smoke point. I sometimes use a combination of both for the best of both worlds.
- Don’t skip the fresh finish. The fresh parsley and lemon juice added after cooking aren’t just for looks. They provide a crucial burst of freshness that cuts through the richness and elevates the entire dish from great to unforgettable.
How to Make Old Bay Shrimp
Step 1: Prepare your shrimp. If your shrimp aren’t already prepared, peel and devein them, leaving the tails on or off based on your preference (I take them off for easier eating). This is also the time to pat them very, very dry with paper towels. Any excess moisture will prevent that lovely, light crust from forming and will make the shrimp boil in their own juices. You’ll notice they feel a bit tacky to the touch when they’re properly dry.
Step 2: Season generously. Place your dry shrimp in a bowl and sprinkle the Old Bay seasoning over them. Use your hands or a spoon to toss everything together, ensuring each shrimp is evenly coated in that vibrant red-orange spice blend. Don’t be afraid to use a heavy hand—the seasoning is the star of the show. Let them sit for about 5 minutes while you heat your pan; this allows the flavors to start penetrating the shrimp.
Step 3: Heat the pan. Place your large skillet over medium-high heat and add the olive oil or butter. You want the fat to be hot but not smoking. If using butter, wait until the foaming subsides. A properly heated pan is your best defense against soggy shrimp. You should see a gentle shimmer on the oil’s surface.
Step 4: Cook the shrimp and garlic. Carefully add the shrimp to the hot skillet in a single layer. You should hear a satisfying sizzle. Cook for about 2 minutes, undisturbed, until the bottoms turn pink and opaque and develop a slight crust. Add the minced garlic to the pan around the shrimp. Now, flip each shrimp and cook for another 1 to 2 minutes. The garlic will become fragrant very quickly—be careful not to let it burn.
Step 5: Finish and serve. The shrimp are done when they’ve formed a tight “C” shape and are opaque all the way through. Immediately remove the skillet from the heat. Squeeze the fresh lemon juice all over the shrimp and toss to combine. The acid will react with the pan, lifting any delicious browned bits. Finally, stir in the chopped parsley. Give everything one last toss and transfer to a serving platter. Serve right away while they’re hot and juicy.
Storage & Freshness Guide
- Fridge: Store in an airtight container for up to 2 days.
- Freezer: Freeze in a single layer then transfer to a bag for up to 1 month.
- Reviving: Gently reheat in a skillet with a splash of water or broth to prevent drying.
Serving Suggestions
Complementary Dishes
- Creamy Cheddar Grits — The rich, cheesy grits are a dreamy bed for the spicy shrimp, creating a classic Southern combination that is pure comfort.
- A Simple Arugula Salad — The peppery bite of arugula with a light lemon vinaigrette provides a fresh, crisp contrast to the warm, savory shrimp.
- Toasted Baguette or Cornbread — Essential for sopping up every last bit of the delicious, spiced butter or oil left in the bottom of the skillet.
Drinks
- A Crisp Lager or Pilsner — The clean, effervescent quality of a cold beer cuts through the spice and cleanses the palate beautifully between bites.
- A Dry Rosé — Its bright acidity and subtle red fruit notes complement the shrimp without overpowering the delicate spice blend.
- Sparkling Water with Lemon — A non-alcoholic option that mimics the effect of the beer or wine, keeping your palate refreshed and ready for more.
Something Sweet
- Lemon Sorbet — The ultimate palate cleanser. Its sharp, citrusy sweetness is the perfect, light finale after a savory and spiced main course.
- Key Lime Pie — The tropical, tangy creaminess of this classic dessert continues the coastal theme and provides a lovely, cool finish.
- Fresh Berry Fool — A simple dessert of whipped cream and macerated berries is light, fruity, and feels special without being too heavy.
Top Mistakes to Avoid
- Overcooking the shrimp. This is the cardinal sin of shrimp cookery. Shrimp cook incredibly fast and become tough and rubbery when left in the pan too long. The moment they curl into a C-shape and are opaque, they’re done. An O-shape means they’re overdone.
- Adding the garlic too early. If you add minced garlic at the same time as the shrimp, it will burn and turn bitter by the time the shrimp are cooked. Adding it in the last minute or two of cooking allows it to gently perfume the dish without scorching.
- Crowding the pan. If you dump all the shrimp in and they’re piled on top of each other, they’ll steam instead of sear. You need that single layer to ensure each shrimp gets direct contact with the hot pan
Old Bay Shrimp
Make perfect Old Bay Shrimp in just 15 minutes! This easy recipe delivers juicy, flavorful shrimp every time. Get the simple steps and serve it tonight!
Ingredients
For the Ingredients
-
450 g large raw shrimp (peeled and deveined)
-
2 tbsp olive oil or unsalted butter
-
2–3 tbsp Old Bay seasoning
-
3 garlic cloves (minced)
-
1 lemon (juiced (about 2 tbsp), plus extra wedges for serving)
-
2 tbsp fresh parsley (chopped)
-
A pinch salt (taste first, as Old Bay is salty)
-
A dash hot sauce or a pinch of red pepper flakes (optional)
Instructions
-
Prepare your shrimp. If your shrimp aren’t already prepared, peel and devein them, leaving the tails on or off based on your preference (I take them off for easier eating). This is also the time to pat them very, very dry with paper towels. Any excess moisture will prevent that lovely, light crust from forming and will make the shrimp boil in their own juices. You’ll notice they feel a bit tacky to the touch when they’re properly dry.01
-
Season generously. Place your dry shrimp in a bowl and sprinkle the Old Bay seasoning over them. Use your hands or a spoon to toss everything together, ensuring each shrimp is evenly coated in that vibrant red-orange spice blend. Don’t be afraid to use a heavy hand—the seasoning is the star of the show. Let them sit for about 5 minutes while you heat your pan; this allows the flavors to start penetrating the shrimp.02
-
Heat the pan. Place your large skillet over medium-high heat and add the olive oil or butter. You want the fat to be hot but not smoking. If using butter, wait until the foaming subsides. A properly heated pan is your best defense against soggy shrimp. You should see a gentle shimmer on the oil’s surface.03
-
Cook the shrimp and garlic. Carefully add the shrimp to the hot skillet in a single layer. You should hear a satisfying sizzle. Cook for about 2 minutes, undisturbed, until the bottoms turn pink and opaque and develop a slight crust. Add the minced garlic to the pan around the shrimp. Now, flip each shrimp and cook for another 1 to 2 minutes. The garlic will become fragrant very quickly—be careful not to let it burn.04
-
Finish and serve. The shrimp are done when they’ve formed a tight “C” shape and are opaque all the way through. Immediately remove the skillet from the heat. Squeeze the fresh lemon juice all over the shrimp and toss to combine. The acid will react with the pan, lifting any delicious browned bits. Finally, stir in the chopped parsley. Give everything one last toss and transfer to a serving platter. Serve right away while they’re hot and juicy.05