Batch cooked shrimp is your secret weapon for effortless meals. This method delivers perfectly tender, versatile shrimp ready for salads, pastas, or tacos in minutes. A little planning upfront transforms your meals for days.
Why You’ll Love This Batch Cooked Shrimp
- Effortless meal prep: Cook once, eat multiple times for quick assembly.
- Perfect texture: Poaching avoids rubbery, overcooked results.
- Incredibly versatile: A blank canvas for countless cuisines and flavors.
- Freezer-friendly: Portion and freeze for up to three months.
Ingredients & Tools
- 1 kg (about 2.2 lbs) raw shrimp, peeled and deveined (size 26/30 or 31/40 works best)
- 2 liters water
- 1 tbsp kosher salt
- 1 lemon, halved
- 2 bay leaves
- 1 tsp black peppercorns
- Optional aromatics: a few sprigs of parsley, 2 smashed garlic cloves, or a slice of onion
Tools: A large pot (around 5-6 quarts), a slotted spoon or spider strainer, a large bowl for the ice bath, and a baking sheet lined with parchment paper for initial cooling.
Notes: The quality of your shrimp really matters here—since we’re not masking it with heavy sauces, you want it to taste fresh and sweet. And don’t skip the ice bath; it’s the key to stopping the cooking process instantly and locking in that perfect texture.
Nutrition (per serving)
| Calories: | 110 kcal |
| Protein: | 22 g |
| Fat: | 1.5 g |
| Carbs: | 1 g |
| Fiber: | 0 g |
Serves: 6 | Prep Time: 5 minutes | Cook Time: 5 minutes | Total Time: 10 minutes
Before You Start: Tips & Ingredient Notes
- What size shrimp is best? I recommend a medium size like 26/30 or 31/40 (the numbers indicate how many shrimp make up a pound). They’re large enough to have a satisfying bite but small enough to cook through quickly and evenly without risking a rubbery texture.
- To peel or not to peel? For maximum convenience in your meal prep, buy them already peeled and deveined. If you’re using shell-on shrimp, you can still use this method—the shells will add more flavor to the poaching liquid—but you’ll have to peel them after cooking, which is a bit messier and warmer on the fingers.
- Don’t forget the ice bath. This is non-negotiable for perfect shrimp. Having a large bowl of ice water ready before you even turn on the stove ensures you can shock the shrimp the moment they’re done, preserving their delicate texture and preventing them from cooking further in their own residual heat.
- Why poach and not sauté? Poaching in a gently simmering liquid is a much more forgiving method for batch cooking. It’s harder to overcook them, and you end up with a cleaner-tasting shrimp that can adapt to any recipe later, from a spicy stir-fry to a delicate pasta.
How to Make Batch Cooked Shrimp
Step 1: First, get your mise en place ready—this process is fast! Fill your large pot with the 2 liters of water. Add the salt, halved lemon (squeeze the juice into the water first, then toss in the halves), bay leaves, and peppercorns. If you’re using any optional aromatics like garlic or parsley, add them now. This is your poaching liquid, and it’s what will give the shrimp a subtle, foundational flavor.
Step 2: Place the pot over high heat and bring the liquid to a rolling boil. You’ll notice the aroma starting to release from the lemon and bay leaves. Once it’s boiling vigorously, give it a quick stir to ensure the salt is fully dissolved. Meanwhile, prepare your ice bath by filling a large bowl halfway with cold water and the other half with ice cubes. Set it right next to your stove.
Step 3: Now, here’s the crucial part. Turn off the heat completely. Yes, remove the pot from the burner if you have an electric stove. The residual heat in the water is more than enough to cook the shrimp through without making them tough. Immediately add all the raw shrimp to the hot water. They should all be submerged.
Step 4: Let the shrimp sit in the hot water for 2 to 4 minutes. The exact time will depend on the size of your shrimp. For 26/30 count, start checking at 2 minutes; for larger ones, it might take 3-4. You’re looking for them to be opaque, pink, and firm to the touch, and they should have curled into a loose “C” shape. Do not walk away—this is the most common point of overcooking!
Step 5: The moment the shrimp are cooked, use your slotted spoon or spider strainer to quickly transfer them from the hot pot directly into the waiting ice bath. This “shocking” process halts the cooking instantly. Swirl them around in the icy water for a minute or two until they feel completely cold to the touch.
Step 6: Drain the shrimp thoroughly from the ice bath. I like to spread them out in a single layer on a baking sheet lined with a clean kitchen towel or paper towels to air-dry for a few minutes. This removes excess surface moisture, which helps if you plan to sear them later or add them to a salad without making it watery.
Step 7: Your batch-cooked shrimp are now ready to use! You can portion them into airtight containers for the fridge (they’ll keep for 3-4 days) or freezer bags for long-term storage. If freezing, lay them in a single layer on a parchment-lined sheet to freeze solid first before bagging them up—this prevents them from clumping together into one big shrimp-block.
Storage & Freshness Guide
- Fridge: Store in an airtight container for 3-4 days.
- Freezer: Freeze in a single layer, then transfer to a bag for 2-3 months.
- Reviving: Thaw overnight in fridge; gently warm in sauces or skillet if needed.
Serving Suggestions
Complementary Dishes
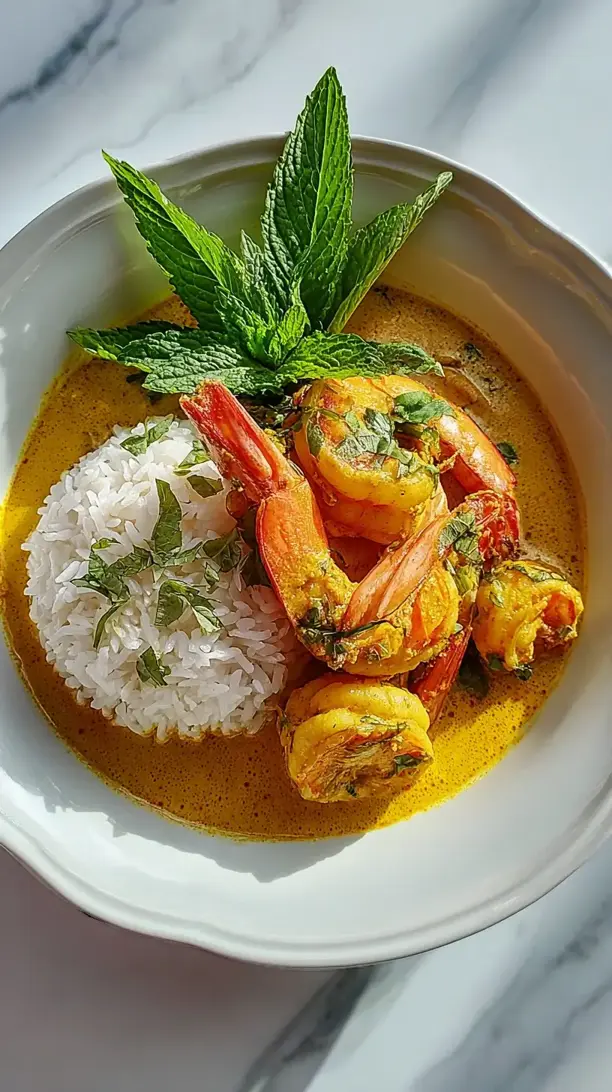
- Zucchini Noodle Scampi — The light, delicate shrimp pairs beautifully with spiralized zucchini sautéed in garlic, white wine, and a pinch of red pepper flakes for a low-carb feast.
- Mango Avocado Salad — Toss the cold shrimp with cubed ripe mango, creamy avocado, red onion, and a lime-cilantro vinaigrette for a refreshing and vibrant lunch.
- Quick Shrimp Tacos — Warm corn tortillas, add the shrimp (you can quickly sauté them with taco seasoning), and top with crunchy cabbage slaw and a drizzle of chipotle crema.
Drinks
- A crisp Sauvignon Blanc — The herbaceous and citrusy notes in this wine are a classic pairing that will highlight the lemon and clean flavor of the shrimp perfectly.
- Sparkling Water with Lime — For a non-alcoholic option, the effervescence and acidity cut through the richness and cleanse the palate, making each bite of shrimp taste fresh again.
- A light Mexican Lager — If you’re going the taco route, a cold, crisp lager with a squeeze of lime is the ultimate companion, balancing spice and refreshment.
Something Sweet
- Lemon Sorbet — The bright, sharp citrus is a perfect palate-cleanser after a shrimp-based meal, feeling light and sophisticated without being too heavy.
- Almond Biscotti — For a little crunch and a nutty flavor that doesn’t overwhelm, these are ideal for dipping into a final cup of coffee or tea.
- Fresh Berry Salad with Mint — Simply toss mixed berries with a tiny drizzle of honey and torn mint leaves for a dessert that feels healthy, vibrant, and satisfyingly sweet.
Top Mistakes to Avoid
- Mistake: Boiling the shrimp. If you leave the heat on while the shrimp are in the water, you are guaranteed to overcook them. They’ll become tough and rubbery. The trick is to use the off-heat poaching method for gentle, even cooking.
- Mistake: Skipping the ice bath. I’ve messed this up before too, thinking I could just spread them out on a tray. The shrimp continue to cook from their own internal heat, leading to that unpleasant overcooked texture. The ice bath is your best friend here.
- Mistake: Crowding the pot. If you’re doubling the batch, use a pot large enough to hold all the shrimp in a single layer without stacking. If they’re too crowded, they won’t cook evenly, and you’ll end up with some undercooked and some overcooked shrimp.
- Mistake: Not drying them after the ice bath. That extra water clinging to the shrimp will water down any sauce you add them to later and can prevent them from getting a nice sear if you plan to pan-fry them. A quick pat or air-dry makes a big difference.
Expert Tips
- Tip: Create a custom flavor profile. Before adding the shrimp, you can steep the boiling water with other aromatics. Try a slice of ginger and a star anise for an Asian-inspired base, or some Old Bay seasoning and a beer substitute for part of the water for a classic boil vibe.
- Tip: Save that poaching liquid! Don’t pour it down the drain. Strain it and you have a fantastic, light shrimp stock. You can use it as a base for soups, chowders, or to cook rice or grains, infusing them with a subtle seafood flavor.
- Tip: For easy peeling, make a small shallow cut along the back of the shrimp after they’re cooked and cooled. The shell will often pull away much more cleanly, and you can easily remove the vein if it wasn’t done beforehand.
- Tip: If using frozen raw shrimp, thaw them completely in the refrigerator overnight before batch cooking. Cooking them from frozen will throw off your timing and result in unevenly cooked, watery shrimp.
FAQs
How long does batch-cooked shrimp last in the fridge?
Properly stored in an airtight container, your cooked shrimp will stay fresh and safe to eat for 3 to 4 days in the refrigerator. The key is to cool them down quickly (hence the ice bath) and get them into the fridge within two hours of cooking. You’ll know they’ve gone bad if they develop a sour, ammonia-like smell or a slimy texture.
Can I freeze the cooked shrimp?
Absolutely, and it’s one of the best parts of this method! For the best texture, freeze them in a single layer on a parchment-lined baking sheet until solid (about 1-2 hours), then transfer the frozen shrimp to a freezer bag. This prevents them from freezing into a giant block. They’ll keep for 2-3 months. Thaw overnight in the fridge before using.
Can I use this method for different sizes of shrimp?
You can, but your timing will need to adjust. The 2-4 minute window is a guide for medium shrimp (26/40). For smaller shrimp (51/60), check at 90 seconds. For jumbo shrimp (16/20), it might take 4-5 minutes. Always go by visual cues—opaque, pink, and firm—rather than a strict timer.
Why did my shrimp turn out tough?
This almost always means they were overcooked. The most common culprit is leaving them in the hot water for too long. Remember, they continue to cook a little even after being removed from the water, so it’s better to err on the side of slightly underdone. Also, ensure you turned the heat OFF before adding them.
What’s the best way to reheat the shrimp?
Honestly, they are best eaten cold or just gently warmed. If you must reheat, do it very gently. Toss them into a simmering sauce for the last minute just to heat through, or warm them briefly in a skillet with a little butter or oil over low heat. Microwaving will almost certainly make them rubbery, so I’d avoid that if possible.

Batch Cooked Shrimp
Learn how to make perfect Batch Cooked Shrimp for easy meal prep. This poaching method guarantees tender, versatile shrimp every time. Get the recipe now!
Ingredients
For the Ingredients & Tools
-
1 kg raw shrimp (peeled and deveined, size 26/30 or 31/40 works best)
-
2 liters water
-
1 tbsp kosher salt
-
1 lemon (halved)
-
2 bay leaves
-
1 tsp black peppercorns
-
Optional aromatics (a few sprigs of parsley, 2 smashed garlic cloves, or a slice of onion)