
Why You’ll Love This Peanut Butter Jelly Pancakes
- A total flavor explosion. This isn’t just a pancake with toppings; the peanut butter and jelly are baked right in, so every single forkful is a perfect balance of savory, sweet, and fluffy.
- They’re surprisingly satisfying. Thanks to the protein and healthy fats in the peanut butter, these pancakes have a bit more staying power than your average stack, keeping you full and happy for hours.
- Incredibly fun to make. Swirling that jelly into the batter is such a simple, joyful step. It feels a little like being a kid again, creating edible art right in your skillet.
- Endlessly customizable. You can use any nut butter and any jam or jelly you have on hand. It’s the perfect way to use up those almost-empty jars lurking in the fridge.
Ingredients & Tools
- 1 cup all-purpose flour
- 2 tbsp granulated sugar
- 2 tsp baking powder
- 1/2 tsp salt
- 1 cup milk (any kind will work)
- 1 large egg
- 1/3 cup creamy peanut butter
- 2 tbsp melted butter or neutral oil, plus more for cooking
- 1 tsp vanilla extract
- 1/3 cup your favorite jelly or jam (grape, strawberry, or raspberry are classics!)
Tools: A large mixing bowl, a medium mixing bowl, a whisk, a ladle or 1/4-cup measure, a non-stick skillet or griddle, and a spatula.
The real star here is, of course, the peanut butter. Using a standard creamy variety works best for a smooth batter, but if you’re a crunchy peanut butter fan, feel free to use it for a bit of texture! And don’t stress about the jelly—this is the time to use whatever flavor makes you happiest.
Serves: 2-3 (makes about 8-10 pancakes) | Prep Time: 10 minutes | Cook Time: 15 minutes | Total Time: 25 minutes
Before You Start: Tips & Ingredient Notes
- Is your peanut butter stubborn? If it’s straight from the fridge and too stiff to mix easily, pop the measured amount in a microwave-safe bowl and heat for 10-15 seconds just to loosen it up. You don’t want it hot, just stir-able.
- What’s the best jelly to use? Honestly, any jam, jelly, or even preserves will work! Jelly will give you the smoothest swirls, while jam or preserves will have little fruit pieces for extra texture. The trick is to avoid anything too runny.
- Don’t overmix the batter. This is the golden rule of pancake-making. A few lumps in the batter are totally fine—overmixing develops the gluten in the flour and can lead to tough, chewy pancakes instead of light, fluffy clouds.
- Get your skillet to the right temperature. This is crucial. A drop of water should sizzle and dance across the surface. If it instantly vaporizes, it’s too hot; if it just sits there, it’s not hot enough. A medium-low heat is usually the sweet spot.
How to Make Peanut Butter Jelly Pancakes
Step 1: Combine the Dry Ingredients. In your large mixing bowl, whisk together the flour, sugar, baking powder, and salt. You really want to whisk this well—it ensures the baking powder is evenly distributed, which is key for getting those perfectly even, fluffy rises on every single pancake. Give it a good 20-second whisk until everything is one uniform color.
Step 2: Whisk the Wet Ingredients. In the medium bowl, whisk the milk, egg, peanut butter, melted butter (or oil), and vanilla extract. Now, the peanut butter might resist at first and look a little clumpy in the milk. That’s okay! Just keep whisking energetically. You’ll notice it will eventually surrender and emulsify into a smooth, thick, and creamy liquid. This is exactly what you want.
Step 3: Bring It All Together. Pour the wet peanut butter mixture into the bowl with the dry ingredients. Now, use your whisk or a spatula and gently fold everything together. I mean it—be gentle! Stir just until the last streaks of flour disappear. The batter will be thick and might still have a few lumps. Walk away from the bowl. Seriously, a slightly lumpy batter is the secret to tender pancakes.
Step 4: Heat and Grease Your Skillet. Place your skillet or griddle over medium heat. Let it get properly hot for a minute or two. Add a small pat of butter or a drizzle of oil and swirl it around to coat the surface. You should hear a gentle sizzle when the butter hits the pan.
Step 5: Cook and Swirl! Using a ladle or a 1/4-cup measure, pour batter onto the hot skillet to form pancakes. Let them cook for about 2-3 minutes. You’ll know it’s time to add the jelly when you see bubbles forming on the surface and the edges look set. Now for the fun part: drop small teaspoon-sized dollops of jelly directly onto the uncooked top of each pancake. Then, take a knife or the tip of a chopstick and gently swirl the jelly into the batter. Don’t go too deep—you’re just marbling the surface.
Step 6: Flip and Finish. Carefully slide your spatula under a pancake and flip it. The underside should be a beautiful golden brown. Cook for another 1-2 minutes on the second side, until it’s also golden and the pancake is cooked through. You might see a little jelly sneak out the sides—that’s a good sign! Transfer to a plate and repeat with the remaining batter, adding more butter or oil to the skillet as needed.
Serving Suggestions
Complementary Dishes
- Crispy bacon or turkey bacon — The salty, smoky crunch is an incredible contrast to the sweet, soft pancakes. It’s a classic pairing for a reason.
- A simple fruit salad — A mix of fresh berries, orange segments, and a little mint adds a bright, refreshing element that cuts through the richness beautifully.
- Scrambled eggs with chives — For a truly epic brunch spread, the savory, fluffy eggs balance the meal and make it feel complete and satisfying.
Drinks
- A cold glass of milk — It’s the ultimate nostalgic companion to anything peanut butter. It just feels right.
- Strong black coffee — The bitterness of the coffee is a perfect palate cleanser between bites of the sweet, rich pancakes.
- A berry smoothie — Double down on the fruit flavors! A strawberry-banana smoothie feels like a drinkable extension of the jelly swirls.
Something Sweet
- A drizzle of maple syrup — Yes, even with the jelly inside, a little extra maple syrup on top takes it over the top in the best way possible.
- A dollop of whipped cream — For a truly decadent treat, a cloud of lightly sweetened whipped cream adds a cool, creamy texture.
- A sprinkle of chopped peanuts — This adds a wonderful salty crunch and makes the peanut flavor pop even more.
Top Mistakes to Avoid
- Mistake: Using a skillet that’s too hot. This is the number one reason for burnt outsides and raw insides. If your pancakes are browning too quickly, turn the heat down. Low and slow wins the race for perfectly cooked pancakes.
- Mistake: Pressing down on the pancakes with the spatula. I know it’s tempting, but resist! Pressing them flattens them and squeezes out the air bubbles you worked so hard to create, resulting in dense pancakes.
- Mistake: Swirling the jelly too vigorously. You just want to marble it on the surface. If you mix it in too thoroughly, it will thin out the batter in spots and can make the pancakes difficult to flip.
- Mistake: Overcrowding the skillet. Give each pancake some breathing room. This makes them easier to flip and ensures the heat circulates evenly for consistent cooking.
Expert Tips
- Tip: Keep finished pancakes warm in a single layer on a baking sheet in a 200°F (95°C) oven. This prevents them from getting soggy and ensures everyone can eat together with hot pancakes.
- Tip: For a flavor boost, use browned butter. Instead of just melting your butter, cook it in a saucepan until it turns a nutty golden brown. Let it cool slightly before adding it to the wet ingredients. It adds an incredible depth of flavor.
- Tip: Make a “test pancake” first. Cook one small pancake first to check your skillet’s temperature and seasoning. It’s your chance to adjust the heat or add more butter before committing to the whole batch.
- Tip: Warm your jelly slightly. If your jelly is very thick, warming it for 10 seconds in the microwave will make it much easier to dollop and swirl smoothly across the pancake surface.
FAQs
Can I make the batter ahead of time?
You can, but with a caveat. Pancake batter is best used immediately because the baking powder starts working as soon as it gets wet. If you must make it ahead, prepare it and store it covered in the fridge for up to 2 hours. Don’t be surprised if you need to add a tiny splash of milk to thin it out again after it rests. The pancakes will still be delicious, but they might not be quite as lofty.
Can I use a different nut butter?
Absolutely! Almond butter, cashew butter, or even sunflower seed butter would work wonderfully here. Just make sure it’s a creamy variety for the smoothest batter. Each will bring its own unique flavor profile—almond butter with jelly is a particularly delicious combination.
My jelly is leaking out and making a mess in the pan. What did I do wrong?
This usually happens if the dollops of jelly are too large or placed too close to the edge. A little leakage is normal and actually kind of yummy (it creates caramelized bits!), but to minimize it, keep your jelly portions to about a teaspoon and place them closer to the center of the pancake before swirling.
How do I store and reheat leftovers?
Let the pancakes cool completely, then store them in an airtight container in the fridge for up to 3 days. To reheat, the best method is in a toaster or a toaster oven until warm and slightly crispy again. The microwave will work in a pinch but can make them a bit soft.
Can I make these gluten-free or vegan?
Yes, with a few simple swaps! For gluten-free, use a 1:1 gluten-free flour blend. For vegan, use a flax egg (1 tbsp ground flaxseed mixed with 3 tbsp water, let sit for 5 minutes), plant-based milk, and vegan butter or oil. The structure might be slightly different, but the fantastic flavor will still be there.
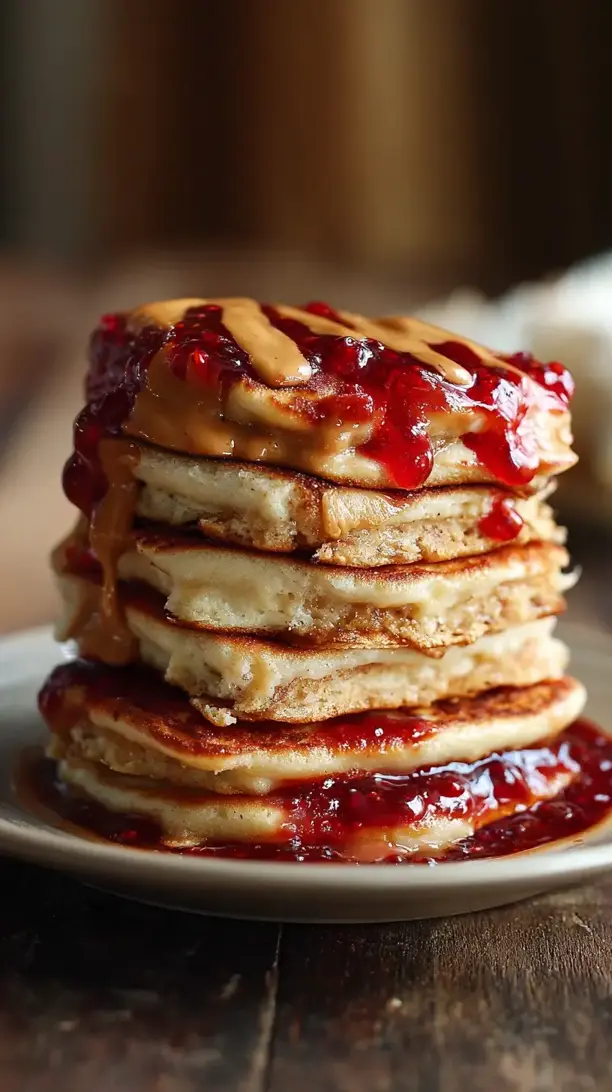
Peanut Butter Jelly Pancakes
Transform your favorite sandwich into the ultimate breakfast! These fluffy Peanut Butter Jelly Pancakes have swirls of jam baked right in for a burst of flavor in every bite. Easy, fun, and totally irresistible.
Ingredients
Ingredients
-
1 cup all-purpose flour
-
2 tbsp granulated sugar
-
2 tsp baking powder
-
1/2 tsp salt
-
1 cup milk (any kind will work)
-
1 large egg
-
1/3 cup creamy peanut butter
-
2 tbsp melted butter or neutral oil (plus more for cooking)
-
1 tsp vanilla extract
-
1/3 cup your favorite jelly or jam (grape, strawberry, or raspberry are classics!)
Instructions
-
Combine the Dry Ingredients. In your large mixing bowl, whisk together the flour, sugar, baking powder, and salt. You really want to whisk this well—it ensures the baking powder is evenly distributed, which is key for getting those perfectly even, fluffy rises on every single pancake. Give it a good 20-second whisk until everything is one uniform color.01
-
Whisk the Wet Ingredients. In the medium bowl, whisk the milk, egg, peanut butter, melted butter (or oil), and vanilla extract. Now, the peanut butter might resist at first and look a little clumpy in the milk. That's okay! Just keep whisking energetically. You'll notice it will eventually surrender and emulsify into a smooth, thick, and creamy liquid. This is exactly what you want.02
-
Bring It All Together. Pour the wet peanut butter mixture into the bowl with the dry ingredients. Now, use your whisk or a spatula and gently fold everything together. I mean it—be gentle! Stir just until the last streaks of flour disappear. The batter will be thick and might still have a few lumps. Walk away from the bowl. Seriously, a slightly lumpy batter is the secret to tender pancakes.03
-
Heat and Grease Your Skillet. Place your skillet or griddle over medium heat. Let it get properly hot for a minute or two. Add a small pat of butter or a drizzle of oil and swirl it around to coat the surface. You should hear a gentle sizzle when the butter hits the pan.04
-
Cook and Swirl! Using a ladle or a 1/4-cup measure, pour batter onto the hot skillet to form pancakes. Let them cook for about 2-3 minutes. You'll know it's time to add the jelly when you see bubbles forming on the surface and the edges look set. Now for the fun part: drop small teaspoon-sized dollops of jelly directly onto the uncooked top of each pancake. Then, take a knife or the tip of a chopstick and gently swirl the jelly into the batter. Don't go too deep—you're just marbling the surface.05
-
Flip and Finish. Carefully slide your spatula under a pancake and flip it. The underside should be a beautiful golden brown. Cook for another 1-2 minutes on the second side, until it's also golden and the pancake is cooked through. You might see a little jelly sneak out the sides—that's a good sign! Transfer to a plate and repeat with the remaining batter, adding more butter or oil to the skillet as needed.06