
Why You’ll Love These Greek Yogurt Protein Pancakes
- They’re secretly packed with protein. Thanks to the Greek yogurt and eggs, these pancakes are surprisingly filling. They’ll keep you satisfied for hours, making them perfect for a busy day or a pre-workout fuel.
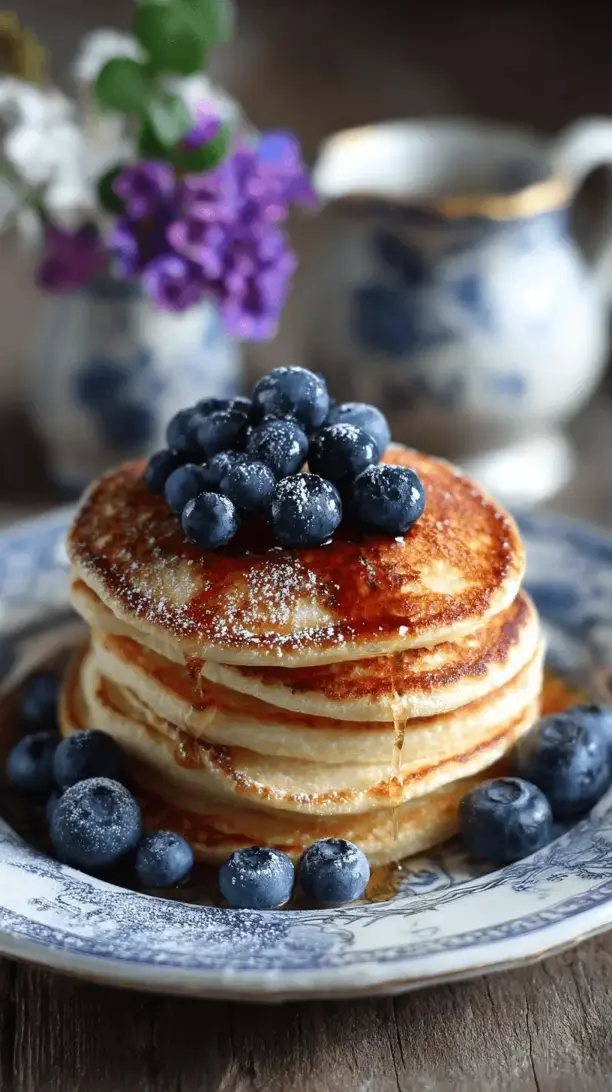
- The texture is just dreamy. You might expect a protein pancake to be heavy, but these are wonderfully light and fluffy. The yogurt adds a tenderness that’s honestly hard to beat.
- They’re incredibly versatile. Love blueberries? Throw them in. Craving chocolate chips? Go for it. This batter is a fantastic base for all your favorite pancake add-ins.
- They come together in one bowl. Minimal cleanup is a huge win in my book. You can mix the batter, cook, and be eating in under 20 minutes—which is essential for those hungry mornings.
Ingredients & Tools
- 1 cup (120 g) all-purpose flour
- 1 scoop (about 30 g) vanilla or unflavored protein powder
- 2 tsp baking powder
- 1/4 tsp salt
- 1 cup (240 g) plain Greek yogurt (I use 2% or 5%)
- 2 large eggs
- 1/4 cup (60 ml) milk (any kind)
- 2 tbsp maple syrup or honey
- 1 tsp vanilla extract
- Butter or oil, for cooking
Tools: A large mixing bowl, whisk, measuring spoons/cups, a non-stick skillet or griddle, and a spatula.
The protein powder is key here—it really boosts the staying power of these pancakes. And don’t skip the vanilla extract; it works with the yogurt to create a wonderful, warm flavor base. Using a good, thick Greek yogurt is also crucial for that perfect texture.
Serves: 2-3 (makes about 8-10 medium pancakes) | Prep Time: 5 minutes | Cook Time: 10-15 minutes | Total Time: 20 minutes
Before You Start: Tips & Ingredient Notes
- What kind of protein powder works best? I’ve had great success with both whey and plant-based vanilla powders. An unflavored one works too if you want the yogurt flavor to shine. Just avoid powders with heavy “cake batter” or chocolate flavors, as they can overpower the other ingredients.
- Can I use a different flour? Absolutely. Whole wheat pastry flour or a 1:1 gluten-free flour blend will work well. The texture might be a tad denser, but still delicious. I wouldn’t recommend using almond or coconut flour alone, as they absorb liquid very differently.
- Why is my batter so thick? Don’t panic! This batter is meant to be thick—that’s what helps create those tall, fluffy pancakes. If it’s *too* thick to scoop, add a tablespoon of milk at a time until it’s a scoopable consistency.
- The importance of preheating your pan. This is a non-negotiable step for perfect pancakes. A properly heated pan ensures a golden-brown exterior without burning. A drop of water should sizzle and evaporate immediately when it hits the surface.
How to Make Greek Yogurt Protein Pancakes
Step 1: Combine the Dry Ingredients. In your large mixing bowl, whisk together the flour, protein powder, baking powder, and salt. You really want to get this mixture uniform—it ensures the baking powder is evenly distributed, which is the secret to a consistent, fluffy rise in every single pancake. No one wants a bite that’s all baking powder!
Step 2: Whisk the Wet Ingredients. In a separate bowl or a large measuring jug, whisk the Greek yogurt, eggs, milk, maple syrup, and vanilla extract until smooth. The yogurt might be a little lumpy at first, but just keep whisking—it’ll come together into a creamy, pale mixture. You’ll notice the vanilla aroma start to bloom, which is always a good sign.
Step 3: Bring It All Together. Pour the wet ingredients into the dry ingredients. Now, here’s the trick: use a gentle hand. Stir with your whisk or a spatula until the ingredients are *just* combined. A few lumps are totally fine—I promise! Overmixing is the enemy of fluffy pancakes, as it develops the gluten in the flour and makes them tough.
Step 4: Let the Batter Rest. This is a sneaky-important step. Let the batter sit for about 5 minutes while you heat your skillet over medium heat. This allows the flour to hydrate fully and the baking powder to start activating, resulting in a lighter texture. You might see a few bubbles forming on the surface—that’s exactly what you want to see.
Step 5: Cook to Golden-Brown Perfection. Add a small pat of butter or a drizzle of oil to your hot skillet. For each pancake, drop about 1/4 cup of batter onto the skillet. You’ll know it’s ready to flip when bubbles form on the surface and the edges look set, which usually takes 2-3 minutes. The underside should be a beautiful golden brown. Flip gently and cook for another 1-2 minutes on the other side until cooked through.
Step 6: Serve Immediately. Pancakes are best enjoyed straight from the pan! Keep finished pancakes warm in a single layer on a baking sheet in a low oven (around 200°F/95°C) if you’re cooking in batches. This prevents them from getting soggy while you finish the rest.
Serving Suggestions
Complementary Dishes
- Crispy Turkey Bacon or Sausage — The salty, savory crunch is the perfect contrast to the sweet, fluffy pancakes. It creates a truly balanced breakfast plate.
- Fresh Berry Compote — Simply simmer some mixed berries with a touch of maple syrup until they break down. It’s a vibrant, fruity topping that feels much more special than plain syrup.
- Scrambled Eggs with Herbs — For the ultimate protein-packed brunch, a side of soft, creamy scrambled eggs with chives or dill complements the pancakes beautifully.
Drinks
- A Strong Cup of Coffee — The bitterness of a good brew cuts through the richness of the pancakes and yogurt. It’s a classic pairing for a reason.
- Cold Glass of Milk — Sometimes, the simple options are the best. A cold glass of milk feels nostalgic and is a perfect protein partner.
- Green Smoothie — If you’re going for a super-healthy start, a light green smoothie on the side keeps things fresh and doesn’t weigh you down.
Something Sweet
- Dark Chocolate Shavings — A little goes a long way. Shaving some high-quality dark chocolate over the top adds a sophisticated, slightly bitter note that elevates the whole dish.
- Toasted Coconut Flakes — These add a wonderful nutty flavor and a delightful crunch. Toast them in a dry pan until golden for the best aroma.
- Whipped Coconut Cream — For a dairy-free indulgence, a dollop of lightly sweetened coconut cream feels incredibly decadent but is surprisingly light.
Top Mistakes to Avoid
- Mistake: Overmixing the batter. This is the number one reason pancakes turn out dense and rubbery. Stir until the flour is just incorporated, and walk away. Those lumps will cook out, I promise.
- Mistake: Flipping too early. Impatience is the enemy of a good flip. Wait for those bubbles to form and pop on the surface and for the edges to look matte and set. If you try to flip too soon, you’ll end up with a messy, undercooked pancake.
- Mistake: Cooking on too high heat. A blazing hot pan will give you a burnt outside and a raw inside. Medium heat is your friend—it allows the center to cook through while the exterior gets golden brown.
- Mistake: Pressing down on the pancakes with your spatula. I’ve been guilty of this too! You might think you’re helping them cook, but you’re actually squeezing out the air bubbles that make them fluffy. Just let them be.
Expert Tips
- Tip: Use a cookie scoop for perfectly shaped pancakes. A large ice cream or cookie scoop ensures every pancake is the same size, which means they’ll all cook at the same rate. It also makes the process so much cleaner and faster.
- Tip: Add mix-ins at the very end. If you’re adding blueberries or chocolate chips, fold them in gently right after you’ve combined the wet and dry ingredients. This prevents them from sinking to the bottom or bleeding color throughout the batter.
- Tip: Test your baking powder. If your pancakes aren’t rising, your baking powder might be old. To test it, stir half a teaspoon into a little hot water. If it doesn’t fizz vigorously, it’s time for a new tin.
- Tip: Make a double batch for meal prep. These pancakes freeze beautifully! Let them cool completely, then layer them between sheets of parchment paper in a freezer bag. Reheat in a toaster or oven for a quick breakfast any day of the week.
FAQs
Can I make these pancakes dairy-free?
Absolutely! You can easily swap the Greek yogurt for a thick, plain dairy-free yogurt (like coconut or almond-based). Just make sure it’s a variety that’s nice and thick, similar to Greek yogurt, to maintain the batter consistency. Use a plant-based milk as well, and you’re all set for a delicious dairy-free version.
My pancakes are turning out flat. What did I do wrong?
Flat pancakes are usually a sign of expired baking powder, as it’s the leavening agent that makes them rise. Another common culprit is overmixing the batter, which deflates the air bubbles. Finally, make sure your skillet is properly preheated—if it’s not hot enough, the pancakes will spread too much before they have a chance to set and rise.
Can I make the batter the night before?
I wouldn’t recommend it, honestly. The baking powder will activate as soon as it hits the liquid, and its power will diminish if left to sit overnight. You’ll likely end up with dense pancakes. The good news is that the batter comes together so quickly in the morning, it’s really not much effort to make it fresh.
How can I tell when the pancakes are cooked through?
The visual cues are your best friends here: bubbles on top and set edges. But if you’re unsure, you can always gently lift a corner to peek at the color. You can also press the center lightly with your finger—if it springs back, it’s done. If it leaves an indent, it needs another minute.
What’s the best way to reheat leftover pancakes?
The toaster is my absolute favorite method! It brings back their crisp exterior and warm, fluffy interior. You can also warm them on a baking sheet in a 350°F (175°C) oven for about 5-10 minutes. Avoid the microwave if you can, as it tends to make them soft and a bit rubbery.
Greek Yogurt Protein Pancakes
Whip up light & fluffy Greek yogurt protein pancakes in 20 minutes! This easy, one-bowl recipe is packed with protein for a satisfying, guilt-free weekend breakfast.
Ingredients
Ingredients
-
1 cup all-purpose flour (120 g)
-
1 scoop vanilla or unflavored protein powder (about 30 g)
-
2 tsp baking powder
-
1/4 tsp salt
-
1 cup plain Greek yogurt (240 g, I use 2% or 5%)
-
2 large eggs
-
1/4 cup milk (60 ml, any kind)
-
2 tbsp maple syrup or honey
-
1 tsp vanilla extract
-
Butter or oil (for cooking)
Instructions
-
Combine the Dry Ingredients. In your large mixing bowl, whisk together the flour, protein powder, baking powder, and salt. You really want to get this mixture uniform—it ensures the baking powder is evenly distributed, which is the secret to a consistent, fluffy rise in every single pancake. No one wants a bite that's all baking powder!01
-
Whisk the Wet Ingredients. In a separate bowl or a large measuring jug, whisk the Greek yogurt, eggs, milk, maple syrup, and vanilla extract until smooth. The yogurt might be a little lumpy at first, but just keep whisking—it'll come together into a creamy, pale mixture. You'll notice the vanilla aroma start to bloom, which is always a good sign.02
-
Bring It All Together. Pour the wet ingredients into the dry ingredients. Now, here's the trick: use a gentle hand. Stir with your whisk or a spatula until the ingredients are *just* combined. A few lumps are totally fine—I promise! Overmixing is the enemy of fluffy pancakes, as it develops the gluten in the flour and makes them tough.03
-
Let the Batter Rest. This is a sneaky-important step. Let the batter sit for about 5 minutes while you heat your skillet over medium heat. This allows the flour to hydrate fully and the baking powder to start activating, resulting in a lighter texture. You might see a few bubbles forming on the surface—that's exactly what you want to see.04
-
Cook to Golden-Brown Perfection. Add a small pat of butter or a drizzle of oil to your hot skillet. For each pancake, drop about 1/4 cup of batter onto the skillet. You'll know it's ready to flip when bubbles form on the surface and the edges look set, which usually takes 2-3 minutes. The underside should be a beautiful golden brown. Flip gently and cook for another 1-2 minutes on the other side until cooked through.05
-
Serve Immediately. Pancakes are best enjoyed straight from the pan! Keep finished pancakes warm in a single layer on a baking sheet in a low oven (around 200°F/95°C) if you're cooking in batches. This prevents them from getting soggy while you finish the rest.06