
Why You’ll Love This Banana Nut Pancakes
- Perfectly fluffy texture. The secret is in not overmixing the batter—a few lumps are totally fine, I promise. You’ll get these wonderfully light and airy pancakes that just melt in your mouth.
- An incredible use for overripe bananas. You know those bananas turning black on your counter? They’re gold for this recipe. Their super-soft sweetness permeates every single bite, meaning you need less added sugar.
- A fantastic mix of textures. The soft, cakey pancake, the little bursts of creamy banana, and the satisfying crunch of toasted walnuts… it’s a symphony in every forkful.
- They’re surprisingly forgiving. Even if you’re not a morning person, this recipe is hard to mess up. It’s flexible and comes together quickly, leaving you more time to sip your coffee.
Ingredients & Tools
- 2 cups all-purpose flour
- 2 tbsp granulated sugar
- 1 tbsp baking powder
- 1 tsp baking soda
- 1/2 tsp salt
- 1 tsp ground cinnamon
- 1/4 tsp ground nutmeg
- 2 large eggs
- 1 3/4 cups buttermilk
- 1/4 cup unsalted butter, melted and slightly cooled
- 1 tsp pure vanilla extract
- 3 medium, very ripe bananas, mashed (about 1 1/2 cups)
- 3/4 cup chopped walnuts, toasted
- Butter or oil for greasing the pan
Tools: A large mixing bowl, a medium mixing bowl, a whisk, a spatula, a griddle or large non-stick skillet, and a 1/4 cup measuring cup for pouring.
Using buttermilk is non-negotiable here—it’s the key to that tender crumb and slight tang. And toasting the walnuts first? A little step that makes a world of difference, bringing out their nutty, almost buttery flavor.
Serves: 4 (makes about 12-14 pancakes) | Prep Time: 15 minutes | Cook Time: 15 minutes | Total Time: 30 minutes
Before You Start: Tips & Ingredient Notes
- Banana ripeness is everything. The blacker the banana, the better. They mash easily and their natural sugars are at their peak, which means more flavor and sweetness for your pancakes.
- Don’t skip toasting the nuts. Honestly, it takes five minutes and transforms them from bland and crunchy to deeply aromatic and delicious. Just toss them in a dry pan over medium heat until fragrant.
- Why buttermilk? The acidity in buttermilk reacts with the baking soda, creating tons of little air bubbles. This is what gives the pancakes their signature lift and fluffy texture. No buttermilk? Make a quick substitute by adding 1 tbsp of lemon juice or vinegar to regular milk and letting it sit for 5 minutes.
- Melted butter should be cool. If you add hot, melted butter to the wet ingredients, you risk scrambling the eggs. Let it sit for a minute or two after melting until it’s just warm to the touch.
How to Make Banana Nut Pancakes
Step 1: Combine the Dry Ingredients. In your large mixing bowl, whisk together the flour, sugar, baking powder, baking soda, salt, cinnamon, and nutmeg. You want to make sure the leavening agents are evenly distributed throughout the flour—this ensures every pancake rises beautifully. Give it a good, thorough whisk until the mixture looks uniform in color.
Step 2: Whisk the Wet Ingredients. In the medium bowl, whisk the eggs until they’re pale and frothy. This incorporates air, which also helps with fluffiness. Then, whisk in the buttermilk, the cooled melted butter, and the vanilla extract. The mixture might look a little curdled because of the buttermilk and butter—that’s completely normal, don’t worry about it.
Step 3: Mash and Incorporate the Bananas. Peel your very ripe bananas and add them to the wet ingredients. Use a fork to mash them right in the bowl. You can leave it a little chunky if you like pockets of banana, or mash it smooth. I prefer a bit of texture. Stir the banana into the wet mixture until it’s just combined.
Step 4: The Big Merge (Don’t Overmix!). This is the most crucial step. Pour the wet ingredients into the dry ingredients. Using your spatula, gently fold everything together. You’ll see streaks of flour—that’s good! Stop mixing when there are still a few dry patches. A lumpy batter is a fluffy pancake batter. Overmixing develops gluten and leads to tough, flat pancakes.
Step 5: Fold in the Goodies. Now, gently fold in the toasted walnuts. Just a few folds to distribute them evenly. Then, walk away. Let the batter rest for 5-10 minutes on the counter. You’ll notice it thicken up slightly as the flour hydrates. This rest period makes for a more tender pancake.
Step 6: Heat Your Griddle. Preheat your griddle or non-stick skillet over medium heat. It’s ready when a few drops of water sizzle and dance across the surface. Brush or spray with a little butter or oil. I like using butter for that rich flavor, but a neutral oil works great too.
Step 7: Cook to Golden Perfection. Using your 1/4 cup measure, pour batter onto the hot griddle. Cook until the edges look set and you see bubbles forming and popping on the surface, about 2-3 minutes. The underside should be a beautiful golden brown. Carefully flip and cook for another 1-2 minutes, until the second side is golden and the pancake is cooked through.
Step 8: Keep Them Warm. As you cook, transfer the finished pancakes to a wire rack placed on a baking sheet in a 200°F (95°C) oven. This keeps them warm and crispy-edged without getting soggy. Stacking them on a plate will trap steam and make them soft.
Serving Suggestions
Complementary Dishes
- Crispy bacon or sausage links — The salty, savory crunch is the perfect counterpoint to the sweet, fluffy pancakes. It’s a classic combo for a reason.
- Scrambled eggs with chives — For a more complete, protein-packed breakfast, a side of soft, creamy scrambled eggs balances the meal beautifully.
- Fresh berry compote — If you want to lean into the fruitiness, a quick compote made from simmered berries adds a bright, tart contrast to the bananas.
Drinks
- A strong cup of coffee — The bitterness of a good dark roast cuts through the sweetness and makes the whole experience feel even more decadent.
- Cold glass of milk — A timeless pairing that just feels right, especially if you have kids at the table.
- Freshly squeezed orange juice — The citrusy zing wakes up your palate and complements the warm spices in the pancakes.
Something Sweet
- Warm maple syrup — Obviously. But warm it up! Pouring warm syrup over hot pancakes is a tiny luxury that makes a big difference.
- A dollop of whipped cream — For a truly indulgent treat, a cloud of lightly sweetened whipped cream on top feels like dessert for breakfast.
- A drizzle of peanut butter sauce — If you’re a peanut butter and banana fan, melt some peanut butter with a splash of milk for a rich, nutty sauce.
Top Mistakes to Avoid
- Mistake: Overmixing the batter. This is the number one pancake killer. Overmixing develops gluten, resulting in tough, chewy, and flat pancakes instead of light and fluffy ones. A few lumps are your friend.
- Mistake: Cooking at the wrong temperature. If the pan is too hot, the outside will burn before the inside is cooked. Too low, and they’ll be pale and greasy. Medium heat is the sweet spot for a perfect golden brown.
- Mistake: Pressing down on the pancakes after flipping. I’ve done this too, thinking it will cook them faster. All it does is squeeze out the air you worked so hard to incorporate, making them dense. Just let them be.
- Mistake: Using underripe bananas. Yellow, firm bananas lack the intense sweetness and moisture of their spotty, overripe counterparts. They won’t mash well and will leave your pancakes lacking in flavor.
Expert Tips
- Tip: Make a “test” pancake. Cook one small pancake first to check your heat level and seasoning. It’s your chance to adjust the batter (a pinch more salt? another sprinkle of cinnamon?) before committing to the whole batch.
- Tip: Keep your pancakes warm and crisp. As mentioned, the oven method is key. Placing them on a wire rack instead of a plate allows air to circulate, preventing the dreaded sogginess.
- Tip: Freeze extras for a quick breakfast. These pancakes freeze beautifully. Let them cool completely, then layer them between parchment paper in a freezer bag. Reheat in the toaster for a fast, homemade breakfast on a busy day.
- Tip: Customize your mix-ins. Not a walnut fan? Try pecans or almonds. Add a handful of chocolate chips or blueberries for a different twist. This recipe is a wonderful canvas for your favorite flavors.
FAQs
Can I make the batter the night before?
I don’t recommend it, honestly. The baking powder will lose its potency overnight, and the bananas might brown and make the batter a bit gray. For the best results, mix it fresh in the morning. If you must prep ahead, mix the dry and wet ingredients separately and combine them just before cooking.
My pancakes are turning out gummy in the middle. What did I do wrong?
This usually points to two things: the griddle wasn’t hot enough, causing them to steam rather than fry, or the batter was overmixed. Next time, make sure your pan is properly preheated and fold the batter just until combined. Also, avoid opening the oven door constantly if you’re keeping them warm, as the temperature drop can affect the cooking.
Can I make these pancakes vegan?
Absolutely! For a vegan version, use a flax egg (1 tbsp ground flaxseed mixed with 3 tbsp water per egg), a plant-based milk mixed with lemon juice for the buttermilk, and vegan butter or oil. The bananas do a great job of binding everything together.
Why did my first pancake always turn out weird?
Ah, the “sacrificial first pancake” is a universal truth! It’s usually because the pan isn’t quite at the perfect, even temperature yet. That’s why the test pancake tip is so handy. Consider it a warm-up for your pan—and a tasty snack for the cook!
How can I tell when to flip the pancake?
Look for the edges to look dry and set, and for bubbles to form on the surface and start to pop. Once most of the bubbles have popped and the holes they leave don’t immediately fill back in with batter, it’s time to flip. Peek underneath—it should be a lovely golden brown.
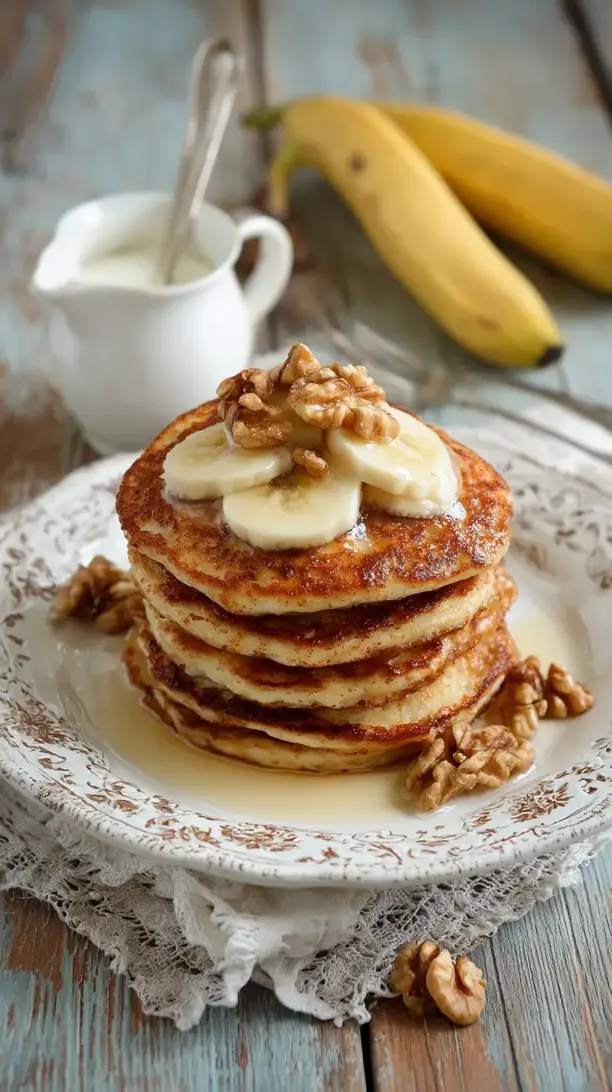
Banana Nut Pancakes
Whip up the fluffiest, most flavorful Banana Nut Pancakes! My easy, from-scratch recipe uses ripe bananas & toasted walnuts for a weekend breakfast that feels like a hug. Perfectly golden every time!
Ingredients
Ingredients
-
2 cups all-purpose flour
-
2 tbsp granulated sugar
-
1 tbsp baking powder
-
1 tsp baking soda
-
1/2 tsp salt
-
1 tsp ground cinnamon
-
1/4 tsp ground nutmeg
-
2 large eggs
-
1 3/4 cups buttermilk
-
1/4 cup unsalted butter (melted and slightly cooled)
-
1 tsp pure vanilla extract
-
3 medium, very ripe bananas (mashed (about 1 1/2 cups))
-
3/4 cup chopped walnuts (toasted)
-
Butter or oil (for greasing the pan)
Instructions
-
Combine the Dry Ingredients. In your large mixing bowl, whisk together the flour, sugar, baking powder, baking soda, salt, cinnamon, and nutmeg. You want to make sure the leavening agents are evenly distributed throughout the flour—this ensures every pancake rises beautifully. Give it a good, thorough whisk until the mixture looks uniform in color.01
-
Whisk the Wet Ingredients. In the medium bowl, whisk the eggs until they're pale and frothy. This incorporates air, which also helps with fluffiness. Then, whisk in the buttermilk, the cooled melted butter, and the vanilla extract. The mixture might look a little curdled because of the buttermilk and butter—that's completely normal, don't worry about it.02
-
Mash and Incorporate the Bananas. Peel your very ripe bananas and add them to the wet ingredients. Use a fork to mash them right in the bowl. You can leave it a little chunky if you like pockets of banana, or mash it smooth. I prefer a bit of texture. Stir the banana into the wet mixture until it's just combined.03
-
The Big Merge (Don't Overmix!). This is the most crucial step. Pour the wet ingredients into the dry ingredients. Using your spatula, gently fold everything together. You'll see streaks of flour—that's good! Stop mixing when there are still a few dry patches. A lumpy batter is a fluffy pancake batter. Overmixing develops gluten and leads to tough, flat pancakes.04
-
Fold in the Goodies. Now, gently fold in the toasted walnuts. Just a few folds to distribute them evenly. Then, walk away. Let the batter rest for 5-10 minutes on the counter. You'll notice it thicken up slightly as the flour hydrates. This rest period makes for a more tender pancake.05
-
Heat Your Griddle. Preheat your griddle or non-stick skillet over medium heat. It's ready when a few drops of water sizzle and dance across the surface. Brush or spray with a little butter or oil. I like using butter for that rich flavor, but a neutral oil works great too.06
-
Cook to Golden Perfection. Using your 1/4 cup measure, pour batter onto the hot griddle. Cook until the edges look set and you see bubbles forming and popping on the surface, about 2-3 minutes. The underside should be a beautiful golden brown. Carefully flip and cook for another 1-2 minutes, until the second side is golden and the pancake is cooked through.07
-
Keep Them Warm. As you cook, transfer the finished pancakes to a wire rack placed on a baking sheet in a 200°F (95°C) oven. This keeps them warm and crispy-edged without getting soggy. Stacking them on a plate will trap steam and make them soft.08