
Why You’ll Love This Almond Joy Pancakes
- It’s like dessert for breakfast (but totally acceptable). We’re talking rich chocolate, sweet coconut, and crunchy almonds in every single bite. It satisfies that sweet tooth first thing in the morning without feeling overly heavy.
- Incredibly fluffy texture with delightful surprises. The base batter is light and airy, but then you get little pockets of melted chocolate chips and chewy shredded coconut. The toasted almonds on top add a fantastic crunch that really makes the whole experience.
- Surprisingly simple to make. If you can make basic pancakes, you can absolutely master these. It’s a one-bowl situation for the most part, and the “fancy” part is just sprinkling your toppings. It’s a low-effort, high-reward kind of recipe.
- Completely customizable to your taste. Not a fan of dark chocolate? Use milk chocolate chips. Want to go dairy-free? Use your favorite plant-based milk and chocolate. You have full control over the level of coconut and almond in each stack.
Ingredients & Tools
- 1 ¼ cups all-purpose flour
- ¼ cup unsweetened cocoa powder
- 2 tbsp granulated sugar
- 1 tbsp baking powder
- ½ tsp salt
- 1 large egg
- 1 ¼ cups milk (whole milk is great for richness)
- 3 tbsp melted butter (or coconut oil), plus more for the pan
- 1 tsp vanilla extract
- ½ cup sweetened shredded coconut
- ⅓ cup dark chocolate chips
- ¼ cup sliced almonds, toasted, for serving
- Maple syrup or chocolate syrup, for serving
Tools: A large mixing bowl, whisk, measuring cups/spoons, a large non-stick skillet or griddle, and a spatula.
The quality of your cocoa powder really matters here—it’s the main source of that deep chocolate flavor. And don’t skip toasting the almonds! It only takes a minute in a dry pan, but it unlocks a nutty aroma that elevates the entire dish from good to unforgettable.
Serves: 3-4 (makes about 8-10 pancakes) | Prep Time: 10 minutes | Cook Time: 15 minutes | Total Time: 25 minutes
Before You Start: Tips & Ingredient Notes
- Toasting the almonds is non-negotiable. Seriously, it’s the difference between a good pancake and a great one. Just toss them in a dry skillet over medium heat for 3-4 minutes, shaking the pan often, until they’re fragrant and lightly golden. It brings out their essential oils and adds a depth of flavor that raw almonds just can’t match.
- Don’t overmix the batter. A few lumps are totally fine—in fact, they’re desirable! Overmixing develops the gluten in the flour and will lead to tough, chewy pancakes instead of the light, fluffy clouds we’re aiming for. Stir until the ingredients are *just* combined.
- What’s the deal with the baking powder? This is our main leavening agent, responsible for all that wonderful fluffiness. Make sure yours is fresh! If it’s been sitting in your cupboard for over six months, it might have lost its potency. A good test is to spoon a little into hot water—if it fizzes vigorously, you’re good to go.
- Can I use coconut flour? Unfortunately, no. Coconut flour is highly absorbent and can’t be substituted 1:1 for all-purpose flour. It requires a completely different ratio of liquid to flour and eggs. Stick with all-purpose here for the perfect texture.
How to Make Almond Joy Pancakes
Step 1: First, let’s get our dry ingredients together. In your large mixing bowl, whisk together the flour, cocoa powder, sugar, baking powder, and salt. You’ll want to whisk this really well to ensure the cocoa and baking powder are evenly distributed throughout the flour—this prevents little bitter pockets of pure cocoa in your finished pancakes. It should look like a uniform, chocolatey powder.
Step 2: Now, in a separate smaller bowl or a large measuring cup, whisk the egg, milk, melted butter, and vanilla extract until they’re fully combined. The melted butter might try to solidify a bit when it hits the cold milk, but just keep whisking—it’ll be fine. This is our wet ingredient base.
Step 3: Here’s the crucial part. Pour the wet ingredients into the dry ingredients. Using your whisk, gently stir everything together. You’ll notice lumps forming—that’s perfect! Stop stirring the moment you no longer see large streaks of dry flour. It should be a thick, shaggy batter. Now, gently fold in the shredded coconut and chocolate chips with a spatula. Just a few folds to incorporate them.
Step 4: Time to cook! Heat your skillet or griddle over medium heat. I like to test if it’s ready by flicking a few drops of water onto the surface—if they sizzle and dance, you’re good to go. Lightly grease the surface with a little butter or oil. Using a ¼-cup measure or a ladle, pour the batter onto the hot skillet. You’ll see bubbles start to form on the surface after about 2 minutes.
Step 5: Wait for those bubbles to pop and leave little holes before you flip. This is your sign that the bottom is cooked and the top is setting. This usually takes 2-3 minutes. Slide your spatula underneath and flip each pancake with confidence! They should be a deep, matte brown. Cook for another 1-2 minutes on the second side until cooked through.
Step 6: As the pancakes are done, transfer them to a plate. You can keep them warm in a single layer on a baking sheet in a 200°F (95°C) oven if you’re making a big batch. Just be careful not to stack them while they’re super hot, or they’ll get steamy and lose some of their delightful crisp edges.
Serving Suggestions
Complementary Dishes
- Crispy bacon or sausage links — The salty, savory contrast cuts through the sweetness of the pancakes beautifully, creating a perfect balance on your plate.
- Fresh fruit salad with berries and orange segments — The bright, acidic fruit provides a refreshing counterpoint to the rich, chocolatey pancakes and cleanses the palate between bites.
- Whipped coconut cream — For an extra coconut kick, skip the regular whipped cream and whip up some chilled coconut cream with a little sugar. It’s dreamy.
Drinks
- A cold glass of milk — It’s a classic for a reason. The cool creaminess is the ultimate partner for warm, chocolatey baked goods.
- Strong black coffee — The bitterness of a good brew highlights the deep cocoa notes in the pancakes and keeps the meal from feeling too sweet.
- Almond milk latte — Double down on the almond flavor with a warm, frothy latte made with your favorite almond milk. It’s a thematic match made in heaven.
Something Sweet
- A drizzle of chocolate syrup — For the true chocoholics, an extra drizzle of chocolate syrup over the top takes the indulgence to the next level.
- A dusting of powdered sugar — Simple, elegant, and adds a subtle extra sweetness that looks beautiful against the dark pancakes.
- Warm maple syrup — The classic choice. The caramel notes of maple syrup complement the coconut and almond flavors incredibly well.
Top Mistakes to Avoid
- Mistake: Using a skillet that’s too hot. If your pan is smoking, it’s way too hot. The outside of the pancake will burn before the inside has a chance to cook through, leaving you with a charred exterior and a raw, gummy center. Medium heat is your friend—be patient!
- Mistake: Pressing down on the pancakes with your spatula. I’ve messed this up before too… it’s so tempting! But pressing down squeezes out the precious air bubbles that we worked so hard to create with the baking powder, resulting in dense, flat pancakes. Just let them be.
- Mistake: Flipping too early. If you flip the pancake before the surface is covered with popped bubbles, it will likely tear and you’ll lose that perfect round shape. Wait for those bubbles to set and pop—it’s the pancake telling you it’s ready.
- Mistake: Adding the mix-ins to the dry ingredients. If you add the chocolate chips and coconut to the flour mixture, they’ll just sink to the bottom of the bowl. Folding them in at the very end ensures they’re evenly distributed throughout the batter.
Expert Tips
- Tip: Let the batter rest for 5 minutes. After you’ve mixed it, just walk away. This allows the flour to fully hydrate and the gluten to relax a bit, which leads to a more tender pancake. You’ll also notice the batter thicken up slightly, which helps create a taller, fluffier result.
- Tip: Use a cookie scoop for perfectly round pancakes. For those who are particular about shape, a large ice cream or cookie scoop (about ¼-cup size) gives you uniform amounts of batter and lovely, round pancakes every single time.
- Tip: Create a “test” pancake. The first pancake is often a sacrificial one, used to test the heat of your pan. Use it to adjust the temperature if needed—if it’s too dark too fast, lower the heat; if it’s taking forever to bubble, turn it up a notch.
- Tip: Keep finished pancakes warm properly. If you’re not serving immediately, place them in a single layer on a wire rack set over a baking sheet in a low oven. This prevents the bottoms from getting soggy from trapped steam, which happens if you stack them directly on a plate.
FAQs
Can I make the batter the night before?
I wouldn’t recommend it for the best results. The baking powder will start to react as soon as it gets wet, and by morning, it will have lost most of its leavening power, leading to flat pancakes. For a quicker morning, you can mix the dry ingredients and the wet ingredients in separate containers the night before. Then, in the morning, you just combine them and cook—it takes less than two minutes!
Can I make these pancakes gluten-free?
Absolutely! The easiest swap is to use a 1:1 gluten-free all-purpose flour blend. Look for one that contains xanthan gum, which helps bind the batter and replicate the texture of gluten. I’ve had great success with brands like Bob’s Red Mill or King Arthur Measure for Measure. The rest of the recipe stays exactly the same.
My pancakes are turning out too dark. What’s happening?
This is almost always a heat issue. Your pan is likely too hot. Cocoa powder can burn more easily than plain flour, so it’s extra important to cook these over a steady medium heat, not medium-high. If you find they’re still getting too dark on the outside, you can also try reducing the sugar by a tablespoon, as sugar caramelizes and contributes to browning.
Can I use almond extract instead of vanilla?
You can, but a little goes a long way! Almond extract is much more potent than vanilla. I’d recommend using ½ teaspoon of almond extract and ½ teaspoon of vanilla extract for a balanced flavor. Using a full teaspoon of just almond extract might be overpowering and taste a bit artificial.
How should I store and reheat leftovers?
Let the pancakes cool completely, then store them in an airtight container in the refrigerator for up to 3 days. To reheat, the best method is in a toaster or a 350°F (175°C) oven for about 5-10 minutes. This will restore some of the crispness to the edges. Microwaving will make them soft and steamy, but it’s fine in a pinch if you’re short on time!
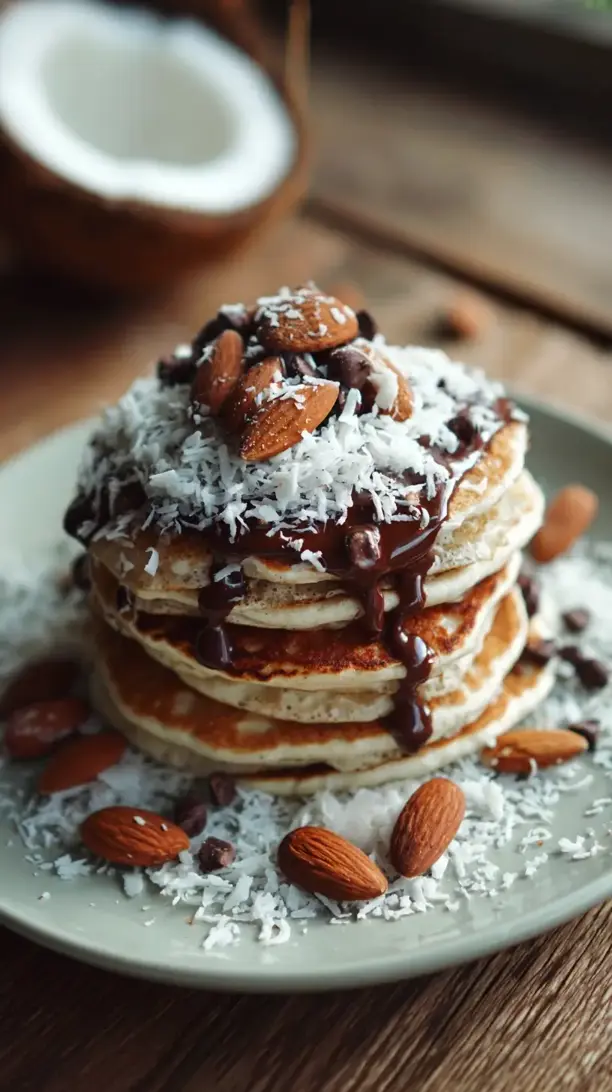
Almond Joy Pancakes
Craving dessert for breakfast? My Almond Joy Pancakes are a decadent, fluffy stack loaded with chocolate, coconut & toasted almonds. An easy, 25-minute recipe for a special morning treat!
Ingredients
Ingredients
-
1 ¼ cups all-purpose flour
-
¼ cup unsweetened cocoa powder
-
2 tbsp granulated sugar
-
1 tbsp baking powder
-
½ tsp salt
-
1 large egg
-
1 ¼ cups milk (whole milk is great for richness)
-
3 tbsp melted butter (or coconut oil, plus more for the pan)
-
1 tsp vanilla extract
-
½ cup sweetened shredded coconut
-
⅓ cup dark chocolate chips
-
¼ cup sliced almonds (toasted, for serving)
-
Maple syrup or chocolate syrup (for serving)
Instructions
-
First, let's get our dry ingredients together. In your large mixing bowl, whisk together the flour, cocoa powder, sugar, baking powder, and salt. You'll want to whisk this really well to ensure the cocoa and baking powder are evenly distributed throughout the flour—this prevents little bitter pockets of pure cocoa in your finished pancakes. It should look like a uniform, chocolatey powder.01
-
Now, in a separate smaller bowl or a large measuring cup, whisk the egg, milk, melted butter, and vanilla extract until they're fully combined. The melted butter might try to solidify a bit when it hits the cold milk, but just keep whisking—it'll be fine. This is our wet ingredient base.02
-
Here's the crucial part. Pour the wet ingredients into the dry ingredients. Using your whisk, gently stir everything together. You'll notice lumps forming—that's perfect! Stop stirring the moment you no longer see large streaks of dry flour. It should be a thick, shaggy batter. Now, gently fold in the shredded coconut and chocolate chips with a spatula. Just a few folds to incorporate them.03
-
Time to cook! Heat your skillet or griddle over medium heat. I like to test if it's ready by flicking a few drops of water onto the surface—if they sizzle and dance, you're good to go. Lightly grease the surface with a little butter or oil. Using a ¼-cup measure or a ladle, pour the batter onto the hot skillet. You'll see bubbles start to form on the surface after about 2 minutes.04
-
Wait for those bubbles to pop and leave little holes before you flip. This is your sign that the bottom is cooked and the top is setting. This usually takes 2-3 minutes. Slide your spatula underneath and flip each pancake with confidence! They should be a deep, matte brown. Cook for another 1-2 minutes on the second side until cooked through.05
-
As the pancakes are done, transfer them to a plate. You can keep them warm in a single layer on a baking sheet in a 200°F (95°C) oven if you're making a big batch. Just be careful not to stack them while they're super hot, or they'll get steamy and lose some of their delightful crisp edges.06