
Why You’ll Love This Pumpkin Cranberry Cookies
- The perfect texture. We’re aiming for a soft, almost muffin-top-like cookie here—cakey and tender, not thin and crispy. It’s the kind of cookie that stays moist for days, thanks to the pumpkin.
- A brilliant flavor balance. The warm, earthy spices from the pumpkin pie blend mingle so beautifully with the bright, sharp pop of the dried cranberries. It’s a sweet-and-tart situation that keeps you coming back for just one more.
- Incredibly simple to make. Honestly, this is a one-bowl situation (mostly!). You don’t need a mixer, and there’s no fussy chilling of the dough. It’s a straightforward mix, scoop, and bake kind of recipe.
- They feel special. These cookies look and taste like you spent hours in the kitchen, with their golden-orange hue and jewel-like cranberries. They’re perfect for cookie swaps, holiday platters, or just because you deserve a treat.
Ingredients & Tools
- 240 g (2 cups) all-purpose flour
- 1 tsp baking soda
- 1/2 tsp baking powder
- 1/2 tsp salt
- 2 tsp pumpkin pie spice
- 115 g (1/2 cup or 1 stick) unsalted butter, melted and slightly cooled
- 150 g (3/4 cup) light brown sugar, packed
- 50 g (1/4 cup) granulated sugar
- 1 large egg, at room temperature
- 1 tsp vanilla extract
- 225 g (1 cup) pure pumpkin purée (not pumpkin pie filling!)
- 120 g (1 cup) dried cranberries
Tools: A large mixing bowl, a whisk, a spatula, a baking sheet, and parchment paper or a silicone baking mat.
You’ll notice I specify weights for the flour and sugar—a little kitchen scale is a game-changer for consistent baking. And that note about the pumpkin purée is crucial; you want the plain, unsweetened stuff. The melted butter makes the dough a dream to mix by hand and contributes to that wonderfully soft texture.
Serves: Makes about 18-20 cookies | Prep Time: 15 minutes | Cook Time: 12-14 minutes | Total Time: About 30 minutes
Before You Start: Tips & Ingredient Notes
- Pumpkin Purée Power. This is the star, so get it right. Use 100% pure pumpkin purée, not the pre-spiced pie filling. The consistency can vary by brand; if yours seems particularly watery, you can blot it gently with a paper towel.
- Room Temperature Egg is Key. I know it’s a small thing, but a cold egg hitting warm melted butter can cause the butter to seize up a little. Taking the egg out 30 minutes before you start ensures a smooth, emulsified batter.
- Don’t Overmix the Dough. Once you add the flour, switch to a spatula and mix just until the last streaks of flour disappear. Overmixing develops gluten, which can lead to tougher, denser cookies—the opposite of what we want!
- The Cranberry Conundrum. Dried cranberries are perfect as-is, but if you want them to be extra soft and plump in your cookies, try soaking them in warm water or orange juice for 10 minutes before adding them to the dough. Just be sure to pat them dry thoroughly.
How to Make Pumpkin Cranberry Cookies
Step 1: First, get your oven preheating to 175°C (350°F). This gives it plenty of time to reach the perfect temperature. Line your baking sheet with parchment paper or a silicone mat—this prevents sticking and makes cleanup a breeze. Now, in that large mixing bowl, whisk together the flour, baking soda, baking powder, salt, and pumpkin pie spice. Whisk it really well so those leaveners and spices are evenly distributed throughout the flour. This is our dry team, ready to go.
Step 2: In a separate, medium-sized bowl (or you can just make a well in the center of your dry ingredients), combine the melted (and slightly cooled!) butter with the brown and granulated sugars. Whisk them together until they’re smooth and well-combined. You’ll notice the mixture looks a little like wet sand. Now, whisk in the room-temperature egg and vanilla extract until the mixture is smooth and glossy.
Step 3: Here comes the pumpkin! Add the pumpkin purée to the wet ingredients and whisk until everything is fully incorporated. The batter will be a beautiful orange color and quite loose—that’s exactly what we want. Now, pour these gorgeous wet ingredients into the bowl with the dry ingredients.
Step 4: This is the crucial moment. Put the whisk away and grab your spatula. Gently fold the dry ingredients into the wet. Use a sweeping motion, scraping from the bottom of the bowl and folding over. Mix just until you no longer see any pockets of dry flour. It’s okay if the dough is a bit lumpy. Overmixing is the enemy of tenderness!
Step 5: Time for the star ingredient. Sprinkle the dried cranberries over the dough and fold them in gently until they’re evenly distributed. The dough will be quite soft and sticky—this is normal and right. It’s what gives us that wonderfully cakey texture.
Step 6: Using a cookie scoop or two spoons, drop rounded tablespoons of dough onto your prepared baking sheet, leaving about 5 cm (2 inches) between each one. They won’t spread a huge amount, but they need a little room to puff up. You can gently flatten the tops just a tad with damp fingers if you like a flatter cookie.
Step 7: Bake for 12 to 14 minutes. The edges should be set and just starting to turn a light golden brown, but the centers will still look soft and puffy. Don’t wait for them to look fully firm—they’ll continue to cook on the hot baking sheet out of the oven. That soft center is the secret to their moistness.
Step 8: Let the cookies cool on the baking sheet for at least 10 minutes before transferring them to a wire rack to cool completely. I know it’s tempting, but this resting time is essential for them to set up properly. They’re delicious warm, but they’re even better once they’ve fully cooled and the flavors have had a chance to meld.
Serving Suggestions
Complementary Dishes
- A sharp cheddar cheese plate — The salty, tangy flavor of a good aged cheddar is a fantastic contrast to the sweet, spiced cookies. It’s a classic fall pairing that feels a little sophisticated.
- A bowl of creamy butternut squash soup — For a lovely light lunch or dinner, these cookies make a sweet ending that continues the autumnal theme perfectly.
Drinks
- Hot spiced apple cider — The warm spices in the cider echo the spices in the cookie, creating a wonderfully cohesive and cozy experience.
- A cold glass of milk — It’s a classic for a reason. The creaminess of the milk is the perfect partner to the soft, cakey texture of the cookie.
- Earl Grey tea — The bergamot in the tea adds a lovely citrusy note that plays beautifully off the tart cranberries.
Something Sweet
- A simple scoop of vanilla bean ice cream — Sandwich a scoop between two slightly warmed cookies for the ultimate autumnal ice cream sandwich. The warm cookie and cold ice cream is pure magic.
- A dollop of sweetened whipped cream — For a simple, elegant dessert, serve the cookies with a cloud of lightly sweetened whipped cream on the side.
Top Mistakes to Avoid
- Mistake: Using pumpkin pie filling. This is the number one error! Pie filling has sugar and spices already added, which will throw off the balance of our recipe and likely make the cookies far too sweet and wet.
- Mistake: Overbaking the cookies. I’ve messed this up before too—you wait for them to look “done” in the center, but by then they’re dry. Pull them when the edges are set but the centers are still soft. They’ll firm up as they cool.
- Mistake: Measuring flour incorrectly. Scooping the flour directly from the bag packs it down, leading to too much flour and dry, dense cookies. The best method is to spoon the flour into your measuring cup and level it off.
- Mistake: Adding the cranberries too early. If you mix them in with the dry ingredients, they can get coated in flour and might not distribute as evenly. Folding them in at the very end ensures every bite has a pop of fruit.
Expert Tips
- Tip: Brown your butter. For a next-level, nutty, caramel-like flavor, take the extra five minutes to brown your butter before adding it to the sugars. Let it cool slightly so it’s not scorching hot, but the flavor it adds is incredible.
- Tip: Add a sprinkle of flaky salt. Right when the cookies come out of the oven, give them a very light sprinkle of flaky sea salt. It enhances all the other flavors and creates a more complex taste profile.
- Tip: Create a flavor variation. Feel free to swap half the cranberries for white chocolate chips or toasted pecans. The combination of cranberry and white chocolate is particularly festive and delicious.
- Tip: For a crispier edge, try chilling the dough for 30 minutes before scooping and baking. This prevents the cookies from spreading as much, resulting in a slightly thicker cookie with a bit more structure.
FAQs
Can I make these cookies gluten-free?
Absolutely! You can substitute the all-purpose flour with a 1:1 gluten-free baking blend. I’ve had great success with brands like Bob’s Red Mill or King Arthur Measure for Measure. The texture might be a tiny bit more delicate, but they’ll still be soft and delicious. Just be sure your baking blend includes xanthan gum, which helps bind the ingredients together in place of gluten.
Why are my cookies so cakey and not chewy?
That’s the intended texture for this recipe! The high moisture content from the pumpkin purée and the specific balance of leaveners (both baking soda and powder) create a soft, muffin-like crumb. If you’re looking for a chewier cookie, this might not be the recipe for you—but honestly, this cakey texture is what makes them so unique and perfect for fall.
Can I freeze the dough or the baked cookies?
Yes to both! To freeze the dough, scoop it into balls and freeze them solid on a baking sheet before transferring to a freezer bag. You can bake them straight from frozen, just add 1-2 minutes to the baking time. Baked cookies freeze beautifully for up to 3 months. Let them thaw at room temperature, or warm them gently in the oven.
My dough is really sticky. Is that normal?
Yes, it is! Because of the pumpkin purée, this is a very soft, wet dough. That’s why a cookie scoop is so helpful. If it’s unmanageable, you can chill it for 15-20 minutes to make it a bit firmer and easier to handle, but don’t worry—the stickiness is a sign of a moist cookie to come.
Can I use fresh or frozen cranberries instead of dried?
You can, but it will change the recipe significantly. Fresh or frozen cranberries are much more tart and contain a lot of water. If you use them, I’d recommend chopping them roughly and tossing them in a tablespoon of the recipe’s flour first to prevent sinking. Be prepared for a much tarter, juicier cookie and a longer baking time by a few minutes.
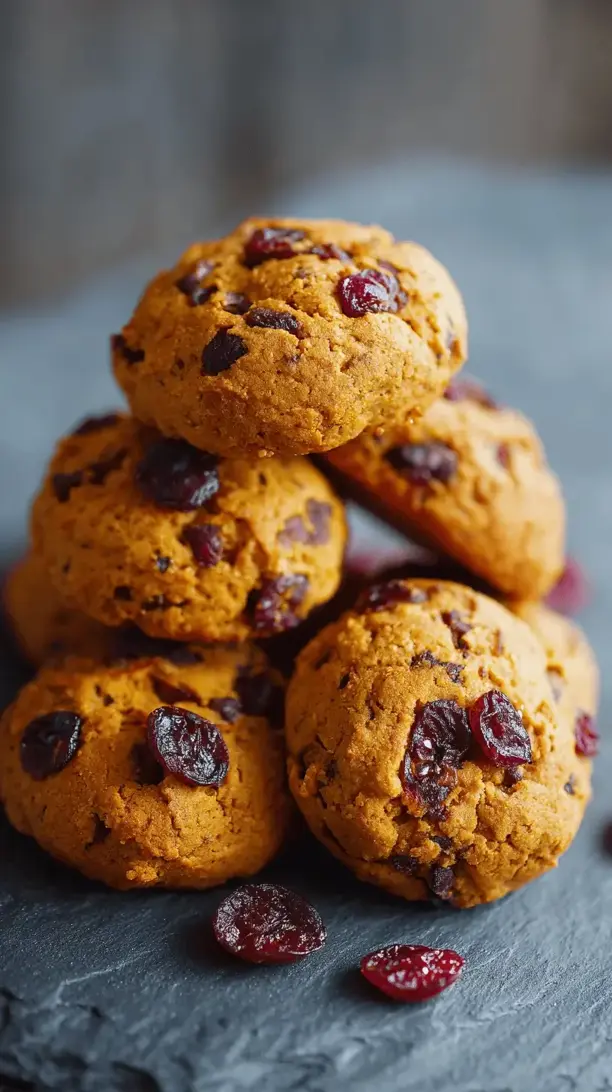
Pumpkin Cranberry Cookies
Bake the ultimate soft & cakey Pumpkin Cranberry Cookies! My easy, one-bowl recipe delivers perfect autumn flavor with sweet pumpkin & tart cranberries. Pure cozy happiness!
Ingredients
Ingredients
-
240 g all-purpose flour (2 cups)
-
1 tsp baking soda
-
0.5 tsp baking powder
-
0.5 tsp salt
-
2 tsp pumpkin pie spice
-
115 g unsalted butter (1/2 cup or 1 stick, melted and slightly cooled)
-
150 g light brown sugar (3/4 cup, packed)
-
50 g granulated sugar (1/4 cup)
-
1 large egg (at room temperature)
-
1 tsp vanilla extract
-
225 g pure pumpkin purée (1 cup, not pumpkin pie filling)
-
120 g dried cranberries (1 cup)
Instructions
-
First, get your oven preheating to 175°C (350°F). This gives it plenty of time to reach the perfect temperature. Line your baking sheet with parchment paper or a silicone mat—this prevents sticking and makes cleanup a breeze. Now, in that large mixing bowl, whisk together the flour, baking soda, baking powder, salt, and pumpkin pie spice. Whisk it really well so those leaveners and spices are evenly distributed throughout the flour. This is our dry team, ready to go.01
-
In a separate, medium-sized bowl (or you can just make a well in the center of your dry ingredients), combine the melted (and slightly cooled!) butter with the brown and granulated sugars. Whisk them together until they’re smooth and well-combined. You’ll notice the mixture looks a little like wet sand. Now, whisk in the room-temperature egg and vanilla extract until the mixture is smooth and glossy.02
-
Here comes the pumpkin! Add the pumpkin purée to the wet ingredients and whisk until everything is fully incorporated. The batter will be a beautiful orange color and quite loose—that’s exactly what we want. Now, pour these gorgeous wet ingredients into the bowl with the dry ingredients.03
-
This is the crucial moment. Put the whisk away and grab your spatula. Gently fold the dry ingredients into the wet. Use a sweeping motion, scraping from the bottom of the bowl and folding over. Mix just until you no longer see any pockets of dry flour. It’s okay if the dough is a bit lumpy. Overmixing is the enemy of tenderness!04
-
Time for the star ingredient. Sprinkle the dried cranberries over the dough and fold them in gently until they’re evenly distributed. The dough will be quite soft and sticky—this is normal and right. It’s what gives us that wonderfully cakey texture.05
-
Using a cookie scoop or two spoons, drop rounded tablespoons of dough onto your prepared baking sheet, leaving about 5 cm (2 inches) between each one. They won’t spread a huge amount, but they need a little room to puff up. You can gently flatten the tops just a tad with damp fingers if you like a flatter cookie.06
-
Bake for 12 to 14 minutes. The edges should be set and just starting to turn a light golden brown, but the centers will still look soft and puffy. Don’t wait for them to look fully firm—they’ll continue to cook on the hot baking sheet out of the oven. That soft center is the secret to their moistness.07
-
Let the cookies cool on the baking sheet for at least 10 minutes before transferring them to a wire rack to cool completely. I know it’s tempting, but this resting time is essential for them to set up properly. They’re delicious warm, but they’re even better once they’ve fully cooled and the flavors have had a chance to meld.08


