
Why You’ll Love This Dark Chocolate Peanut Butter Cups
- They’re surprisingly simple. You don’t need any fancy equipment or candy-making expertise. If you can melt chocolate and stir a bowl, you’re more than halfway there.
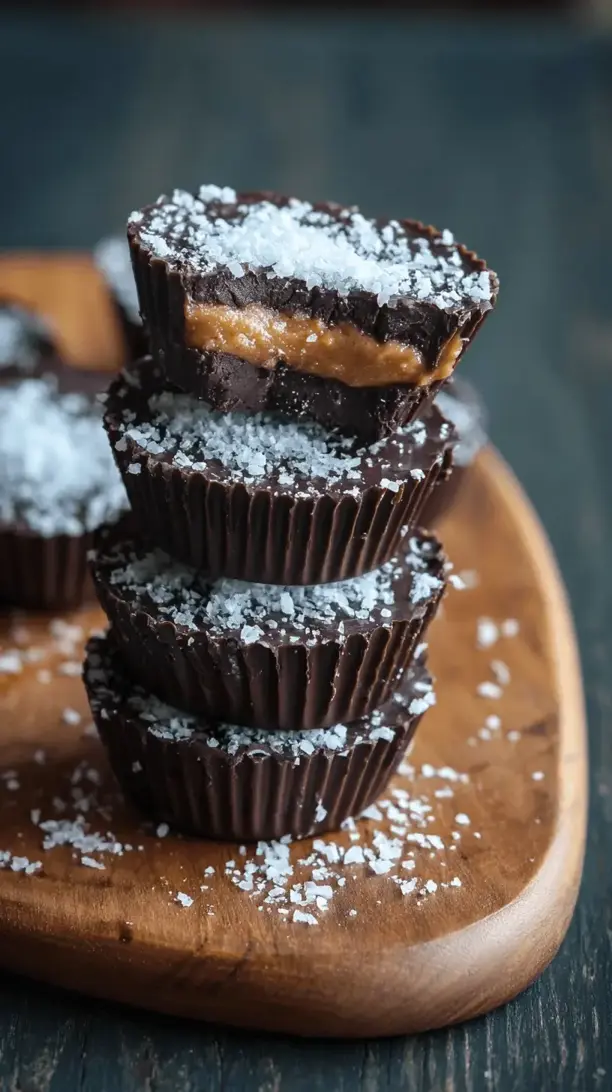
- You’re in complete control. This is your chance to customize. Love a salty kick? Add flaky sea salt on top. Prefer a sweeter center? Use a creamy, classic peanut butter. It’s all up to you.
- The texture is pure magic. The contrast between the firm, snappy dark chocolate shell and the soft, almost melt-in-your-mouth peanut butter filling is an experience you just don’t get from mass-produced treats.
- They make the most thoughtful gift. A little box of these homemade delights shows you care in a way a store-bought box never could. They’re perfect for holidays, hostess gifts, or just because.
Ingredients & Tools
- 300 g high-quality dark chocolate (around 70% cocoa), chopped, or high-quality dark chocolate chips
- 1 cup creamy natural peanut butter (the kind where the oil separates)
- 1/4 cup powdered sugar (or maple syrup for a refined sugar-free option)
- 2 tablespoons coconut flour or almond flour
- 1/4 teaspoon fine sea salt, plus more for sprinkling
- 1 teaspoon pure vanilla extract
- 1 tablespoon coconut oil, divided (optional, but helps with smooth melting)
Tools: Standard 12-cup muffin tin, paper or silicone cupcake liners, a double boiler (or a heatproof bowl over a pot of simmering water), two small bowls, a spoon or small spatula.
The quality of your chocolate really is the star here, so choose one you enjoy eating on its own. For the peanut butter, using a natural variety gives you the best control over the texture and sweetness—plus, you avoid the hydrogenated oils found in many conventional brands.
Serves: 12 | Prep Time: 20 minutes | Cook Time: 5 minutes (melting) | Total Time: 1 hour (includes setting)
Before You Start: Tips & Ingredient Notes
- Why chop the chocolate? If you’re using a bar instead of chips, chopping it into small, even pieces helps it melt smoothly and evenly, reducing the risk of seizing.
- The peanut butter matters. I really recommend a natural, stirred-well peanut butter. The oil helps create a wonderfully creamy texture. If you use a stabilized brand like Skippy, the filling will be much stiffer and sweeter—still tasty, but a different experience.
- Don’t skip the coconut flour. This is our secret weapon! It soaks up the natural oils in the peanut butter just enough to give the filling a perfect, sliceable consistency that doesn’t ooze out when you take a bite.
- What about a double boiler? If you don’t have one, no worries. A heatproof bowl snugly set over a pot with an inch of gently simmering water (making sure the bottom of the bowl doesn’t touch the water) works perfectly. The gentle, indirect heat is key.
How to Make Dark Chocolate Peanut Butter Cups
Step 1: Prepare Your Station. First things first, line your muffin tin with the paper or silicone liners. This is a great time to make sure your peanut butter is well-stirred if it’s the natural kind. Having everything measured and ready to go—what chefs call *mise en place*—makes this process flow so smoothly.
Step 2: Create the Peanut Butter Filling. In a medium bowl, combine the peanut butter, powdered sugar (or maple syrup), coconut flour, salt, and vanilla extract. Stir until everything is completely blended and smooth. You’ll notice the mixture thicken up slightly as the flour incorporates—that’s exactly what we want. Set this aside.
Step 3: Melt the Chocolate. Set up your double boiler. Add about two-thirds of the chopped chocolate (or chips) and half a tablespoon of the coconut oil to the top bowl. The oil is optional, but it gives the chocolate a beautiful glossy finish and a slightly softer snap. Melt over low heat, stirring frequently with a dry spatula or spoon until the chocolate is completely smooth and liquid. Remove the bowl from the heat.
Step 4: The First Chocolate Layer. Using a small spoon, put about a teaspoon of melted chocolate into the bottom of each liner. Now, here’s a pro-tip: use the back of the spoon to spread the chocolate up the sides of the liner, creating a little chocolate “cup.” This helps encase the filling. Don’t worry about perfection! Once all twelve have a base, pop the whole tin into the freezer for about 5 minutes to let the chocolate set firm.
Step 5: Add the Peanut Butter Layer. Take the tin out of the freezer. Scoop up a portion of the peanut butter mixture—about a heaping teaspoon—roll it into a small ball, and then gently flatten it into a disc. Place this disc right on top of the set chocolate base. Repeat for all the cups. The goal is to leave a small border around the edge so the top chocolate layer can seal everything in.
Step 6: The Final Chocolate Seal. If the remaining melted chocolate has thickened up, place the bowl back over the double boiler for a minute to re-liquify it. You can also add the remaining third of your chopped chocolate to help temper it and cool it down. Spoon the melted chocolate over each peanut butter disc, covering it completely and sealing the edges. Gently tap the tin on the counter to settle the top layer and create a smooth finish.
Step 7: The Grand Finale—Setting. This is the hardest part: waiting. For a speedy set, place the muffin tin in the refrigerator for at least 30-40 minutes. For a slower, more stable set that reduces blooming (those white streaks on chocolate), you can leave them at cool room temperature for a couple of hours. They’re ready when the chocolate is firm to the touch.
Serving Suggestions
Complementary Dishes
- A scoop of vanilla bean ice cream — The simplicity of cold, creamy vanilla is the ultimate contrast to the rich, room-temperature chocolate and peanut butter. It turns a candy into a decadent dessert.
- A bowl of fresh berries like raspberries or strawberries — Their bright, tart acidity cuts through the richness beautifully, cleansing the palate between each blissful bite.
Drinks
- A glass of cold whole milk — It’s a classic for a reason. The creaminess is a perfect partner, and it just feels right.
- A bold cup of black coffee — The bitterness of a good espresso or French press coffee highlights the deep, complex notes of the dark chocolate, creating a truly sophisticated pairing.
Something Sweet
- A simple shortbread cookie — The buttery, crumbly texture of shortbread provides a lovely textural counterpoint and isn’t overly sweet, letting the peanut butter cups remain the star.
Top Mistakes to Avoid
- Mistake: Getting water in your melting chocolate. Even a single drop of water can cause the chocolate to “seize,” turning it into a grainy, thick mess. Always ensure your bowls, spoons, and hands are completely dry. I’ve messed this up before too, and it’s a heartbreaker.
- Mistake: Using the wrong peanut butter. As mentioned, a highly processed, oil-free peanut butter will yield a very stiff, dry filling. Sticking to a natural style gives you that dreamy, creamy texture we’re after.
- Mistake: Skipping the chill after the first chocolate layer. If you add the peanut butter filling to soft chocolate, they’ll mix together and you’ll lose that beautiful, distinct layered effect. The five minutes in the freezer is non-negotiable for a perfect cup.
- Mistake: Rushing the final set. If you try to unmold them before they’re fully firm, you risk breaking the delicate chocolate shell. Patience is a virtue here, I promise.
Expert Tips
- Tip: Temper your chocolate for a professional snap and shine. This sounds fancy, but it’s manageable! After melting 2/3 of your chocolate, take it off the heat and stir in the remaining 1/3 of unmelted chocolate until it’s all melted and cooled to about 88-90°F (31-32°C). This stabilizes the cocoa butter, resulting in a crisp snap and a glossy finish that doesn’t bloom.
- Tip: Use a small cookie scoop for the filling. For perfectly even and mess-free peanut butter portions, a small spring-loaded cookie scoop (like a #60 or a teaspoon-sized scoop) is a game-changer. It speeds things up and keeps your hands clean.
- Tip: Add a surprise in the center. For a next-level treat, press a single roasted, salted peanut or a few crunchy peanut butter chips into the center of the peanut butter disc before adding the top chocolate layer. It’s a wonderful little textural surprise.
- Tip: For easy removal, use silicone liners. If you have them, silicone cupcake liners are fantastic here. The peanut butter cups pop out effortlessly without any sticking, and they’re reusable!
FAQs
Can I use milk chocolate instead of dark chocolate?
Absolutely, you can! The recipe method stays exactly the same. Just know that milk chocolate is sweeter and softer than dark chocolate, so the final cups will have a milder, creamier chocolate flavor and a less firm snap. It’s a great option for those who prefer a less intense chocolate experience. Honestly, it’s a delicious variation—like a gourmet version of a classic Reese’s.
How should I store these, and how long do they last?
Store them in an airtight container in the refrigerator for up to two weeks. They also freeze beautifully for up to three months. Just layer them between parchment paper in a freezer-safe container. Let them thaw in the fridge for a few hours or at room temperature for about 15 minutes before eating. The cold from the fridge makes the chocolate extra snappy, which I love.
My chocolate became thick and grainy. What happened?
Ah, that’s a classic case of seized chocolate. It happens when a tiny bit of moisture gets into the melting chocolate. Unfortunately, it’s very difficult to fix. Your best bet is to repurpose it—stir in some warm cream to make a chocolate sauce for ice cream! To avoid it next time, be extra vigilant about keeping everything completely dry.
Can I make these with a different nut butter?
Yes, this recipe is very adaptable! Almond butter, cashew butter, or even sunflower seed butter (for a nut-free version) work wonderfully. Just keep in mind that different nut butters have different oil contents and textures. You might need to adjust the amount of coconut flour slightly—start with the recipe amount and add a bit more if the mixture seems too oily or soft to hold its shape.
Why did white streaks appear on my chocolate after they set?
Those white streaks are called “bloom.” It’s usually caused by temperature fluctuation—like moving the chocolate from a cold fridge to a warm room too quickly. While it might not look as pretty, it’s perfectly safe to eat and the taste is unaffected! For a bloom-free finish, try the slow-set method at a cool room temperature, or properly temper your chocolate as described in the expert tips.


