
Why You’ll Love This Cheesy Cauliflower Breadsticks
- They’re surprisingly satisfying. You get that wonderful cheesy, garlicky breadstick experience without the heaviness that can sometimes follow. The texture is firm enough to hold a dip but tender on the inside.
- Incredibly versatile. Think of this as a fantastic base recipe. Once you master the basic version, you can start adding your favorite herbs, different cheeses, or even some chopped pepperoni for a pizza-inspired twist.
- A great way to sneak in veggies. If you have veggie-hesitant folks around, this is a brilliant gateway. The cauliflower flavor is very mild, letting the cheese and seasonings really shine through.
- They come together faster than you think. While there’s a bit of waiting for the cauliflower to cool, the active prep time is quite short. In less than an hour, you can have a warm, homemade snack on the table.
Ingredients & Tools
- 1 large head of cauliflower, cut into florets (about 4-5 cups once riced)
- 1 large egg, lightly beaten
- 1 cup shredded mozzarella cheese, divided
- 1/4 cup grated Parmesan cheese
- 1/2 teaspoon garlic powder
- 1/2 teaspoon dried oregano
- 1/4 teaspoon kosher salt
- 1/4 teaspoon black pepper
- Optional for topping: 2 tablespoons chopped fresh parsley or basil
Tools: A box grater or food processor, a clean kitchen towel or a few layers of cheesecloth, a baking sheet, and parchment paper.
The key player here is, of course, the cauliflower. You’ll want a nice, fresh head that feels heavy for its size. The mozzarella is your main glue and source of that iconic stretch, while the Parmesan adds a salty, nutty depth. Don’t skip the step of wringing out the cauliflower—it’s the secret to a non-soggy final product!
Serves: 4 | Prep Time: 20 minutes | Cook Time: 25 minutes | Total Time: 45 minutes
Before You Start: Tips & Ingredient Notes
- Don’t skip the squeezing! This is the single most important step. Cauliflower holds a ton of water, and if you don’t remove most of it, your breadsticks will be steamed and mushy instead of firm and bread-like.
- What’s the best way to “rice” the cauliflower? A food processor is the fastest method—just pulse until it looks like coarse crumbs. No processor? A standard box grater on the large holes works perfectly well, it just takes a bit more arm power.
- Can I use pre-riced cauliflower? Absolutely, it’s a great time-saver! Just be sure to thaw it completely if it’s frozen and give it a really good squeeze in that towel. You might be surprised by how much liquid still comes out.
- Get creative with seasonings. The garlic powder and oregano are a classic start, but feel free to add a pinch of onion powder, some Italian seasoning blend, or even a little smoked paprika for a different flavor profile.
How to Make Cheesy Cauliflower Breadsticks
Step 1: Prepare the Cauliflower Rice. Preheat your oven to 425°F (220°C). Line a baking sheet with parchment paper. Working in batches if necessary, place the cauliflower florets into your food processor and pulse until they’re broken down into rice-sized pieces. You’ll know it’s ready when it has a texture similar to couscous or coarse sand. Be careful not to over-process it into a puree.
Step 2: Cook and Drain the Cauliflower. Now, you have two options. You can spread the riced cauliflower on the prepared baking sheet and bake for about 15 minutes to dry it out, stirring halfway. Or, for a faster method, place the riced cauliflower in a microwave-safe bowl, cover it, and microwave on high for 4-5 minutes. Either way, the goal is to cook it just enough so it’s pliable. Let it cool until you can handle it comfortably.
Step 3: The All-Important Squeeze. Transfer the cooked (and now slightly cooled) cauliflower onto a clean, thin kitchen towel or a few layers of cheesecloth. Gather the edges of the towel and twist it tightly over the sink. Squeeze with all your might! You will be amazed at the amount of water that comes out. Keep squeezing until no more liquid drips out. This step is crucial for the right texture.
Step 4: Mix the Dough. Place the squeezed-dry cauliflower into a clean, dry bowl. Add the beaten egg, 3/4 cup of the mozzarella cheese (reserving the rest for the top), the Parmesan, garlic powder, oregano, salt, and pepper. Mix everything together with a fork until it’s very well combined. It should start to clump together and feel a bit like a wet dough.
Step 5: Shape the Breadsticks. Transfer the cauliflower mixture onto the parchment-lined baking sheet. Using your hands, press and shape it into a rectangle that’s about 1/2-inch thick. Try to get the thickness as even as possible so everything bakes uniformly. You can use a spatula to help straighten the edges.
Step 6: The First Bake. Pop the shaped cauliflower crust into the preheated oven and bake for about 15-20 minutes, or until the edges start to turn a beautiful golden brown and the top feels set to the touch. This initial bake firms up the base so it can hold the extra cheese.
Step 7: Add the Final Cheese and Bake Again. Carefully remove the baking sheet from the oven. Sprinkle the remaining 1/4 cup of mozzarella cheese evenly over the top. Return it to the oven for another 5-7 minutes, or until the cheese is completely melted, bubbly, and maybe even has a few golden spots.
Step 8: Slice and Serve. Take the baking sheet out of the oven and let the giant breadstick rest for a couple of minutes—this makes it easier to slice. Use a pizza cutter or a sharp knife to slice it into breadstick-sized strips. Sprinkle with fresh parsley or basil if you’re using it, and serve immediately with warm marinara sauce for dipping.
Serving Suggestions
Complementary Dishes
- A big, fresh garden salad — The crisp, cool greens with a tangy vinaigrette provide a perfect contrast to the warm, cheesy richness of the breadsticks.
- Your favorite bowl of pasta — Think of these as the ultimate sidekick to a classic spaghetti and meatballs or a creamy fettuccine Alfredo. They’re perfect for sopping up any extra sauce.
- A hearty soup or chili — Dunking these breadsticks into a warm, comforting bowl of tomato soup or a robust bean chili is a next-level cozy meal experience.
Drinks
- A crisp, chilled Pinot Grigio — The bright acidity and citrus notes in the wine cut through the richness of the cheese beautifully.
- A light Italian lager — The effervescence and mild bitterness are a classic pairing for anything cheesy and pizza-adjacent.
- Sparkling water with a lemon wedge — For a non-alcoholic option, the bubbles and citrus are wonderfully refreshing and palate-cleansing.
Something Sweet
- A simple affogato — A scoop of vanilla gelato or ice cream with a shot of hot espresso poured over it. It’s an elegant, easy dessert that contrasts the savory meal perfectly.
- Dark chocolate almond clusters — Just a few pieces of something dark and slightly salty after the meal feels satisfying without being too heavy.
- Lemon sorbet — The ultimate palate cleanser. Its sharp, clean, citrusy flavor is the perfect finish after a cheesy, garlicky dinner.
Top Mistakes to Avoid
- Mistake: Not squeezing the cauliflower enough. I’ve messed this up before too, thinking a few squeezes was sufficient. It’s not. You really need to wring it out until it feels quite dry. This is the difference between a firm breadstick and a soggy mess.
- Mistake: Skipping the first bake before adding the cheese. If you put all the cheese on top right away, the base won’t have time to set and firm up. You’ll end up with a topping that’s done before the “dough” is cooked through.
- Mistake: Making the crust too thick. Aim for that 1/2-inch thickness. If it’s much thicker, the center might stay a bit soft and moist. A thinner, even layer ensures a crispier edge and a firm bite throughout.
- Mistake: Using fresh mozzarella (the kind in water). The high moisture content in fresh mozzarella can make your breadsticks wet. Stick with low-moisture, pre-shredded or block-style mozzarella for the best results.
Expert Tips
- Tip: Let the steamed cauliflower cool completely before squeezing. This isn’t just about saving your fingers from burns. A cooler cauliflower is actually easier to squeeze thoroughly, allowing you to extract more water for a better final texture.
- Tip: Use a pizza stone for an extra-crispy bottom. If you have a pizza stone, preheat it in the oven and then slide your parchment paper with the breadstick dough directly onto it. The intense heat will give you a fantastically crisp crust.
- Tip: Get creative with your toppings after baking. Once the cheese is melted, try a drizzle of chili oil, a sprinkle of red pepper flakes, or even a light drizzle of truffle oil for a gourmet touch. Add these after baking so their flavors stay bright.
- Tip: Reheat leftovers in the oven or toaster oven. To maintain the best texture, avoid the microwave for reheating. A few minutes in a hot oven or toaster oven will bring back the crispness and melt the cheese perfectly.
FAQs
Can I make these cauliflower breadsticks ahead of time?
You can! Prepare the recipe up through shaping the “dough” on the baking sheet and doing the first bake (without the top cheese). Let it cool completely, then cover and refrigerate for up to 24 hours. When you’re ready to serve, add the cheese and bake for 10-12 minutes from cold, until heated through and bubbly. The texture might be a tiny bit softer, but it’s a great time-saver for entertaining.
Why are my breadsticks soggy?
This almost always comes down to moisture. The most common culprits are: 1) not squeezing the cauliflower enough—really go for it! 2) the cauliflower wasn’t cooked (steamed or baked) before squeezing, or 3) the crust wasn’t baked long enough before adding the cheese. Ensuring each step properly removes or evaporates moisture is key to a firm, non-soggy result.
Can I freeze these?
Yes, they freeze quite well after they are fully baked and cooled. Slice them into breadsticks, place them in a single layer on a baking sheet to freeze solid (this prevents sticking), then transfer to a freezer bag. To reheat, bake frozen breadsticks on a parchment-lined sheet at 375°F (190°C) for 10-15 minutes, until hot and crisp. I don’t recommend freezing the unbaked dough.
Are these gluten-free and low-carb?
Yes, they are naturally gluten-free since the base is made from cauliflower, egg, and cheese. They are also significantly lower in carbohydrates and calories compared to traditional flour-based breadsticks, making them a popular choice for those following specific dietary plans. Always check your specific ingredient labels to be sure.
Can I add other ingredients to the dough?
Absolutely! This is a fantastic base for customization. Try mixing in 1/4 cup of finely chopped sun-dried tomatoes, a handful of chopped fresh spinach, or some cooked and crumbled Italian sausage into the dough mixture before the first bake. Just be mindful that adding very wet ingredients might require a little extra squeezing or a minute or two longer in the initial bake.
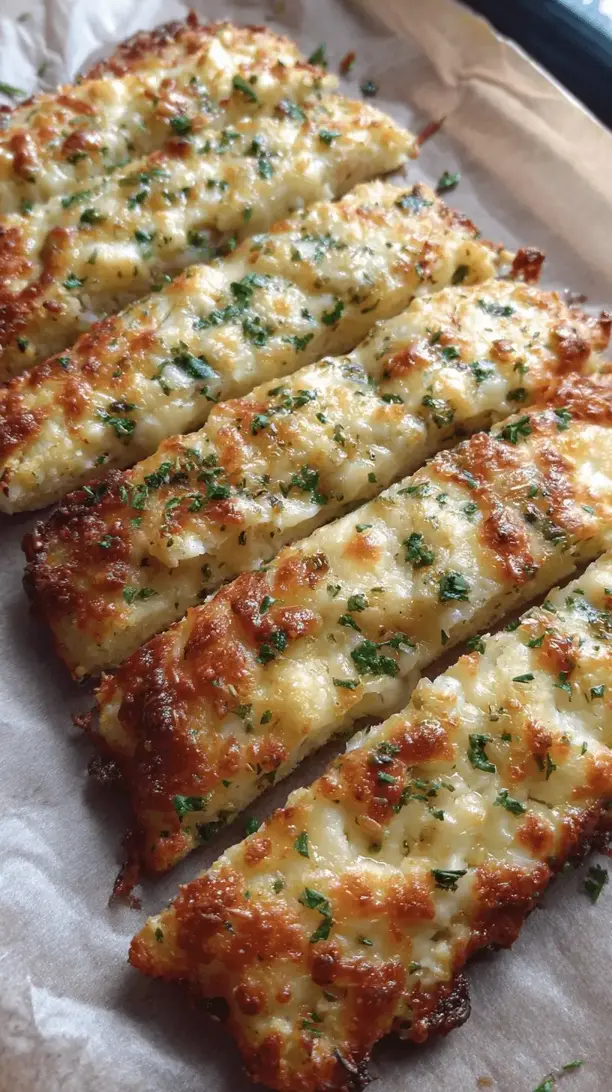
Cheesy Cauliflower Breadsticks
Discover the secret to incredible Cheesy Cauliflower Breadsticks! This easy, low-carb recipe delivers a warm, garlicky, pull-apart snack that's surprisingly satisfying. Perfect for dipping.
Ingredients
Ingredients
-
1 large head cauliflower (cut into florets (about 4-5 cups once riced))
-
1 large egg (lightly beaten)
-
1 cup shredded mozzarella cheese (divided)
-
1/4 cup grated Parmesan cheese
-
1/2 teaspoon garlic powder
-
1/2 teaspoon dried oregano
-
1/4 teaspoon kosher salt
-
1/4 teaspoon black pepper
-
2 tablespoons chopped fresh parsley or basil (optional for topping)
Instructions
-
Prepare the Cauliflower Rice. Preheat your oven to 425°F (220°C). Line a baking sheet with parchment paper. Working in batches if necessary, place the cauliflower florets into your food processor and pulse until they're broken down into rice-sized pieces. You'll know it's ready when it has a texture similar to couscous or coarse sand. Be careful not to over-process it into a puree.01
-
Cook and Drain the Cauliflower. Now, you have two options. You can spread the riced cauliflower on the prepared baking sheet and bake for about 15 minutes to dry it out, stirring halfway. Or, for a faster method, place the riced cauliflower in a microwave-safe bowl, cover it, and microwave on high for 4-5 minutes. Either way, the goal is to cook it just enough so it's pliable. Let it cool until you can handle it comfortably.02
-
The All-Important Squeeze. Transfer the cooked (and now slightly cooled) cauliflower onto a clean, thin kitchen towel or a few layers of cheesecloth. Gather the edges of the towel and twist it tightly over the sink. Squeeze with all your might! You will be amazed at the amount of water that comes out. Keep squeezing until no more liquid drips out. This step is crucial for the right texture.03
-
Mix the Dough. Place the squeezed-dry cauliflower into a clean, dry bowl. Add the beaten egg, 3/4 cup of the mozzarella cheese (reserving the rest for the top), the Parmesan, garlic powder, oregano, salt, and pepper. Mix everything together with a fork until it's very well combined. It should start to clump together and feel a bit like a wet dough.04
-
Shape the Breadsticks. Transfer the cauliflower mixture onto the parchment-lined baking sheet. Using your hands, press and shape it into a rectangle that's about 1/2-inch thick. Try to get the thickness as even as possible so everything bakes uniformly. You can use a spatula to help straighten the edges.05
-
The First Bake. Pop the shaped cauliflower crust into the preheated oven and bake for about 15-20 minutes, or until the edges start to turn a beautiful golden brown and the top feels set to the touch. This initial bake firms up the base so it can hold the extra cheese.06
-
Add the Final Cheese and Bake Again. Carefully remove the baking sheet from the oven. Sprinkle the remaining 1/4 cup of mozzarella cheese evenly over the top. Return it to the oven for another 5-7 minutes, or until the cheese is completely melted, bubbly, and maybe even has a few golden spots.07
-
Slice and Serve. Take the baking sheet out of the oven and let the giant breadstick rest for a couple of minutes—this makes it easier to slice. Use a pizza cutter or a sharp knife to slice it into breadstick-sized strips. Sprinkle with fresh parsley or basil if you're using it, and serve immediately with warm marinara sauce for dipping.08


