
Why You’ll Love These Peanut Butter Oat Energy Bars
- They’re incredibly simple. Honestly, if you can stir a bowl, you can make these. There’s no baking involved, which means less mess and less waiting. You just mix, press, and chill.
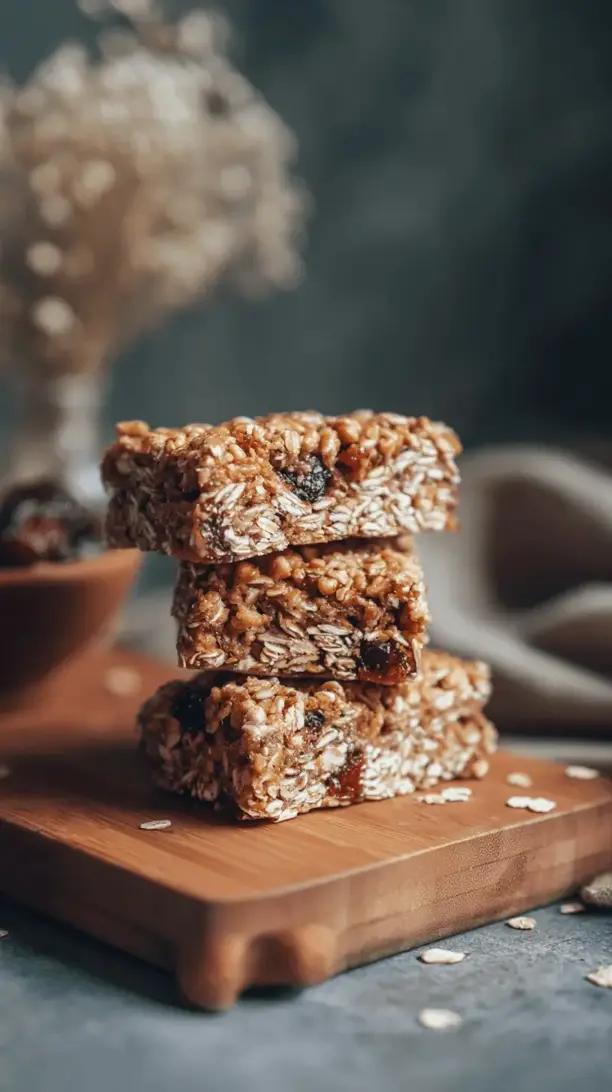
- The perfect texture combo. You get the chewy base from the oats, little pops of crunch from the nuts or seeds, and a delightful stickiness from the dates and peanut butter. It’s a texture party in every bite.
- Endlessly customizable. Don’t like raisins? Use chocolate chips. Allergic to nuts? Use sunflower seed butter. This recipe is a fantastic template you can make your own, depending on what’s in your pantry.
- They actually keep you going. Thanks to the combination of complex carbs, healthy fats, and a bit of protein, these bars provide a steady release of energy instead of a sugary spike and crash. You’ll feel satisfied, not sluggish.
Ingredients & Tools
- 2 cups old-fashioned rolled oats
- 1 cup creamy, natural peanut butter (the kind that’s just peanuts and salt)
- 1/2 cup honey or pure maple syrup
- 1 cup pitted Medjool dates
- 1/4 cup ground flaxseed
- 1 tsp pure vanilla extract
- 1/2 tsp fine sea salt
- 1/2 cup mix-ins like chopped nuts, seeds, or dark chocolate chips
Tools: 8×8 inch baking pan, parchment paper, large mixing bowl, food processor or very good knife, spatula.
The quality of your peanut butter really makes a difference here—using a natural one without added oils or sugars gives you control over the sweetness and ensures a pure, nutty flavor. And those Medjool dates? They’re the secret glue. They’re naturally so soft and sweet, they help bind everything together beautifully.
Serves: 12 bars | Prep Time: 15 minutes | Chill Time: 1 hour | Total Time: 1 hour 15 minutes
Before You Start: Tips & Ingredient Notes
- Why can’t I use instant oats? Old-fashioned rolled oats give these bars the perfect chewy, substantial texture. Instant oats are cut too fine and can make the bars mushy. Stick with the rolled oats for the best result.
- My dates are hard as rocks! No problem at all. If your dates aren’t soft and sticky, simply soak them in very hot water for about 10 minutes. Drain them well and pat dry before using. This little trick brings them back to life.
- Is the flaxseed necessary? It adds a wonderful nutty flavor and a boost of nutrients, but if you don’t have it, you can substitute with an equal amount of oat flour or even more oats. The bars might be a tad less firm, but still delicious.
- What’s the deal with the peanut butter? Using a natural, drippy peanut butter is key. The oil in it helps coat the oats and creates the right consistency. If you use a super-stiff, processed peanut butter, the mixture might be too dry and crumbly.
How to Make Peanut Butter Oat Energy Bars
Step 1: Prepare Your Pan and Dates. First things first, line your 8×8 inch baking pan with parchment paper, leaving some overhang on two opposite sides. This creates little “handles” that will make it super easy to lift the whole slab of bars out later. Trust me, you’ll thank yourself. Now, if your dates aren’t already super soft, give them a quick soak in hot water as mentioned above. Then, pit them if necessary and chop them finely. You can do this by hand, but a quick pulse in a food processor makes it effortless.
Step 2: Combine the Wet Ingredients. In your large mixing bowl, add the peanut butter, honey (or maple syrup), and vanilla extract. Stir it all together until it’s smooth and well-combined. You’ll notice it might be a little thick at first, but keep stirring—it will come together into a glossy, fragrant mixture. This is the base that’s going to hold everything together.
Step 3: Add the Dry Ingredients. Now, dump in the rolled oats, chopped dates, ground flaxseed, and salt. This is also the time to add any of your chosen mix-ins, like chopped almonds, pumpkin seeds, or a handful of chocolate chips. Use a sturdy spatula to mix everything together. It will take a bit of elbow grease! Keep folding and pressing until every single oat is coated in the peanut butter mixture. The mixture should look uniform and hold together when you press it between your fingers.
Step 4: Press and Compact. Transfer the mixture into your prepared pan. Now, here’s the crucial part for getting bars that don’t crumble: press, press, press! Use the bottom of a flat measuring cup or a glass to firmly and evenly compact the mixture into the pan. Really get in there and apply pressure to every corner. The more compact it is now, the better the bars will hold their shape later.
Step 5: Chill Until Firm. Pop the pan into the refrigerator for at least one hour, or until the slab is completely firm. Don’t try to cut them early! This chilling time is non-negotiable—it allows the fats from the peanut butter to solidify and bind all the ingredients together, transforming the loose mixture into solid, sliceable bars.
Step 6: Slice and Store. Once firm, use the parchment paper handles to lift the entire block out of the pan. Place it on a cutting board and use a sharp knife to slice it into 12 bars (or 9 for larger ones). For clean cuts, wipe your knife blade clean between slices. Store them in an airtight container in the fridge for up to two weeks, or you can even freeze them for a couple of months.
Serving Suggestions
Complementary Dishes
- A crisp apple on the side — The fresh, juicy crunch of an apple provides a lovely contrast to the dense, chewy texture of the bar, making it feel like a more complete snack.
- A small bowl of Greek yogurt — The tanginess of the yogurt balances the sweetness of the bar perfectly, and adds an extra hit of protein to keep you full even longer.
Drinks
- A cold glass of milk — It’s a classic for a reason. The creaminess of milk is the ultimate partner for peanut butter, turning your quick snack into a comforting treat.
- A hot cup of black coffee — The bitterness of the coffee cuts through the richness of the bar beautifully, making for a sophisticated and energizing mid-morning break.
Something Sweet
- A few fresh berries — If you’re craving something a little extra but don’t want to overdo it, a handful of raspberries or strawberries adds a burst of freshness and a touch of natural sweetness.
- A small square of dark chocolate — For true indulgence, enjoy a piece of high-quality dark chocolate alongside your bar. It feels decadent but is still perfectly reasonable.
Top Mistakes to Avoid
- Mistake: Not pressing the mixture firmly enough. This is the number one reason bars fall apart. If the mixture is loose in the pan, the bars will be crumbly. Really lean into it and compact that mixture as much as you can.
- Mistake: Skipping the chill time. I know, waiting is hard. But if you try to cut the bars before they are fully set, you’ll end up with a sticky, messy pile of granola instead of neat bars. Patience is key.
- Mistake: Using the wrong peanut butter. I’ve messed this up before too—using a thick, stabilized peanut butter can lead to a dry mixture that won’t bind. The natural, oily kind is essential for the right texture.
- Mistake: Cutting with a dull knife. A dull knife will mash the bars rather than slicing cleanly through them, causing them to break. A sharp knife wiped clean between cuts gives you perfect, professional-looking bars every time.
Expert Tips
- Tip: Toast your oats for deeper flavor. For a next-level bar, spread the rolled oats on a baking sheet and toast them in a 350°F (175°C) oven for 8-10 minutes, until fragrant and lightly golden. Let them cool completely before using. This adds a wonderful nutty depth.
- Tip: Make a “flour” from some of the oats. If you want an even denser, more cohesive bar, take about 1/4 cup of the oats and blitz them in a blender or food processor into a coarse flour. Add this to the mixture—it acts as an additional binder.
- Tip: Get creative with mix-ins. The add-in possibilities are endless! Think shredded coconut, dried cranberries, chopped pretzels for a salty twist, or even a sprinkle of cinnamon or espresso powder into the wet ingredients for a flavor boost.
- Tip: Individually wrap for grab-and-go ease. Once the bars are cut, wrap each one tightly in parchment paper or plastic wrap. This makes them incredibly easy to grab from the fridge or freezer and toss into a bag without sticking together.
FAQs
Can I make these vegan?
Absolutely! It’s a super easy swap. Just use pure maple syrup instead of honey. Make sure your chocolate chips (if using) are dairy-free, and you’ve got yourself a perfect vegan energy bar. The texture and flavor will be exactly the same—delicious.
My mixture seems too dry and crumbly. What can I do?
This usually happens if the peanut butter isn’t oily enough or the dates are a bit dry. Don’t worry, it’s fixable! Simply add another tablespoon of peanut butter or a tiny splash of maple syrup (or even water) and mix it in. The mixture should hold together when pressed. If it’s still dry, add a bit more liquid one teaspoon at a time until it comes together.
How long do these bars last, and how should I store them?
Because they’re made with fresh ingredients and no preservatives, they’re best stored in an airtight container in the refrigerator. They’ll keep beautifully for up to two weeks. You can also freeze them for up to 3 months. Just thaw them in the fridge or at room temperature for a bit before eating.
Can I use a different nut or seed butter?
Of course! Almond butter, cashew butter, or even sunflower seed butter (for a nut-free version) work wonderfully. Just keep in mind that each butter has a slightly different flavor and oil content, so the final taste and texture might vary a little, but it will still be great.
Why are my bars too soft even after chilling?
If your bars are still too soft, it’s likely due to the ratio of wet to dry ingredients. Perhaps your dates were extra large and juicy, or you used a particularly runny nut butter. You can try adding an extra 2-3 tablespoons of oats to the mixture next time to absorb the extra moisture. They’ll still be tasty, just a bit more fudgy!
Peanut Butter Oat Energy Bars
Whip up these no-bake Peanut Butter Oat Energy Bars in just 15 minutes! A simple, healthy snack perfect for on-the-go energy. Chewy, customizable & made with pantry staples.
Ingredients
Ingredients
-
2 cups old-fashioned rolled oats
-
1 cup creamy, natural peanut butter (the kind that's just peanuts and salt)
-
1/2 cup honey or pure maple syrup
-
1 cup pitted Medjool dates
-
1/4 cup ground flaxseed
-
1 tsp pure vanilla extract
-
1/2 tsp fine sea salt
-
1/2 cup mix-ins like chopped nuts, seeds, or dark chocolate chips
Instructions
-
Line an 8×8 inch pan with parchment, leaving overhang. If dates are firm, soak in hot water, drain well, pit, and finely chop or pulse.01
-
In a large bowl, stir together peanut butter, honey (or maple syrup), and vanilla until smooth.02
-
Add rolled oats, chopped dates, ground flaxseed, salt, and optional mix-ins (e.g., nuts, seeds, chocolate). Mix until every oat is coated and the mixture holds when pressed.03
-
Press the mixture very firmly and evenly into the lined pan, using the bottom of a measuring cup or glass to compact.04
-
Refrigerate at least 1 hour until completely firm.05
-
Lift out with the parchment, slice into 12 (or 9 larger) bars, wiping the knife between cuts. Store airtight in the fridge up to 2 weeks or freeze.06


