
Why You’ll Love This Coconut Dark Chocolate Clusters
- Effortless Elegance. Seriously, these look like they came from a fancy chocolatier, but the process is as simple as mixing and dropping. They’re the perfect thing to whip up when you need a impressive-looking homemade gift or a last-minute dessert for guests.
- Texture Heaven. You get this incredible symphony of textures in one little cluster. There’s the crisp snap of the dark chocolate shell, the chewy, slightly caramelized interior of the coconut, and if you add them, the delightful crunch of nuts or seeds. It’s a party in your mouth.
- Infinitely Customizable. This recipe is more of a wonderful template. Don’t like almonds? Use pecans. Want a salty kick? Add a flake of sea salt on top. Feel like a bit of spice? A pinch of cayenne works wonders. It’s your chocolate canvas.
- Wholesome Indulgence. By using high-quality dark chocolate and unsweetened coconut, you’re in control of the sweetness. You can make these as rich or as subtly sweet as you like, which honestly makes them feel like a treat you can enjoy without any guilt.
Ingredients & Tools
- 200 g high-quality dark chocolate (70% cocoa works beautifully), chopped
- 150 g unsweetened shredded or desiccated coconut
- 2 tbsp pure maple syrup or honey
- 1 tbsp coconut oil
- 1/2 tsp pure vanilla extract
- 1/4 tsp fine sea salt
- 50 g toasted almonds or pumpkin seeds (optional, but highly recommended for crunch)
Tools: A medium heatproof bowl, a saucepan for a double boiler (or a microwave-safe bowl), a baking sheet, and parchment paper or a silicone baking mat.
Honestly, the quality of your chocolate is the star here, so don’t skimp! A good bar of dark chocolate will melt smoothly and have a much richer, more complex flavor than chocolate chips, which often contain stabilizers. And that little pinch of salt? It’s not optional in my book—it makes all the other flavors pop.
Serves: Makes about 15-18 clusters | Prep Time: 10 minutes | Cook Time: 5 minutes (melting) | Total Time: 45 minutes (includes setting time)
Before You Start: Tips & Ingredient Notes
- Chocolate Choice is Key. I really recommend using a bar of chocolate you’d enjoy eating on its own. Chocolate chips are formulated to hold their shape, which can make tempering and achieving a good snap trickier. A good 70% dark chocolate bar will give you the perfect balance of bitter and sweet.
- Toasting the Coconut. You can use untoasted coconut, but taking the extra five minutes to toast it is a complete game-changer. It deepens the flavor immensely, giving the clusters a wonderful nutty, caramel-like aroma that pairs so well with the dark chocolate.
- The Coconut Oil Role. You might wonder why we need oil when chocolate already has cocoa butter. That little tablespoon of coconut oil does two things: it makes the melted chocolate a bit more fluid for easier mixing, and it gives the finished clusters a slightly softer, more melt-in-your-mouth texture.
- Get Your Station Ready. Before you even melt the chocolate, line your baking sheet with parchment paper. Things move quickly once the chocolate is melted, and having everything ready to go prevents a last-minute scramble and potential chocolate spills.
How to Make Coconut Dark Chocolate Clusters
Step 1: Toast the Coconut (and Nuts). First, preheat your oven to 175°C (350°F). Spread the unsweetened coconut (and your almonds or seeds, if using) in a thin, even layer on a baking sheet. Toast for 5-7 minutes, but keep a very close eye on it! Coconut can go from perfectly golden to burnt in a matter of seconds. You’re looking for a light, fragrant tan color. Give the pan a shake halfway through for even toasting. Once done, pull it out and let it cool slightly.
Step 2: Melt the Chocolate Gently. This is the most crucial step. Create a double boiler by placing a heatproof bowl over a saucepan with an inch of simmering water—make sure the bottom of the bowl doesn’t touch the water. Add the chopped chocolate, coconut oil, and salt to the bowl. Stir gently and continuously with a spatula as it melts. The trick is low, gentle heat; rushing this with high heat will cause the chocolate to seize up and become grainy. You’ll know it’s ready when it’s completely smooth and glossy.
Step 3: Combine Everything. Take the bowl off the heat. Stir in the maple syrup and vanilla extract—you’ll notice the mixture might tighten up just a bit, which is totally normal. Now, add your beautifully toasted coconut and any optional nuts or seeds. Fold everything together until every bit of coconut is thoroughly coated in that luscious dark chocolate. The aroma at this point is just… incredible.
Step 4: Form the Clusters. Using two spoons or a small cookie scoop, drop tablespoon-sized mounds of the mixture onto your prepared parchment-lined baking sheet. Don’t worry about making them perfectly round; the rustic, craggy look is part of their charm. If you’re feeling fancy, now is the time to sprinkle a little extra flaky sea salt on top of each cluster.
Step 5: Set to Perfection. This requires patience! Place the entire baking sheet in the refrigerator for at least 30 minutes, or until the chocolate is completely firm and has a satisfying snap when you break one. Don’t try to speed this up at room temperature, especially on a warm day—the coconut oil needs the chill to set properly.
Step 6: Store and Enjoy. Once set, transfer your clusters to an airtight container. They’ll keep beautifully in the refrigerator for up to two weeks… if they last that long! I like to let them sit at room temperature for a minute or two before eating, just to take the extreme chill off.
Serving Suggestions
Complementary Dishes
- A Simple Fruit Platter — The bright, fresh acidity of berries or orange slices provides a lovely contrast to the rich, deep chocolate, cleansing the palate between bites.
- After a Light Salad Lunch — These clusters feel like a perfect, not-too-heavy ending to a meal that’s fresh and green, like a quinoa salad with a lemon vinaigrette.
Drinks
- A Strong Cup of Black Coffee — This is my personal favorite pairing. The bitterness of the coffee highlights the sweetness of the coconut and the complexity of the dark chocolate in a way that feels incredibly sophisticated.
- A Glass of Full-Bodied Red Wine — If you’re serving these as a dessert for a dinner party, a Zinfandel or a Shiraz with dark fruit notes can stand up to the intensity of the chocolate beautifully.
Something Sweet
- Vanilla Bean Ice Cream — Crumble a cluster or two over a scoop of high-quality vanilla ice cream. The combination of warm ice cream and cold, crunchy chocolate is a textural dream.
- Poached Pears — Serve a cluster on the side of a gently poached pear. The subtle, wine-infused fruit and the bold chocolate create an elegant and surprisingly simple dessert.
Top Mistakes to Avoid
- Mistake: Getting water in your melting chocolate. Even a single drop of water or steam can cause the chocolate to “seize,” turning it from smooth and glossy to a thick, grainy paste. Always ensure your bowls, spoons, and hands are completely dry. I’ve messed this up before too, and it’s a real heartbreaker.
- Mistake: Over-toasting the coconut. Coconut burns in the blink of an eye. Set a timer and don’t walk away. Burnt coconut will make your entire batch taste bitter, overshadowing the delicate chocolate.
- Mistake: Skipping the chilling step. Impatience is the enemy here! If the clusters aren’t fully set, they’ll be messy to eat and won’t have that satisfying snap. The fridge is your friend—let it do its work.
- Mistake: Using sweetened coconut. This might seem like a minor point, but sweetened coconut is often too moist and can make the chocolate mixture sticky. It also makes the final product overwhelmingly sweet. Unsweetened gives you control and a much better texture.
Expert Tips
- Tip: Add a pinch of spice. For a truly next-level experience, add a tiny pinch of flaky sea salt, a dash of cayenne pepper, or even some orange zest to the melted chocolate. These little additions create incredible layers of flavor that will have people wondering what your secret is.
- Tip: Chop your own nuts. If you’re using nuts, buy them whole and chop them yourself. Pre-chopped nuts are often dry and lack flavor. Freshly chopped nuts have more oils and a much more robust, nutty taste that shines through the chocolate.
- Tip: Use a cookie scoop for uniformity. If you plan on making these often, a small (1-tablespoon) cookie scoop is a fantastic investment. It makes the process faster, less messy, and ensures all your clusters are roughly the same size for even setting.
- Tip: Grate a little chocolate for topping. Before you use all your chocolate for melting, set a small piece aside. Once the clusters are dropped on the sheet, use a microplane to grate a little extra chocolate over the top for a professional, finished look.
FAQs
Can I use milk chocolate or white chocolate instead?
Absolutely! The method remains exactly the same. Just keep in mind that milk and white chocolate are sweeter and more delicate, so they can burn more easily. Use very low heat when melting. White chocolate clusters with toasted coconut are particularly delicious and look beautiful. You might want to reduce or omit the maple syrup if you go this route to avoid excessive sweetness.
Why did my chocolate get thick and clumpy when I melted it?
This is called “seizing,” and it’s almost always caused by a tiny bit of moisture getting into the chocolate. It could be steam from your double boiler, a damp spoon, or even a drop of water. Unfortunately, once seized, it’s very difficult to fix. The best approach is prevention: keep everything bone dry. If it happens, you can try stirring in a teaspoon of neutral oil (like vegetable oil) to smooth it out, but it won’t be perfect.
How should I store these, and how long will they keep?
Because of the coconut oil, these clusters are best stored in an airtight container in the refrigerator. They’ll stay firm and fresh for up to two weeks. You can also freeze them for up to three months—just thaw in the fridge before serving. If you leave them at room temperature on a warm day, they will become quite soft.
Can I make these vegan?
Yes, they are very easy to make vegan! Simply ensure your dark chocolate is dairy-free (check the label, but most high-percentage dark chocolates are), and use maple syrup instead of honey. That’s it! You’ve got a fantastic vegan-friendly treat.
My clusters are very soft, even after chilling. What happened?
This usually points to two things. First, the chocolate-to-coconut ratio might be off; if there wasn’t enough chocolate to properly bind and coat the coconut, the structure will be weaker. Second, it could be that your kitchen was very warm when you were working, causing the chocolate to start softening again as you handled it. Pop them back in the fridge for a bit longer, and they should firm up.
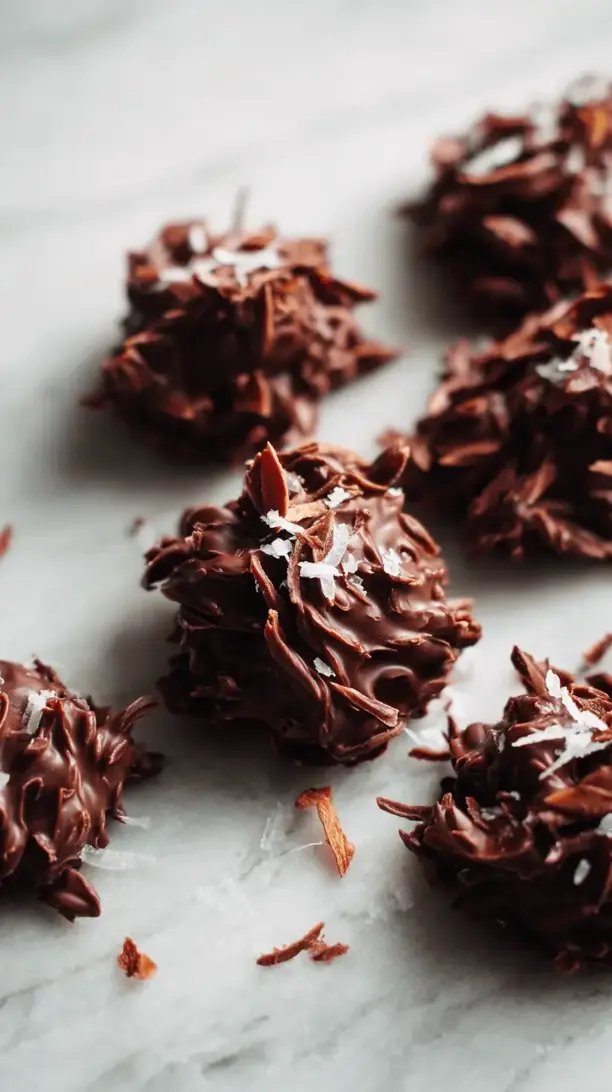
Coconut Dark Chocolate Clusters
Whip up easy, elegant Coconut Dark Chocolate Clusters! This simple no-bake recipe requires just 6 ingredients for a wholesome, decadent treat. Perfect for gifting or a quick sweet fix.
Ingredients
Ingredients
-
200 g high-quality dark chocolate (70% cocoa works beautifully), chopped
-
150 g unsweetened shredded or desiccated coconut
-
2 tbsp pure maple syrup or honey
-
1 tbsp coconut oil
-
1/2 tsp pure vanilla extract
-
1/4 tsp fine sea salt
-
50 g toasted almonds or pumpkin seeds (optional, but highly recommended for crunch)
Instructions
-
Toast the Coconut (and Nuts). First, preheat your oven to 175°C (350°F). Spread the unsweetened coconut (and your almonds or seeds, if using) in a thin, even layer on a baking sheet. Toast for 5-7 minutes, but keep a very close eye on it! Coconut can go from perfectly golden to burnt in a matter of seconds. You're looking for a light, fragrant tan color. Give the pan a shake halfway through for even toasting. Once done, pull it out and let it cool slightly.01
-
Melt the Chocolate Gently. This is the most crucial step. Create a double boiler by placing a heatproof bowl over a saucepan with an inch of simmering water—make sure the bottom of the bowl doesn't touch the water. Add the chopped chocolate, coconut oil, and salt to the bowl. Stir gently and continuously with a spatula as it melts. The trick is low, gentle heat; rushing this with high heat will cause the chocolate to seize up and become grainy. You'll know it's ready when it's completely smooth and glossy.02
-
Combine Everything. Take the bowl off the heat. Stir in the maple syrup and vanilla extract—you'll notice the mixture might tighten up just a bit, which is totally normal. Now, add your beautifully toasted coconut and any optional nuts or seeds. Fold everything together until every bit of coconut is thoroughly coated in that luscious dark chocolate. The aroma at this point is just… incredible.03
-
Form the Clusters. Using two spoons or a small cookie scoop, drop tablespoon-sized mounds of the mixture onto your prepared parchment-lined baking sheet. Don't worry about making them perfectly round; the rustic, craggy look is part of their charm. If you're feeling fancy, now is the time to sprinkle a little extra flaky sea salt on top of each cluster.04
-
Set to Perfection. This requires patience! Place the entire baking sheet in the refrigerator for at least 30 minutes, or until the chocolate is completely firm and has a satisfying snap when you break one. Don't try to speed this up at room temperature, especially on a warm day—the coconut oil needs the chill to set properly.05
-
Store and Enjoy. Once set, transfer your clusters to an airtight container. They'll keep beautifully in the refrigerator for up to two weeks… if they last that long! I like to let them sit at room temperature for a minute or two before eating, just to take the extreme chill off.06


