
Why You’ll Love This Cinnamon Baked Apple Slices
- Effortless Elegance. Honestly, the hardest part is slicing the apples. Once they’re in the oven, you’re free to relax while your kitchen fills with that incredible, cozy fragrance. It’s a dessert that looks and tastes far more impressive than the minimal effort required.
- Incredibly Versatile. These slices are the chameleons of the dessert world. They can be breakfast, a snack, or a show-stopping dessert component. I love how they adapt to whatever you need them to be, making them a staple recipe you’ll return to again and again.
- Healthier Indulgence. By baking the apples, we’re coaxing out their natural sweetness, which means we don’t need to add a ton of sugar. You get all the comfort of a classic apple dessert but feel genuinely good about eating it.
- The Aroma Therapy. This is a bonus reason, but a real one. The combination of baking apples, warm cinnamon, and a hint of vanilla is pure olfactory bliss. It’s a recipe that nourishes more than just your stomach—it lifts your mood, too.
Ingredients & Tools
- 4 large firm-sweet apples (like Honeycrisp, Pink Lady, or Braeburn)
- 2 tablespoons melted coconut oil or unsalted butter
- 2 tablespoons pure maple syrup or honey
- 1 teaspoon ground cinnamon
- 1/4 teaspoon ground nutmeg
- A pinch of fine sea salt
- 1 teaspoon pure vanilla extract
- 1 tablespoon fresh lemon juice
Tools: A sharp chef’s knife, a large mixing bowl, a rimmed baking sheet (like a half-sheet pan), and parchment paper.
The quality of your apples really is the star here, so choose varieties you enjoy eating raw. The lemon juice might seem like a small thing, but it’s crucial—it adds a bright note that keeps the flavor from being one-dimensionally sweet and also helps prevent the apples from browning too much before they go into the oven.
Serves: 4 | Prep Time: 10 minutes | Cook Time: 25-30 minutes | Total Time: 35-40 minutes
Before You Start: Tips & Ingredient Notes
- Apple Selection is Key. You want apples that hold their shape when baked. Firm-sweet varieties like Honeycrisp are perfect because they soften beautifully without turning to complete mush. Avoid very soft apples like Red Delicious—they’ll disintegrate.
- Why the Lemon Juice? Beyond adding a hint of tang, the acid in the lemon juice slows down the enzymatic browning process. This means your apple slices will stay looking fresh and appetizing instead of turning greyish while you prep the other ingredients.
- Don’t Skip the Pinch of Salt. I know it seems odd in a sweet dish, but salt is a flavor enhancer. It makes the sweetness of the apples and maple syrup taste richer and more complex, balancing the spices perfectly.
- To Peel or Not to Peel? That is the question! I almost never peel my apples for this. The skin adds lovely color, a bit of texture, and extra fiber. But if you prefer a super-soft, uniform texture—or are serving someone who dislikes peels—feel free to peel them. It’s entirely up to you.
How to Make Cinnamon Baked Apple Slices
Step 1: First, preheat your oven to 375°F (190°C). This is a fairly standard temperature that gives us a nice balance—hot enough to caramelize the sugars and cook the apples through, but not so hot that the sugars burn before the apples have softened. While the oven heats up, line your baking sheet with parchment paper. This is a non-negotiable step for easy cleanup, trust me. The natural sugars released by the apples can create a sticky situation, and parchment paper is your best friend here.
Step 2: Now, let’s prep the apples. Wash and dry them thoroughly. Using your sharp chef’s knife, slice each apple in half from stem to base. Use a melon baller or a small spoon to scoop out the core and seeds. Then, lay each half flat-side down and slice it into even, 1/4-inch thick half-moons. The trick is to try and get them all roughly the same thickness so they cook at the same rate. Toss all these beautiful slices into your large mixing bowl.
Step 3: It’s time for the flavor bath! Drizzle the melted coconut oil (or butter) and the maple syrup over the apple slices. Then, add the cinnamon, nutmeg, and that all-important pinch of salt. Finally, add the vanilla extract and the lemon juice. Now, using your hands or a large spoon, toss everything together. You’ll want to do this gently but thoroughly, making sure each and every apple slice gets coated in the spiced, glossy mixture. You’ll notice the aroma already starting to bloom—it’s heavenly.
Step 4: Spread the coated apple slices out in a single layer on your prepared baking sheet. This is crucial! If you pile them on top of each other, they’ll steam rather than bake, and you’ll miss out on those delicious caramelized edges. We want them to have a little space to breathe and roast properly.
Step 5: Slide the baking sheet into your preheated oven and bake for 15 minutes. After 15 minutes, carefully remove the pan—the apples will have started to soften. Give them a good stir and rearrange them into a single layer again. This ensures even cooking and caramelization. Pop them back in the oven for another 10-15 minutes. You’re looking for the apples to be tender when pierced with a fork, and the edges will have started to curl and darken slightly. The syrup in the pan will be bubbly and thick.
Step 6: Take the pan out of the oven and let the apple slices cool for about 5 minutes. They will be extremely hot! This brief rest allows the syrupy juices to thicken up just a bit more. Then, they’re ready to serve. Spoon them up with all those delicious pan juices—that’s where a lot of the flavor is!
Serving Suggestions
Complementary Dishes
- Over Greek Yogurt or Oatmeal — This is my absolute favorite breakfast. The warm, spiced apples melt into the cool, creamy yogurt or the hearty oats, creating a perfect contrast in temperatures and textures. It feels like a treat but fuels you for the day.
- With Pork Chops or Roast Chicken — Don’t forget these apples are fantastic with savory dishes! The sweet and savory combination is a classic for a reason. They add a beautiful, sophisticated touch to a simple weeknight dinner.
- As a Pancake or Waffle Topping — Move over, maple syrup! Spooning these warm apples over a stack of pancakes or a crispy waffle takes your brunch game to a whole new level of deliciousness.
Drinks
- A Hot Mug of Chai Tea — The warm spices in the chai—cardamom, cloves, ginger—echo the cinnamon and nutmeg in the apples, creating a wonderfully harmonious and cozy experience.
- Cold Glass of Almond Milk — The simplicity and slight nuttiness of almond milk provides a clean, refreshing contrast to the rich, warm apples. It’s a surprisingly perfect pairing.
- Sparkling Apple Cider — Celebrate the apple in all its forms! The effervescence of the cider cuts through the richness and cleanses the palate beautifully between bites.
Something Sweet
- A Scoop of Vanilla Bean Ice Cream — This is the ultimate. The hot apples meeting the cold ice cream is a textural dream, and the vanilla provides a simple, elegant base that lets the apple-cinnamon flavor shine.
- Freshly Whipped Cream — Sometimes you want something a little lighter than ice cream. A dollop of lightly sweetened whipped cream adds a cloud-like creaminess that’s just divine.
- A Crumbly Oat Streusel — If you want to add a bit of crunch, sprinkle a homemade oat, flour, and brown sugar streusel over the apples before baking. It turns the dish into a deconstructed apple crisp.
Top Mistakes to Avoid
- Mistake: Using the wrong type of apple. This is the biggest pitfall. A mealy apple like a Red Delicious will turn into applesauce, while a super-tart Granny Smith will hold its shape but be quite sharp. A firm-sweet hybrid gives you the best of both worlds.
- Mistake: Crowding the baking sheet. I’ve messed this up before too, thinking I could fit just a few more slices. Overcrowding causes the apples to steam, resulting in a soggy texture instead of those lovely caramelized edges we’re after. Use two pans if you need to!
- Mistake: Skipping the stir halfway through. That mid-bake stir isn’t just busywork. It ensures that the apples on the edge of the pan, which cook faster, get moved to the center, and vice-versa. This simple step guarantees even cooking for every single slice.
- Mistake: Overbaking until mushy. We want tender apples, not apple purée. Start checking at the 25-minute mark. The slices should yield easily to a fork but still have some structural integrity.
Expert Tips
- Tip: Add a tablespoon of orange juice. For a more complex citrus note, replace one tablespoon of the lemon juice with fresh orange juice. It adds a subtle, sunny sweetness that pairs wonderfully with the cinnamon.
- Tip: Get creative with spices. While cinnamon and nutmeg are classic, don’t be afraid to experiment. A tiny pinch of cardamom or a scant 1/8 teaspoon of ground ginger can add a lovely, warm depth.
- Tip: Make a double batch for meal prep. These apples keep beautifully in the fridge for up to 5 days. Having a container ready to go makes breakfasts and healthy snacks a breeze throughout the week.
- Tip: For a deeper flavor, use brown butter. If you’re using butter, take an extra minute to brown it. Melt the butter in a small saucepan over medium heat until it foams and then develops little brown specks at the bottom. It adds a incredible, nutty caramel flavor that takes these apples to the next level.
FAQs
Can I make these ahead of time?
Absolutely! They are a fantastic make-ahead option. Let them cool completely after baking, then store them in an airtight container in the refrigerator for up to 5 days. You can enjoy them cold, or gently reheat them in the microwave or a small saucepan over low heat. The texture might be a little softer upon reheating, but the flavor is still fantastic.
Can I freeze cinnamon baked apple slices?
You can, but with a caveat. The texture will become much softer upon thawing, as the freezing process breaks down the apple’s cell structure. They’ll be perfect for stirring into oatmeal or smoothies, but they won’t have the same distinct slice-like texture. To freeze, spread the cooled slices on a parchment-lined baking sheet until solid (flash freezing), then transfer to a freezer bag. They’ll keep for up to 3 months.
My apples turned out a bit watery. What happened?
This usually happens for one of two reasons. First, the apple variety might have had a very high water content. Second, the pan might have been a bit overcrowded, leading to steaming. Next time, try a different apple type and ensure they’re in a single layer. If it still happens, you can simmer the apples and their juices in a skillet for a few minutes after baking to reduce the liquid into a thicker syrup.
Is there a way to make this recipe without added sugar?
Yes! The apples themselves provide plenty of natural sweetness. You can absolutely omit the maple syrup. The result will be less syrupy and more focused on the pure, tart-sweet flavor of the baked apple. You might want to add a tiny bit more cinnamon to compensate. The lemon juice becomes even more important for balance in this sugar-free version.
Can I use apple pie spice instead of individual spices?
Of course! Apple pie spice is typically a blend of cinnamon, nutmeg, allspice, and sometimes ginger. It’s a great shortcut. Use about 1 ¼ teaspoons of apple pie spice in place of the cinnamon and nutmeg called for in the recipe. It will give you a familiar, well-rounded flavor profile that’s delicious.
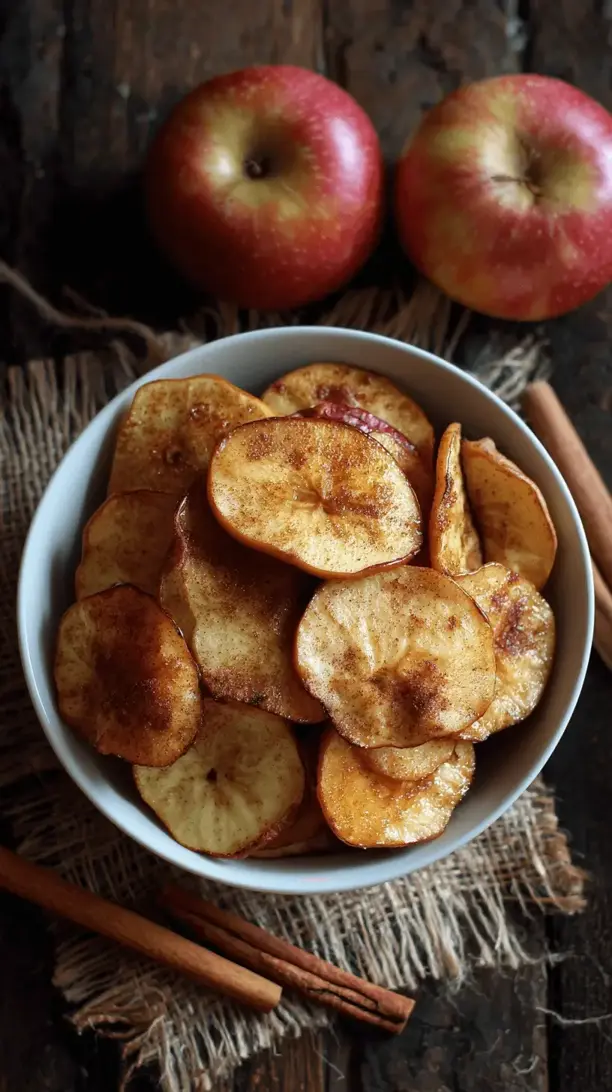
Cinnamon Baked Apple Slices
Warm cinnamon baked apple slices are your new go-to comfort food! Easy 10-min prep, perfectly tender & versatile for breakfast or dessert. Chicago home cook Mike shares his favorite recipe.
Ingredients
Ingredients
-
4 large firm-sweet apples (like Honeycrisp, Pink Lady, or Braeburn)
-
2 tablespoons melted coconut oil or unsalted butter
-
2 tablespoons pure maple syrup or honey
-
1 teaspoon ground cinnamon
-
1/4 teaspoon ground nutmeg
-
A pinch fine sea salt
-
1 teaspoon pure vanilla extract
-
1 tablespoon fresh lemon juice
Instructions
-
First, preheat your oven to 375°F (190°C). This is a fairly standard temperature that gives us a nice balance—hot enough to caramelize the sugars and cook the apples through, but not so hot that the sugars burn before the apples have softened. While the oven heats up, line your baking sheet with parchment paper. This is a non-negotiable step for easy cleanup, trust me. The natural sugars released by the apples can create a sticky situation, and parchment paper is your best friend here.01
-
Now, let's prep the apples. Wash and dry them thoroughly. Using your sharp chef's knife, slice each apple in half from stem to base. Use a melon baller or a small spoon to scoop out the core and seeds. Then, lay each half flat-side down and slice it into even, 1/4-inch thick half-moons. The trick is to try and get them all roughly the same thickness so they cook at the same rate. Toss all these beautiful slices into your large mixing bowl.02
-
It's time for the flavor bath! Drizzle the melted coconut oil (or butter) and the maple syrup over the apple slices. Then, add the cinnamon, nutmeg, and that all-important pinch of salt. Finally, add the vanilla extract and the lemon juice. Now, using your hands or a large spoon, toss everything together. You'll want to do this gently but thoroughly, making sure each and every apple slice gets coated in the spiced, glossy mixture. You'll notice the aroma already starting to bloom—it's heavenly.03
-
Spread the coated apple slices out in a single layer on your prepared baking sheet. This is crucial! If you pile them on top of each other, they'll steam rather than bake, and you'll miss out on those delicious caramelized edges. We want them to have a little space to breathe and roast properly.04
-
Slide the baking sheet into your preheated oven and bake for 15 minutes. After 15 minutes, carefully remove the pan—the apples will have started to soften. Give them a good stir and rearrange them into a single layer again. This ensures even cooking and caramelization. Pop them back in the oven for another 10-15 minutes. You're looking for the apples to be tender when pierced with a fork, and the edges will have started to curl and darken slightly. The syrup in the pan will be bubbly and thick.05
-
Take the pan out of the oven and let the apple slices cool for about 5 minutes. They will be extremely hot! This brief rest allows the syrupy juices to thicken up just a bit more. Then, they're ready to serve. Spoon them up with all those delicious pan juices—that's where a lot of the flavor is!06


