
Why You’ll Love This Chocolate Peanut Butter Protein Cups
- They’re the ultimate healthy-ish treat. You get that incredible satisfaction of biting into a chocolate and peanut butter delight, but with a protein boost that keeps you full and energized. It’s a win-win that doesn’t leave you with a sugar crash.
- They’re incredibly simple to make. Honestly, if you can melt chocolate and stir things together, you’re more than qualified. There’s no baking involved, which is a huge win on a hot day or when you just can’t be bothered to turn on the oven.
- They’re completely customizable. Feel like adding a sprinkle of sea salt on top? Go for it. Want to mix some crushed nuts into the filling? Absolutely. You’re the boss of your cups. This recipe is a fantastic template for your own creations.
- They’re perfect for meal prep. Making a batch on a Sunday means you have a week’s worth of grab-and-go snacks ready and waiting. They store beautifully in the fridge or freezer, so a moment of preparedness pays off all week long.
Ingredients & Tools
- 200 g high-quality dark chocolate (70% works great), chopped, or dark chocolate chips
- 1/2 cup creamy, natural peanut butter (just peanuts and salt)
- 1/4 cup vanilla or chocolate protein powder (a whey/casein blend or plant-based both work)
- 2-3 tbsp maple syrup or honey, to taste
- 1-2 tbsp milk of choice (dairy, almond, oat), as needed
- 1/4 tsp vanilla extract (optional, but lovely)
- A pinch of flaky sea salt, for topping
Tools: A standard 12-cup muffin tin, paper or silicone muffin liners, two small mixing bowls, a spoon or small spatula.
The quality of your chocolate and peanut butter really makes a difference here—since there are so few ingredients, each one gets a chance to shine. Using a natural peanut butter (the kind you have to stir) gives the best flavor and texture, honestly.
Serves: 12 cups | Prep Time: 15 minutes | Chill Time: 30 minutes | Total Time: 45 minutes
Before You Start: Tips & Ingredient Notes
- Why natural peanut butter? The oils in natural peanut butter help create a wonderfully smooth, creamy filling that’s easy to work with. The stabilized kind (with added oils) can sometimes make the filling a bit too stiff and difficult to mix with the protein powder.
- Choosing your protein powder. The type of protein powder you use will affect the texture. Whey/casein blends tend to thicken the filling nicely. If using plant-based powder, you might need an extra splash of milk to get a workable, dough-like consistency. The flavor is up to you—chocolate or vanilla are both fantastic.
- Don’t skip the liners! Seriously, this is a non-negotiable for easy removal. Silicone liners are reusable and pop out perfectly, but paper liners work just as well. Trying to get these out of a bare muffin tin is a recipe for frustration.
- How to melt chocolate like a pro. The key is gentle, indirect heat. A double boiler is best, but a heatproof bowl set over a pot of simmering water (making sure the bowl doesn’t touch the water) works perfectly. This prevents the chocolate from seizing up and becoming grainy.
How to Make Chocolate Peanut Butter Protein Cups
Step 1: First, get your muffin tin ready. Line all 12 cups with your chosen liners. This is your one prep step, and it makes everything else so much smoother. Set the tin aside on a level surface—you’ll be glad you did when you’re pouring the chocolate later.
Step 2: Now, let’s melt the chocolate. Add your chopped chocolate or chocolate chips to a heatproof bowl. Place the bowl over a small saucepan with about an inch of simmering water, ensuring the bottom of the bowl isn’t touching the water. Stir continuously with a spatula until the chocolate is completely smooth and glossy. Once melted, take the bowl off the heat and let it cool for just a minute.
Step 3: Time to create the chocolate base. Using a small spoon, add about a teaspoon of melted chocolate to the bottom of each muffin liner. Gently tap the tin on the counter to spread the chocolate into an even layer. This is your foundation! Pop the entire tin into the freezer for about 5-7 minutes, just until the chocolate is set. You’ll know it’s ready when you touch it lightly and it feels firm.
Step 4: While the base sets, make the peanut butter filling. In a separate bowl, combine the peanut butter, protein powder, maple syrup (start with 2 tbsp), and vanilla extract. Stir vigorously until it starts to come together. It might seem crumbly at first—that’s normal. If it’s too dry and isn’t forming a cohesive “dough,” add a tablespoon of milk and mix again. You’re aiming for a Play-Doh-like consistency that you can easily roll into balls.
Step 5: Divide and conquer the filling. Take the tin out of the freezer. Scoop up small portions of the peanut butter mixture—about a heaping teaspoon each—and roll them into balls. Flatten each ball slightly into a disc and gently press it onto the set chocolate base in each cup. Try to leave a small border around the edge so the top layer of chocolate can seal it in.
Step 6: The final seal! If your remaining melted chocolate has thickened up, you can gently re-warm it for 20 seconds over the simmering water. Spoon the chocolate over each peanut butter disc, covering it completely and sealing the edges. A little swirl of the spoon helps create a nice, smooth top. Now is the time for that flaky sea salt sprinkle—it makes all the difference.
Step 7: The hardest part: waiting. Transfer the tin to the refrigerator for at least 30 minutes, or until the chocolate is completely firm. For the cleanest bite, let them chill for a full hour. Once set, they’re ready to devour! You can store them in an airtight container in the fridge for up to a week, or in the freezer for a couple of months.
Serving Suggestions
Complementary Dishes
- A fresh fruit platter — The bright, juicy acidity of berries like strawberries or raspberries cuts through the richness of the chocolate and peanut butter beautifully, creating a perfectly balanced snack plate.
- A simple Greek yogurt parfait — Layer these cups, crumbled, with some plain Greek yogurt and a handful of granola for a seriously satisfying and protein-packed breakfast or dessert.
Drinks
- A cold glass of almond milk — It’s a classic pairing for a reason. The nutty, slightly sweet flavor of almond milk complements the cups without overpowering them.
- A bold cup of black coffee — The bitterness of a strong brew is the ultimate contrast to the sweet, creamy cups, making for a sophisticated afternoon pick-me-up.
Something Sweet
- A small bowl of mixed berries — Sometimes, the best dessert pairing is something light and fresh. A few berries alongside a cup feels indulgent yet refreshing.
Top Mistakes to Avoid
- Mistake: Using the wrong peanut butter. Skipping the natural, stir-in-the-jar kind can lead to a filling that’s too hard, too sweet, or oddly greasy. The simple ingredient list of natural peanut butter is key for the right texture.
- Mistake: Rushing the setting process. If you try to add the peanut butter layer before the base is firm, or try to eat them before they’re fully set, you’ll end up with a delicious but messy amalgamation. Patience is truly a virtue here.
- Mistake: Getting water in your chocolate. Even a single drop of water can cause melted chocolate to “seize,” turning it into a thick, grainy paste. Make sure all your bowls and utensils are completely dry. I’ve messed this up before too, and it’s a real heartbreaker.
- Mistake: Not tasting the filling. Before you assemble everything, taste your peanut butter mixture. Does it need a touch more sweetness? A pinch more salt? This is your chance to adjust it to your perfect preference.
Expert Tips
- Tip: Warm your peanut butter. If your natural peanut butter is super thick and hard to stir, pop the jar (without the lid) in the microwave for 15-20 seconds. This will make it much easier to mix with the other ingredients and create a smoother filling.
- Tip: Create a marbled effect. For a pretty presentation, don’t fully cover the peanut butter filling with the top layer of chocolate. Instead, drizzle the chocolate over the top in a zig-zag pattern. It looks professional and lets you see the delicious layers.
- Tip: Freeze for a firmer, ice-cream-like treat. While they’re fantastic from the fridge, storing them in the freezer gives them an incredible, dense, and cold texture that’s almost like a candy bar. They’re perfect for a hot day.
- Tip: Use a cookie scoop. For perfectly even cups, use a small cookie scoop or melon baller to portion both the melted chocolate and the peanut butter filling. It’s a little hack that guarantees uniformity and makes the process faster.
FAQs
Can I use a different nut butter?
Absolutely! Almond butter, cashew butter, or even sunflower seed butter (for a nut-free version) would all work wonderfully. Just make sure you’re using the natural, drippy kind for the best results. The flavor profile will change, of course—almond butter will give a slightly milder, toastier taste, which is also delicious. You might need to adjust the sweetness slightly depending on the inherent flavor of the butter you choose.
My filling is too dry/crumbly. What do I do?
This is the most common issue, and it’s an easy fix! Different protein powders absorb liquid differently. Simply add a tiny bit more liquid—a teaspoon at a time of milk or even more maple syrup—and mix well. You’ll see it come together into a pliable dough. The goal is for it to hold together when you pinch it, without being sticky.
Can I make these without protein powder?
You can, but the texture and structure of the filling will be quite different. Without the powder, the peanut butter mixture will be much softer. You could try adding a tablespoon or two of almond flour or oat flour to help thicken it, but honestly, the protein powder is what gives it that satisfying, dough-like consistency that makes these so unique.
How long do they last, and how should I store them?
Store them in an airtight container in the refrigerator for up to one week. They also freeze exceptionally well for up to 2 months. Just layer them between parchment paper in a freezer-safe container. You can eat them straight from the freezer—they have a fantastic fudgy texture—or let them thaw for 10 minutes on the counter.
Why did my chocolate get cloudy or develop white streaks?
That’s called “bloom,” and it’s completely harmless! It happens when chocolate is tempered incorrectly or experiences temperature fluctuations (like going from the fridge to a warm room). It might not look as pretty, but the taste and texture are totally fine. For a glossier finish, you can learn about tempering chocolate, but for these quick cups, it’s not necessary at all.
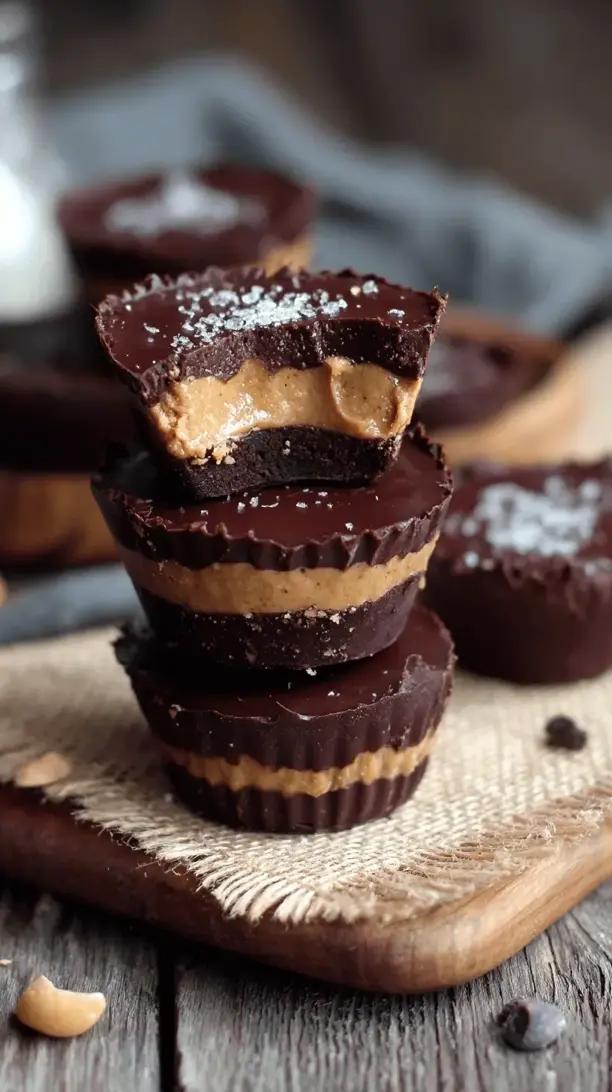
Chocolate Peanut Butter Protein Cups
Whip up decadent Chocolate Peanut Butter Protein Cups! This easy, no-bake recipe is the perfect healthy snack for energy boosts & satisfying cravings. Ready in 45 mins!
Ingredients
Ingredients
-
200 g high-quality dark chocolate (70% works great), chopped, or dark chocolate chips
-
1/2 cup creamy, natural peanut butter (just peanuts and salt)
-
1/4 cup vanilla or chocolate protein powder (a whey/casein blend or plant-based both work)
-
2-3 tbsp maple syrup or honey (to taste)
-
1-2 tbsp milk of choice (dairy, almond, oat, as needed)
-
1/4 tsp vanilla extract (optional, but lovely)
-
A pinch flaky sea salt (for topping)
Instructions
-
Line a 12-cup muffin tin with liners and set aside.01
-
Melt chocolate in a double boiler, stirring until smooth and glossy; let cool 1 minute off heat.02
-
Spoon about 1 teaspoon melted chocolate into each liner, tap to level, and freeze 5–7 minutes until set.03
-
Make filling: mix peanut butter, protein powder, maple syrup (start with 2 Tbsp), and vanilla until cohesive; if dry, add 1 Tbsp milk to reach a Play-Doh-like consistency.04
-
Portion filling: roll heaping teaspoon balls, flatten into discs, and place on the chocolate bases, leaving a small border.05
-
Rewarm chocolate if needed; spoon over each disc to cover completely and seal edges. Optionally sprinkle flaky sea salt.06
-
Refrigerate 30–60 minutes until firm. Store airtight in the fridge up to 1 week or freeze for longer.07


