
Why You’ll Love This Chocolate Peanut Butter Chia Cups
- They’re a meal prep dream. Honestly, these cups get better with time. Making a batch means you have a ready-to-go, no-fuss breakfast or snack for days. Just grab and go from the fridge.
- The texture is pure joy. You get this wonderful combination of creamy pudding from the chia seeds and a satisfying snap from the dark chocolate topping. It’s a sensory experience that never gets old.
- They’re endlessly customizable. Not a fan of peanut butter? Use almond butter. Want a fruity twist? Add a layer of mashed raspberries. This recipe is a fantastic template for your own creations.
- They feel indulgent but are secretly wholesome. With a good dose of fiber, healthy fats, and protein, these cups keep you full and energized. It’s the kind of dessert you can feel really good about.
Ingredients & Tools
- For the Peanut Butter Chia Layer:
- 6 tbsp chia seeds
- 1 ½ cups unsweetened almond milk (or milk of choice)
- ¼ cup creamy, natural peanut butter
- 2 tbsp pure maple syrup
- 1 tsp vanilla extract
- A tiny pinch of fine sea salt
- For the Chocolate Topping:
- 3 tbsp coconut oil
- 2 tbsp pure maple syrup
- 3 tbsp unsweetened cocoa powder
- A tiny pinch of fine sea salt
Tools: A medium mixing bowl, a whisk, a small saucepan or microwave-safe bowl, 4 small jars or cups (about 6-8 oz each), a measuring spoon set.
The quality of your peanut butter and cocoa powder really makes a difference here. For the peanut butter, you want one where the only ingredients are peanuts and maybe salt—this ensures the best flavor and a smooth consistency. And for the cocoa, a good-quality unsweetened cocoa powder gives that deep, rich chocolate flavor we’re after.
Serves: 4 | Prep Time: 15 minutes (+ 4 hours chilling) | Cook Time: 2 minutes | Total Time: 4 hours 17 minutes
Before You Start: Tips & Ingredient Notes
- What kind of peanut butter should I use? This is key! Use a natural, drippy peanut butter that’s stir-able. The kind with added oils and sugars can make the pudding too sweet or separate. If your peanut butter is very thick, gently warm it for a few seconds to make it easier to mix.
- Why isn’t my chia pudding thickening? Chia seeds need time to absorb liquid. If you mix it and it looks too thin, don’t panic! Just give it 10-15 minutes, then whisk it again. This breaks up any clumps and helps it thicken evenly. Patience is the secret ingredient.
- Can I use something other than maple syrup? Absolutely. Honey or agave nectar work well too. Just note that honey has a stronger flavor that will come through. If you want a sugar-free option, a liquid monk fruit sweetener would be a good substitute.
- What’s the deal with the coconut oil? Coconut oil is what makes the chocolate topping firm up beautifully in the fridge. If you forget to take it out of the fridge, it will be rock solid—so measure it out first thing so it can soften a bit at room temperature while you prep the chia layer.
How to Make Chocolate Peanut Butter Chia Cups
Step 1: First, let’s make the chia pudding base. In your medium mixing bowl, combine the almond milk, peanut butter, maple syrup, vanilla extract, and that tiny pinch of salt. Now, whisk it—really go for it! You want the peanut butter to be fully incorporated into the liquid, with no big blobs floating around. It should look smooth and creamy.
Step 2: Here’s the important part. Add all the chia seeds to the bowl at once. Immediately start whisking vigorously. You’ll want to whisk for a good 60-90 seconds to ensure the chia seeds are evenly distributed and don’t clump together. Once it’s well mixed, let it sit on the counter for about 5 minutes, then whisk it again. This second whisk is the trick to a perfectly smooth, lump-free pudding.
Step 3: Now, divide the chia pudding mixture evenly among your four jars or cups. I like to use a ladle or a measuring cup with a spout for less mess. Leave about a half-inch to an inch of space at the top for the chocolate layer. Gently tap the jars on the counter to settle the pudding and remove any air bubbles.
Step 4: Place the jars, uncovered, in the refrigerator. You need to let the pudding set for at least 4 hours, but honestly, overnight is best. This gives the chia seeds ample time to plump up and create that lovely, thick texture. You’ll know it’s ready when you tilt the jar and the pudding doesn’t slosh around like a liquid.
Step 5: Once the pudding is set, it’s time for the chocolate magic. In your small saucepan or microwave-safe bowl, combine the coconut oil, maple syrup, cocoa powder, and salt. If using a saucepan, warm it over low heat, stirring constantly, just until the coconut oil is melted and everything is combined. If using a microwave, heat in 20-second bursts, stirring between each, until smooth. Be careful not to overheat it!
Step 6: Take your chia puddings out of the fridge. Give the chocolate mixture a final stir—it should be glossy and pourable. Slowly and carefully, pour the chocolate mixture over the top of each chia pudding, dividing it evenly. You’re aiming for a layer that’s about a quarter-inch thick.
Step 7: This is the final step! Very carefully return the jars to the refrigerator. Let them chill for another 30-60 minutes, or until the chocolate topping is completely firm to the touch. When you tap it, it should feel solid. And that’s it! You’ve created these gorgeous, layered cups of deliciousness.
Serving Suggestions
Complementary Dishes
- A bowl of fresh berries — The bright, tart acidity of strawberries or raspberries cuts through the richness of the chocolate and peanut butter beautifully, creating a more balanced plate.
- A side of Greek yogurt with a drizzle of honey — If you’re having this for breakfast, a little extra protein from the yogurt makes it an even more substantial and satisfying start to your day.
- A simple green smoothie — The creaminess of the cups pairs wonderfully with a light, refreshing green smoothie. It feels like a complete and nourishing meal.
Drinks
- A strong cup of black coffee — The bitterness of the coffee is a classic partner for both chocolate and peanut butter, making each bite taste even more decadent.
- Cold oat milk or almond milk — A simple, cold glass of plant-based milk is a soothing and complementary drink that doesn’t compete with the flavors in the cup.
- A spicy chai tea latte — The warm spices in chai, like cinnamon and cardamom, add a wonderful aromatic complexity that elevates the whole experience.
Something Sweet
- A few pieces of orange zest dipped in dark chocolate — This is for when you want to double down on the chocolate theme. The citrus oil from the zest provides a fantastic, bright finish.
- A small, chewy date stuffed with almond butter — It continues the nutty, sweet theme but in a different, delightfully chewy texture that’s a nice contrast to the creamy cups.
- A simple ginger snap cookie — The gentle spice of a ginger snap is a surprising and fantastic pairing with the peanut butter, adding a little crunch and warmth.
Top Mistakes to Avoid
- Mistake: Not whisking the chia seeds thoroughly enough. I’ve messed this up before too… if you just give it a quick stir, the chia seeds will clump together into little gelatinous balls. A vigorous, sustained whisk is non-negotiable for a smooth texture.
- Mistake: Using cold, hard coconut oil. If your coconut oil is solid, you need to melt it gently for the chocolate layer. Trying to mix hard coconut oil with the other ingredients will result in a grainy, uneven topping that won’t set properly.
- Mistake: Adding the chocolate layer before the pudding is set. If the pudding base is still runny, the weight of the chocolate layer can sink in or mix with it, and you’ll lose that beautiful clean separation between layers. Patience is key!
- Mistake: Skipping the salt. It might seem insignificant, but that tiny pinch of salt in both layers is crucial. It enhances all the other flavors and keeps the dessert from tasting flat or overly sweet.
Expert Tips
- Tip: Add a textural crunch. Just before serving, sprinkle the top with a few crushed, roasted peanuts or a sprinkle of flaky sea salt. The salt amplifies the chocolate, and the crunch takes the texture to a whole new level.
- Tip: Create a flavored pudding base. Stir in a quarter teaspoon of cinnamon or a tablespoon of finely ground coffee to the pudding mixture before adding the chia seeds. It adds a wonderful depth of flavor that pairs amazingly with the chocolate.
- Tip: Make a double batch of the chocolate topping. Honestly, you might want to! You can store extra melted chocolate mixture in a jar in the fridge. Gently re-melt it for a quick fruit dip or to drizzle over ice cream later in the week.
- Tip: Use an immersion blender for ultimate smoothness. If you’re really sensitive to texture, you can blend the pudding mixture (after the initial 4-hour set) with an immersion blender for a few seconds. This breaks down the chia seeds completely, creating a super-smooth, mousse-like consistency.
FAQs
How long do these chia cups last in the fridge?
They keep wonderfully! Stored in airtight containers, they will last for up to 5 days. The chocolate topping might develop a slight whitish hue over time (that’s just the cocoa butter in the coconut oil, called “bloom,” and it’s perfectly safe to eat), but the taste and texture remain great. They are the ultimate make-ahead snack.
Can I make these cups vegan?
They already are! As long as you use a plant-based milk (like almond or oat) and ensure your chocolate ingredients are vegan (which they typically are), this recipe is naturally vegan. It’s one of the things I love most about it—it’s inclusive and delicious for almost any dietary preference.
My chocolate topping cracked when I tried to eat it. What happened?
This usually happens if the topping layer is too thick. A little goes a long way! Aim for a layer that’s just thick enough to cover the pudding—about 1/8 to 1/4 of an inch is perfect. If it’s much thicker, it can become a little too hard and brittle, leading to cracks when you spoon into it.
Can I use a different nut or seed butter?
Absolutely. Almond butter, cashew butter, or even sunflower seed butter (for a nut-free version) work beautifully. Each will impart its own unique flavor. Sunflower seed butter will give the pudding a slightly greener tint, which is totally normal and safe—it’s just a chemical reaction with the chlorophyll in the seeds.
Is there a way to make these without coconut oil?
The coconut oil is essential for getting the chocolate layer to firm up properly in the fridge. If you need to avoid it, you could simply skip the topping and enjoy the peanut butter chia pudding on its own, perhaps with a drizzle of melted peanut butter and a sprinkle of cocoa nibs for a similar flavor profile without the firm chocolate shell.
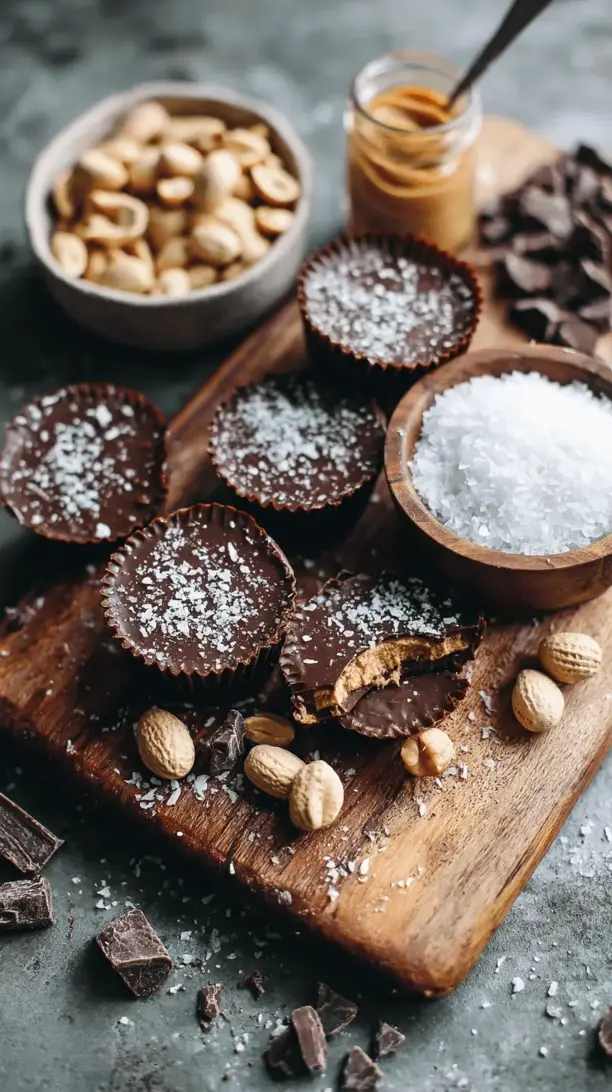
Chocolate Peanut Butter Chia Cups
Whip up these easy Chocolate Peanut Butter Chia Cups! A healthy, make-ahead breakfast or dessert with creamy chia pudding & a rich chocolate topping. Meal prep magic!
Ingredients
Ingredients
-
6 tbsp chia seeds
-
1 ½ cups unsweetened almond milk (or milk of choice)
-
¼ cup creamy, natural peanut butter
-
2 tbsp pure maple syrup
-
1 tsp vanilla extract
-
A tiny pinch fine sea salt
-
3 tbsp coconut oil
-
2 tbsp pure maple syrup
-
3 tbsp unsweetened cocoa powder
-
A tiny pinch fine sea salt
Instructions
-
First, let's make the chia pudding base. In your medium mixing bowl, combine the almond milk, peanut butter, maple syrup, vanilla extract, and that tiny pinch of salt. Now, whisk it—really go for it! You want the peanut butter to be fully incorporated into the liquid, with no big blobs floating around. It should look smooth and creamy.01
-
Here's the important part. Add all the chia seeds to the bowl at once. Immediately start whisking vigorously. You'll want to whisk for a good 60-90 seconds to ensure the chia seeds are evenly distributed and don't clump together. Once it's well mixed, let it sit on the counter for about 5 minutes, then whisk it again. This second whisk is the trick to a perfectly smooth, lump-free pudding.02
-
Now, divide the chia pudding mixture evenly among your four jars or cups. I like to use a ladle or a measuring cup with a spout for less mess. Leave about a half-inch to an inch of space at the top for the chocolate layer. Gently tap the jars on the counter to settle the pudding and remove any air bubbles.03
-
Place the jars, uncovered, in the refrigerator. You need to let the pudding set for at least 4 hours, but honestly, overnight is best. This gives the chia seeds ample time to plump up and create that lovely, thick texture. You'll know it's ready when you tilt the jar and the pudding doesn't slosh around like a liquid.04
-
Once the pudding is set, it's time for the chocolate magic. In your small saucepan or microwave-safe bowl, combine the coconut oil, maple syrup, cocoa powder, and salt. If using a saucepan, warm it over low heat, stirring constantly, just until the coconut oil is melted and everything is combined. If using a microwave, heat in 20-second bursts, stirring between each, until smooth. Be careful not to overheat it!05
-
Take your chia puddings out of the fridge. Give the chocolate mixture a final stir—it should be glossy and pourable. Slowly and carefully, pour the chocolate mixture over the top of each chia pudding, dividing it evenly. You're aiming for a layer that's about a quarter-inch thick.06
-
This is the final step! Very carefully return the jars to the refrigerator. Let them chill for another 30-60 minutes, or until the chocolate topping is completely firm to the touch. When you tap it, it should feel solid. And that's it! You've created these gorgeous, layered cups of deliciousness.07


