
Why You’ll Love This Chocolate Coconut Protein Balls
- They’re the ultimate grab-and-go snack. Seriously, once you make a batch, you’re set for the week. Pop a couple in a container, and you have a perfect pick-me-up for work, the gym, or a busy day running errands.
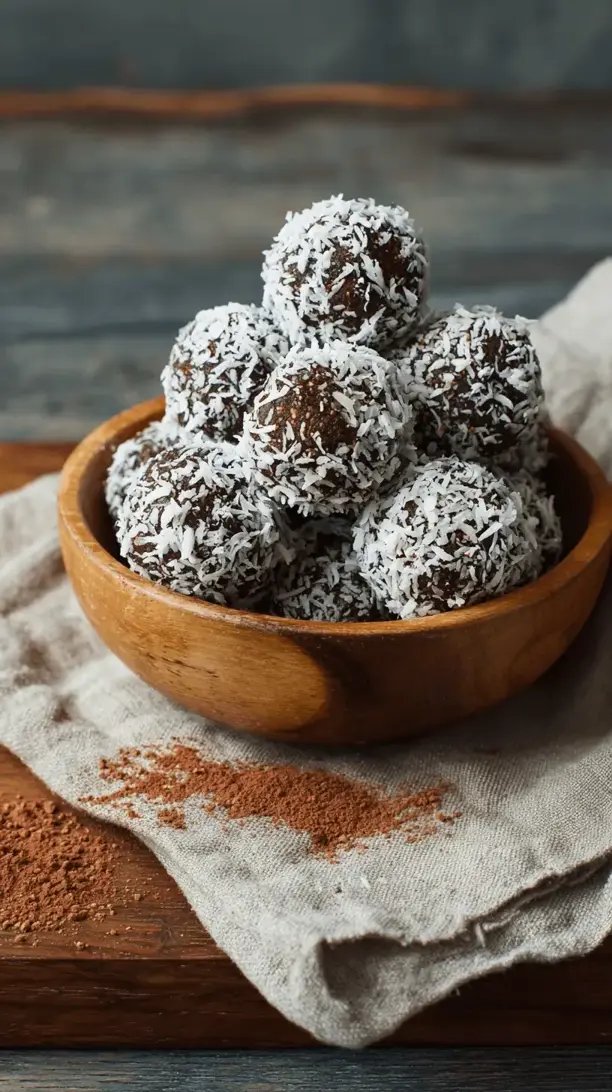
- The texture is pure magic. We’re aiming for a fudgy, almost brownie-like bite that’s held together by the natural stickiness of the dates. It’s chewy, satisfying, and far more interesting than a standard protein bar.
- They’re endlessly customizable. Think of this recipe as your perfect base camp. Once you’ve mastered the basic version, you can start adding in things like a pinch of espresso powder, some orange zest, or even a handful of chopped nuts for extra crunch.
- They feel decadent but are secretly wholesome. With no refined sugar and a solid hit of protein and fiber, these balls give you that chocolate fix without the subsequent energy crash. It’s a little act of self-care you can enjoy any time of day.
Ingredients & Tools
- 1 cup (about 150 g) pitted Medjool dates
- 1 cup (80 g) rolled oats (certified gluten-free if needed)
- 1/2 cup (60 g) vanilla or chocolate protein powder
- 1/4 cup (20 g) unsweetened cocoa powder
- 1/2 cup (45 g) unsweetened shredded coconut, plus more for rolling
- 1/4 cup (65 g) smooth almond butter (or any nut/seed butter you love)
- 2-3 tablespoons maple syrup or honey (optional, depending on your sweetness preference)
- 1-2 tablespoons water or milk of choice, if needed
- 1 teaspoon vanilla extract
- A generous pinch of sea salt
Tools: A food processor is essential here, along with a small bowl for your extra coconut and a baking sheet lined with parchment paper.
The quality of your ingredients really shines through in a simple recipe like this. Using soft, fresh Medjool dates is key—they’re the glue that holds everything together. And don’t skip the pinch of salt; it makes the chocolate flavor pop in the most wonderful way.
Serves: Makes 12-14 balls | Prep Time: 15 minutes | Chill Time: 20 minutes | Total Time: 35 minutes
Before You Start: Tips & Ingredient Notes
- Are your dates dry? If your Medjool dates have been sitting in the pantry for a while, they might be a little hard. Simply soak them in very hot water for about 10 minutes, then drain them thoroughly before using. This will bring back their sticky, sweet magic.
- Protein powder preferences. The type of protein powder you use can affect the texture. A whey or casein-based powder tends to absorb more moisture, so you might need the extra tablespoon of liquid. Plant-based powders like pea or brown rice protein often work beautifully without much adjustment.
- Toasting your coconut (a pro move). While totally optional, toasting the shredded coconut you use for rolling adds a whole new dimension of nutty, toasty flavor. Just spread it on a baking sheet and bake at 175°C for 5-7 minutes, watching carefully so it doesn’t burn.
- The texture test is everything. The mixture should hold together firmly when you squeeze a small amount in your hand. If it’s too crumbly, add liquid a teaspoon at a time. If it’s too sticky, a bit more oat flour or protein powder will fix it.
How to Make Chocolate Coconut Protein Balls
Step 1: First, we need to get our dates ready. If they aren’t already pitted, slice them open and remove the pits. This is a crucial step—you really don’t want to discover a pit with your food processor blade! Add the pitted dates to the bowl of your food processor.
Step 2: Pulse the dates until they break down into a thick, sticky paste. You’ll notice they start to form a ball that clumps together on one side of the bowl. This is exactly what we want. Scrape down the sides with a spatula to make sure everything is evenly incorporated.
Step 3: Now, add the rolled oats, protein powder, cocoa powder, the 1/2 cup of shredded coconut, almond butter, vanilla extract, and that all-important pinch of sea salt. If you’re using the optional maple syrup, add it now too. Pulse a few times to start combining everything.
Step 4: Now, let the food processor run for a good 30-60 seconds. The mixture will go from looking crumbly to coming together into a dark, fudgy-looking dough. Stop the machine and perform the squeeze test. Grab a small handful and press it firmly. It should hold its shape without cracking. If it’s too dry, add a tablespoon of water or milk and process again for another 20 seconds.
Step 5: Pour your extra shredded coconut for rolling into a small bowl. Using a tablespoon or a small cookie scoop, portion out the mixture. I find rolling them into rough balls with my hands first, then rolling them gently in the coconut to coat works best. The coconut not only adds flavor but also prevents them from being too sticky to handle.
Step 6: Place each finished ball on your parchment-lined baking sheet. Once they’re all rolled, pop the entire tray into the fridge for at least 20 minutes. This chilling time is non-negotiable—it allows the oats to soften slightly and the fats from the nut butter to firm up, giving you that perfect, firm-yet-chewy texture.
Step 7: After they’ve chilled, you can transfer them to an airtight container. They’ll keep happily in the fridge for up to two weeks, or you can freeze them for up to three months. Honestly, I always have a stash in the freezer for emergency snack attacks.
Serving Suggestions
Complementary Dishes
- A fresh fruit platter — The bright, juicy acidity of berries, orange segments, or sliced apple provides a lovely contrast to the rich, dense chocolate of the balls.
- A small cup of Greek yogurt or skyr — The tanginess of the yogurt cuts through the sweetness and adds an extra protein boost, making it a more substantial snack or light breakfast.
Drinks
- A cold glass of almond milk — It’s a classic pairing that feels like a wholesome version of milk and cookies, and it’s incredibly refreshing.
- A hot cup of black coffee — The bitterness of the coffee enhances the deep cocoa notes and makes for a sophisticated mid-morning or afternoon treat.
Something Sweet
- A few fresh raspberries on the side — The pop of tartness from the berries is a perfect little palate cleanser that makes each bite of the chocolate coconut ball taste new again.
- A drizzle of melted dark chocolate — For when you’re really leaning into the indulgence, a thin layer of extra chocolate on top turns these into downright elegant petits fours.
Top Mistakes to Avoid
- Mistake: Using hard, dry dates. This is the number one reason the mixture won’t bind. If your dates aren’t soft and sticky, the balls will be crumbly and fall apart. The quick soak in hot water is a lifesaver.
- Mistake: Over-processing the oats. You want the oats to be broken down enough to help bind the mixture, but you don’t want to turn them into a fine flour. A little texture from the oats is part of the charm. I’ve learned this the hard way—it changes the mouthfeel completely.
- Mistake: Skipping the chill time. I know, it’s tempting to dig right in. But if you skip the fridge time, the balls will be too soft and might not hold their shape. That 20 minutes makes all the difference between a good snack and a great one.
- Mistake: Not tasting the mixture before rolling. Before you commit to rolling all the balls, taste a tiny bit. This is your chance to adjust the sweetness or add a pinch more salt. It’s the best way to make sure the final product is perfect for you.
Expert Tips
- Tip: Roll with damp hands. If you find the mixture is sticking to your palms too much, lightly dampen your hands with water. This creates a barrier and makes the rolling process incredibly smooth and mess-free.
- Tip: Create a flavor-infused roll. Instead of plain coconut, try mixing the coconut with a little cinnamon, a pinch of flaky sea salt, or even some finely chopped nuts for the outer coating. It adds a wonderful surprise element.
- Tip: Make a double batch for the freezer. These balls freeze exceptionally well. Layer them between parchment paper in an airtight container, and you can pull out just one or two whenever you need them. They thaw in minutes.
- Tip: Experiment with add-ins. Once you’re comfortable with the base recipe, fold in a quarter cup of mini dark chocolate chips, chopped dried cherries, or even a tablespoon of chia seeds after processing for extra texture and flavor.
FAQs
Can I make these without a food processor?
Honestly, a food processor is pretty crucial for getting the dates to the right sticky consistency. A high-powered blender might work if you pulse very carefully and scrape down the sides constantly, but it’s trickier and can strain the motor. If you don’t have either, you could try mashing the dates with a fork until they form a paste, but it will require some serious elbow grease and the texture might not be as smooth.
My mixture is too wet and sticky. What can I do?
This can happen if your dates were very fresh or if you added a bit too much liquid. Don’t worry! The fix is easy. Just add a tablespoon more of rolled oats or protein powder and pulse to combine. Let the mixture sit for a few minutes to allow the dry ingredients to absorb the excess moisture, and test again before rolling.
Can I use a different nut butter?
Absolutely! Peanut butter will give you a strong peanut flavor (like a healthy peanut butter cup), cashew butter is more neutral and creamy, and sunflower seed butter is a great nut-free option. Just make sure it’s the smooth, drippy kind, not the dry, natural kind that separates, as that can affect the binding.
How long do these actually last?
In an airtight container in the refrigerator, they’ll stay fresh and delicious for about 10-14 days. For longer storage, the freezer is your best friend. They’ll keep for up to 3 months. You can eat them straight from the freezer—they have a lovely firm, almost ice-creamy texture—or let them thaw for 10 minutes.
Are these suitable for kids?
They can be a fantastic healthy snack for kids! You might want to reduce the cocoa powder slightly if they’re sensitive to bitter flavors, and you can use a sweeter protein powder or a touch more maple syrup. Getting them involved in the rolling process is a fun way to make them excited about eating them, too.
Chocolate Coconut Protein Balls
Whip up these easy no-bake Chocolate Coconut Protein Balls in 15 mins! A healthy, energy-boosting snack with oats, dates & protein powder. Perfect for grab-and-go fuel.
Ingredients
Ingredients
-
1 cup pitted Medjool dates (about 150 g)
-
1 cup rolled oats (80 g, certified gluten-free if needed)
-
1/2 cup vanilla or chocolate protein powder (60 g)
-
1/4 cup unsweetened cocoa powder (20 g)
-
1/2 cup unsweetened shredded coconut (45 g, plus more for rolling)
-
1/4 cup smooth almond butter (65 g, or any nut/seed butter you love)
-
2-3 tablespoons maple syrup or honey (optional, depending on your sweetness preference)
-
1-2 tablespoons water or milk of choice (if needed)
-
1 teaspoon vanilla extract
-
1 pinch sea salt (generous)
Instructions
-
First, we need to get our dates ready. If they aren't already pitted, slice them open and remove the pits. This is a crucial step—you really don't want to discover a pit with your food processor blade! Add the pitted dates to the bowl of your food processor.01
-
Pulse the dates until they break down into a thick, sticky paste. You'll notice they start to form a ball that clumps together on one side of the bowl. This is exactly what we want. Scrape down the sides with a spatula to make sure everything is evenly incorporated.02
-
Now, add the rolled oats, protein powder, cocoa powder, the 1/2 cup of shredded coconut, almond butter, vanilla extract, and that all-important pinch of sea salt. If you're using the optional maple syrup, add it now too. Pulse a few times to start combining everything.03
-
Now, let the food processor run for a good 30-60 seconds. The mixture will go from looking crumbly to coming together into a dark, fudgy-looking dough. Stop the machine and perform the squeeze test. Grab a small handful and press it firmly. It should hold its shape without cracking. If it's too dry, add a tablespoon of water or milk and process again for another 20 seconds.04
-
Pour your extra shredded coconut for rolling into a small bowl. Using a tablespoon or a small cookie scoop, portion out the mixture. I find rolling them into rough balls with my hands first, then rolling them gently in the coconut to coat works best. The coconut not only adds flavor but also prevents them from being too sticky to handle.05
-
Place each finished ball on your parchment-lined baking sheet. Once they're all rolled, pop the entire tray into the fridge for at least 20 minutes. This chilling time is non-negotiable—it allows the oats to soften slightly and the fats from the nut butter to firm up, giving you that perfect, firm-yet-chewy texture.06
-
After they've chilled, you can transfer them to an airtight container. They'll keep happily in the fridge for up to two weeks, or you can freeze them for up to three months. Honestly, I always have a stash in the freezer for emergency snack attacks.07


