
Why You’ll Love This Cacao Cashew Bliss Balls
- They’re incredibly simple. Honestly, if you can press a button on a food processor, you can make these. There’s no fussy technique or special equipment needed beyond that.
- The texture is pure bliss. We’re talking a fudgy, chewy, almost brownie-like center with little satisfying crunches from the cashews. It’s a texture experience that’s far more exciting than a standard energy bar.
- They’re a powerhouse of natural energy. Thanks to the healthy fats from the cashews and the natural sweetness from the dates, these balls provide a sustained release of energy without the dreaded sugar crash.
- They’re wonderfully adaptable. Feel like adding a pinch of sea salt on top? Some orange zest? A handful of shredded coconut? Go for it! This recipe is a fantastic base for your own creative twists.
Ingredients & Tools
- 1 cup (150 g) raw cashews
- 1 cup (about 180 g) Medjool dates, pitted
- 3 tablespoons raw cacao powder (or unsweetened cocoa powder)
- 1 tablespoon pure maple syrup (or agave nectar)
- 1 teaspoon pure vanilla extract
- A generous pinch of fine sea salt
- 1-2 tablespoons water, if needed
- For rolling (optional): extra cacao powder, shredded coconut, or finely chopped cashews
Tools: A food processor is essential here. A high-speed blender can work, but you’ll need to scrape down the sides more frequently.
The magic of this recipe really lies in the quality of these simple ingredients. Using plump, sticky Medjool dates is key—they’re the glue that holds everything together and provides that caramel-like sweetness. And raw cacao powder… honestly, it has a deeper, more complex chocolate flavour compared to standard cocoa, but both will create a delicious result.
Serves: Makes 12-14 balls | Prep Time: 15 minutes | Cook Time: 0 minutes | Total Time: 15 minutes
Before You Start: Tips & Ingredient Notes
- Are your dates dry? If your Medjool dates have been sitting in the cupboard for a while, they might be a little firm. Simply soak them in hot water for 10 minutes to soften them up, then be sure to drain them thoroughly before using.
- Raw vs. roasted cashews. I really prefer raw cashews for this. They have a milder, creamier flavour that blends into a perfect paste. Roasted cashews can work, but they’ll give a stronger, toastier taste and the mixture can be a bit oilier.
- The power of patience. When processing, let the machine run for a good minute or two. You’re looking for a texture that starts to clump together on its own—it might seem too crumbly at first, but just keep going. The natural oils from the nuts need time to release.
- Why the pinch of salt? Don’t skip it! Salt is a flavour enhancer, and that tiny pinch will make the chocolate and cashew flavours pop in a way that’s truly magical. It balances the sweetness perfectly.
How to Make Cacao Cashew Bliss Balls
Step 1: First, we need to get our cashews to a coarse meal consistency. Add the raw cashews to the bowl of your food processor. Pulse them about 10-15 times until they resemble coarse sand. You don’t want a fine powder—having some little cashew pieces in there is great for texture. You’ll notice the aroma is already fantastic, nutty and warm.
Step 2: Now, add in the pitted Medjool dates, raw cacao powder, maple syrup, vanilla extract, and that all-important pinch of sea salt. It might look like a lot of dry ingredients at first, but trust the process. Secure the lid on your processor.
Step 3: Here’s where the magic happens. Turn the food processor on high and let it run for a full 1-2 minutes. At first, it’ll sound crumbly and look like nothing is happening. But then, after about a minute, you’ll see the mixture start to clump together on the sides. It should eventually form a ball that chases itself around the bowl. The texture should be sticky and hold together when you pinch a bit between your fingers.
Step 4: Do the pinch test! Take a small amount of the mixture and press it together. If it holds its shape easily, you’re golden. If it’s still a bit crumbly and won’t stick, that’s where the water comes in. Add a tablespoon of water and process for another 30 seconds. Repeat if necessary, but add water sparingly—you can always add more, but you can’t take it out.
Step 5: Time to get your hands a little messy—the best part! Scoop the mixture out of the processor and onto a clean surface or into a bowl. Using your hands, knead the dough for just a few seconds to bring it all together into a cohesive mass. You’ll feel how pliable and fudgy it is.
Step 6: Now, portion the dough. I like to use a small cookie scoop for uniformity, but a tablespoon measure works perfectly. Scoop up a heaping tablespoon of the mixture and roll it firmly between your palms until you have a smooth, round ball. If you’re using a coating, roll each ball in a small bowl of cacao powder, coconut, or chopped nuts until lightly covered.
Step 7: Place your finished bliss balls on a plate or small baking tray. At this point, I highly recommend popping them into the refrigerator for at least 20-30 minutes to firm up. This step makes them so much easier to handle and gives them that perfect, cool, fudgy texture. Then, transfer to an airtight container for storage.
Serving Suggestions
Complementary Dishes
- A fresh fruit platter — The bright, juicy acidity of berries, orange segments, or sliced apple provides a lovely, refreshing contrast to the rich, dense chocolateyness of the bliss balls.
- A small pot of Greek yoghurt — For a more substantial snack, enjoy one or two bliss balls crumbled over a bowl of thick, tangy yoghurt. It’s like a deconstructed healthy cheesecake.
Drinks
- A cold glass of almond milk — This is my absolute favourite pairing. The creamy, slightly sweet nuttiness of the milk complements the cashew and cacao flavours beautifully.
- A hot cup of peppermint tea — The cool, refreshing notes of peppermint make the chocolate taste even richer and more decadent. It’s a truly spa-like experience.
Something Sweet
- A simple bowl of fresh berries — Sometimes, the best dessert is simplicity itself. A handful of raspberries or strawberries alongside a bliss ball feels light, elegant, and perfectly satisfying.
Top Mistakes to Avoid
- Mistake: Using hard, dry dates. This is the number one reason a bliss ball mixture won’t stick together. If your dates aren’t soft and sticky, the mixture will be crumbly. Remember to soak them if needed!
- Mistake: Not processing long enough. Impatience is the enemy here. If you stop the food processor when the mixture still looks like crumbs, you’ll struggle to roll them. Let it run until a ball forms—it really does happen!
- Mistake: Adding too much liquid too soon. I’ve messed this up before too… you add a tablespoon of water, and suddenly the mixture is a sticky paste. Always do the pinch test first and add water only a teaspoon at a time if absolutely necessary.
- Mistake: Skipping the chill time. These balls are quite soft when first rolled. If you try to pack them away immediately, they might stick together. The short time in the fridge firms them up perfectly.
Expert Tips
- Tip: Toast your cashews for a deeper flavour. If you want to elevate these even further, spread the raw cashews on a baking sheet and toast them at 175°C (350°F) for 8-10 minutes until lightly golden and fragrant. Let them cool completely before using. It adds a wonderful nutty depth.
- Tip: Get creative with add-ins. Once you’ve mastered the base recipe, the world is your oyster. Try mixing in a tablespoon of chia seeds for extra fibre, a handful of cacao nibs for crunch, or even a pinch of cinnamon or cayenne pepper for a flavour kick.
- Tip: For perfectly uniform balls, use a scale. If you want them all to be exactly the same size (great for gifts!), weigh the entire mixture after it’s made, then divide that weight by the number of balls you want. Portion accordingly.
- Tip: Make a double batch and freeze. These bliss balls freeze exceptionally well. Layer them in an airtight container with parchment paper between layers and freeze for up to 3 months. They thaw in minutes for an instant healthy treat.
FAQs
How long do these bliss balls last?
Stored in an airtight container in the refrigerator, they will keep beautifully for up to 2 weeks. They also freeze perfectly for up to 3 months. Honestly, I doubt they’ll last that long—they’re that moreish! The texture might firm up a bit more in the fridge, which I actually prefer.
Can I use a different nut?
Absolutely! Almonds work wonderfully—just make sure they are raw and not blanched. Pecans or walnuts would also be delicious, though they have a stronger flavour that will come through. The method remains exactly the same. It’s a great way to use up whatever nuts you have on hand.
My mixture is too wet and sticky. What can I do?
Don’t worry, this is fixable! If you’ve added too much liquid or your dates were very juicy, the mixture might be overly sticky. Simply add another tablespoon of cacao powder or some finely ground oats (blitz rolled oats in the processor first) and process again until it comes together. A little goes a long way.
Can I make these without a food processor?
It’s tricky, but not impossible if you’re determined. You would need to very finely chop the dates and nuts by hand, which is a serious arm workout. Then, you’d have to mix and knead everything together for a long time to get it to bind. A food processor is highly, highly recommended for the right texture.
Are these suitable for kids?
They are a fantastic healthy snack for kids! They taste like a treat but are made from whole foods. You can even get them involved in the rolling process—it’s a fun kitchen activity. Just be mindful that whole nuts can be a choking hazard for very young children, so ensure they are ground very finely.
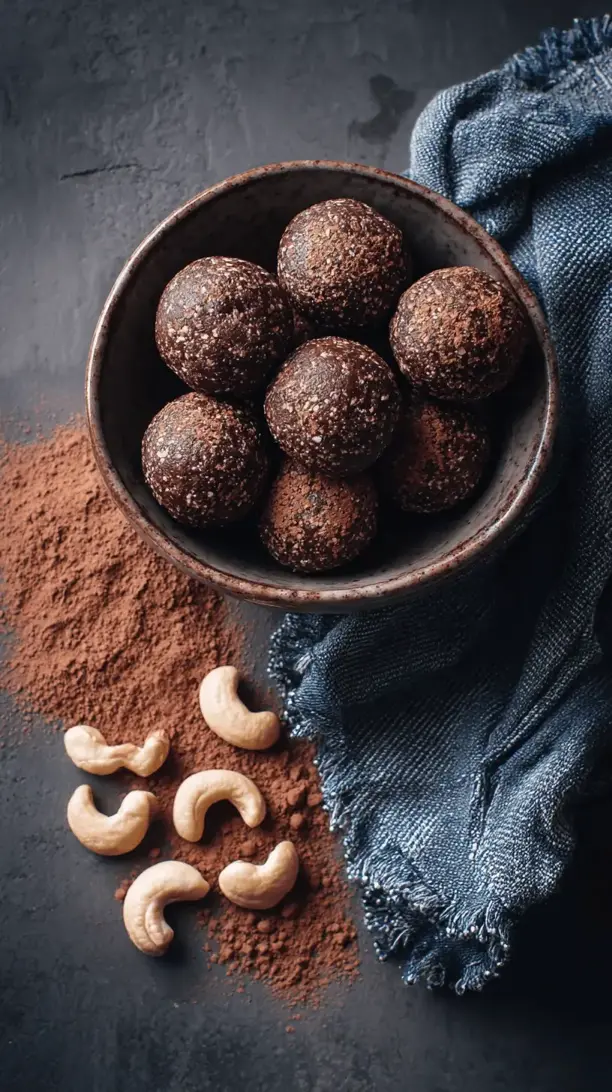
Cacao Cashew Bliss Balls
Whip up these no-bake Cacao Cashew Bliss Balls in just 15 minutes! A healthy, energy-boosting snack with dates, cashews & cacao. Perfect for beating the 3 PM slump.
Ingredients
Ingredients
-
1 cup raw cashews (150 g)
-
1 cup Medjool dates (about 180 g, pitted)
-
3 tablespoons raw cacao powder (or unsweetened cocoa powder)
-
1 tablespoon pure maple syrup (or agave nectar)
-
1 teaspoon pure vanilla extract
-
A generous pinch fine sea salt
-
1-2 tablespoons water (if needed)
-
extra cacao powder, shredded coconut, or finely chopped cashews (for rolling (optional))
Instructions
-
First, we need to get our cashews to a coarse meal consistency. Add the raw cashews to the bowl of your food processor. Pulse them about 10-15 times until they resemble coarse sand. You don't want a fine powder—having some little cashew pieces in there is great for texture. You'll notice the aroma is already fantastic, nutty and warm.01
-
Now, add in the pitted Medjool dates, raw cacao powder, maple syrup, vanilla extract, and that all-important pinch of sea salt. It might look like a lot of dry ingredients at first, but trust the process. Secure the lid on your processor.02
-
Here's where the magic happens. Turn the food processor on high and let it run for a full 1-2 minutes. At first, it'll sound crumbly and look like nothing is happening. But then, after about a minute, you'll see the mixture start to clump together on the sides. It should eventually form a ball that chases itself around the bowl. The texture should be sticky and hold together when you pinch a bit between your fingers.03
-
Do the pinch test! Take a small amount of the mixture and press it together. If it holds its shape easily, you're golden. If it's still a bit crumbly and won't stick, that's where the water comes in. Add a tablespoon of water and process for another 30 seconds. Repeat if necessary, but add water sparingly—you can always add more, but you can't take it out.04
-
Time to get your hands a little messy—the best part! Scoop the mixture out of the processor and onto a clean surface or into a bowl. Using your hands, knead the dough for just a few seconds to bring it all together into a cohesive mass. You'll feel how pliable and fudgy it is.05
-
Now, portion the dough. I like to use a small cookie scoop for uniformity, but a tablespoon measure works perfectly. Scoop up a heaping tablespoon of the mixture and roll it firmly between your palms until you have a smooth, round ball. If you're using a coating, roll each ball in a small bowl of cacao powder, coconut, or chopped nuts until lightly covered.06
-
Place your finished bliss balls on a plate or small baking tray. At this point, I highly recommend popping them into the refrigerator for at least 20-30 minutes to firm up. This step makes them so much easier to handle and gives them that perfect, cool, fudgy texture. Then, transfer to an airtight container for storage.07


