
Why You’ll Love This Banana Oat Muffins
- They’re the ultimate use-up recipe. This is the perfect destination for those bananas that have gone a little too brown and soft. In fact, the riper they are, the sweeter and more flavorful your muffins will be.
- The texture is just dreamy. We’re using oats in two ways—blended into a flour and left whole—which gives you this fantastic, hearty crumb that’s moist and substantial without being dense or gummy.
- They’re incredibly versatile. Think of this recipe as a wonderful base. Feel like adding a handful of chocolate chips, walnuts, or even a swirl of peanut butter? Go for it! They’re your muffins, after all.
- They freeze like a dream. Making a double batch is always a good idea. You can pop these in the freezer and have a ready-to-go breakfast or snack for weeks, which is a total lifesaver on busy mornings.
Ingredients & Tools
- 3 large, very ripe bananas (about 1 ½ cups mashed)
- 2 large eggs, at room temperature
- ⅓ cup (80 ml) melted coconut oil (or neutral oil like avocado or canola)
- ½ cup (120 ml) pure maple syrup or honey
- 1 teaspoon pure vanilla extract
- 1 ¾ cups (175 g) old-fashioned rolled oats (divided use)
- 1 cup (120 g) whole wheat flour (or all-purpose flour)
- 1 teaspoon baking soda
- 1 ½ teaspoons ground cinnamon
- ½ teaspoon fine sea salt
- A pinch of nutmeg (optional, but lovely)
Tools: 12-cup muffin tin, muffin liners, two mixing bowls, a fork or potato masher, a blender or food processor, and a cooling rack.
The quality of your bananas really is the star here, so don’t be shy about using those almost-black ones. The maple syrup adds a beautiful, nuanced sweetness, but honey works just as well if that’s what you have on hand.
Serves: 12 | Prep Time: 15 minutes | Cook Time: 20-22 minutes | Total Time: about 40 minutes
Before You Start: Tips & Ingredient Notes
- Banana Ripeness is Key. Honestly, this is the most important step. Your bananas should be heavily speckled or even brown. This not only means they’re sweeter but they also mash much more easily and incorporate better into the batter.
- Why Two Types of Oats? You’ll notice we blend half the oats into a fine oat flour. This gives the muffins structure without making them heavy. The other half of whole oats provides that wonderful, chewy texture we all love.
- Don’t Overmix the Batter. Muffin batter should be a little lumpy! Once you combine the wet and dry ingredients, stir just until the flour disappears. Overmixing leads to tough, tunnel-ridden muffins, and we definitely don’t want that.
- Room Temperature Eggs Matter. If your eggs are cold, they can cause the melted coconut oil to solidify into little bits. Taking five minutes to let them warm up on the counter ensures a smooth, perfectly emulsified batter.
How to Make Banana Oat Muffins
Step 1: Prep Your Oats and Oven. First things first, preheat your oven to 350°F (175°C) and line your muffin tin with liners or grease it well. Now, take 1 cup of the rolled oats and pop them into your blender or food processor. Pulse until they resemble a coarse flour. This is your homemade oat flour! It smells so nutty and wonderful already.
Step 2: Mash and Combine the Wet Ingredients. In a large mixing bowl, peel your very ripe bananas and mash them thoroughly with a fork until mostly smooth—a few small lumps are totally fine. To the bananas, add the room-temperature eggs, melted coconut oil, maple syrup, and vanilla extract. Whisk everything together until it’s well combined and looks creamy. You’ll notice the maple syrup swirling into the banana mixture beautifully.
Step 3: Whisk Together the Dry Ingredients. In a separate, medium-sized bowl, whisk together your freshly made oat flour, the remaining ¾ cup of whole rolled oats, the whole wheat flour, baking soda, cinnamon, salt, and that optional pinch of nutmeg. Whisking these dry ingredients first ensures the leavening agent is evenly distributed, which is the secret to muffins that rise evenly.
Step 4: Gently Combine Wet and Dry. Now, pour the dry ingredient mixture into the bowl with the wet ingredients. Use a spatula to gently fold them together. The trick is to stop mixing the very moment you no longer see streaks of flour. The batter will be thick and a bit lumpy—that’s exactly what you want! If you’re adding any mix-ins like chocolate chips, fold them in now.
Step 5: Portion and Bake. Divide the batter evenly among the 12 muffin cups. I like to use an ice cream scoop for this—it’s so much cleaner and ensures they’re all the same size. You can fill the cups almost to the top for nice, domed muffins. If you like, sprinkle a few extra whole oats on top for a pretty finish. Bake for 20-22 minutes, or until the tops are springy to the touch and a toothpick inserted into the center comes out clean.
Step 6: The All-Important Cool Down. As soon as the muffins come out of the oven, let them cool in the pan for about 5 minutes. This allows them to set up. Then, carefully transfer them to a wire rack to cool completely. I know it’s tempting to eat one straight away, but letting them cool ensures the texture sets perfectly and they won’t stick to the liners.
Serving Suggestions
Complementary Dishes
- A bowl of Greek yogurt with berries — The tanginess of the yogurt and the freshness of the berries cut through the muffin’s sweetness beautifully, making a balanced and protein-packed breakfast.
- A simple green smoothie — Pairing these hearty muffins with a light, refreshing smoothie creates the perfect feel-good meal. The muffins provide the substance, the smoothie the hydration.
- Scrambled eggs with herbs — For a more savory-leaning brunch, the savory, fluffy eggs are a fantastic contrast to the sweet, spiced muffins.
Drinks
- A hot cup of black coffee — This is the classic pairing for a reason. The bitterness of the coffee highlights the warm spices and sweetness of the muffin in the most satisfying way.
- Cold glass of milk — Whether it’s dairy or your favorite plant-based alternative, there’s something timeless and comforting about dunking a warm muffin into a cold glass of milk.
- Chai latte — The spices in a chai latte—cinnamon, cardamom, cloves—echo the spices in the muffin, creating a wonderfully cozy and aromatic experience.
Something Sweet
- A small dish of vanilla bean ice cream — For a decadent dessert, split a warm muffin and top it with a scoop of ice cream. The contrast of temperatures and textures is absolutely divine.
- A drizzle of salted caramel sauce — If you’re really treating yourself, a little drizzle of salted caramel over the top takes these muffins to a whole new level of indulgence.
- Fresh sliced strawberries with a dollop of whipped cream — This turns your muffin into a simple, elegant shortcake-like dessert that feels special without much effort.
Top Mistakes to Avoid
- Mistake: Using underripe bananas. Pale yellow, firm bananas just don’t have the same concentration of sugar or flavor. Your muffins will be less sweet and lack that deep, caramel-like banana essence we’re after.
- Mistake: Skipping the cooling step. It might seem like a small detail, but transferring the muffins to a wire rack allows air to circulate around them. If they steam in the hot pan, the bottoms can become soggy.
- Mistake: Not filling the muffin cups enough. This batter doesn’t rise excessively, so don’t be afraid to fill the liners nearly to the top. Underfilling will give you small, flat muffins instead of the beautiful, domed tops we want.
Expert Tips
- Tip: For an extra flavor boost, toast your oats. Before you blend them, spread the cup of oats on a baking sheet and toast them in a 350°F oven for 5-7 minutes until fragrant. This deepens their nutty flavor and makes the muffins taste even more incredible.
- Tip: Create your own custom mix-in blend. The basic batter is a perfect canvas. Try ½ cup of dark chocolate chips and ¼ cup of chopped pecans, or ½ cup of dried cranberries and ¼ cup of shredded coconut. The possibilities are endless!
- Tip: Make a streusel topping for a bakery-style finish. Mix ¼ cup oats, 2 tbsp flour, 2 tbsp brown sugar, 1 tbsp melted butter, and a pinch of cinnamon until crumbly. Sprinkle over the batter before baking for a delightful crunchy top.
- Tip: For ultra-moist muffins, let the batter rest. After you’ve mixed it, let the batter sit for 10 minutes before scooping. This allows the oats to absorb some of the liquid, resulting in an even more tender texture.
FAQs
Can I make these gluten-free?
Absolutely! The recipe is very adaptable. Simply ensure your oats are certified gluten-free (as oats are often processed in facilities with wheat), and replace the whole wheat flour with a 1:1 gluten-free all-purpose flour blend. The texture will be virtually identical—still wonderfully moist and hearty.
Can I use quick oats instead of old-fashioned rolled oats?
You can, but the texture will be different. Quick oats are cut smaller and absorb more liquid, which can make the muffins a bit denser. If it’s all you have, use the same amount by weight (175g) rather than volume for the best results. I’d still recommend blending a portion of them to create the oat flour.
How should I store these muffins, and how long will they last?
Once completely cool, store them in an airtight container at room temperature for up to 3 days. For longer storage, they freeze exceptionally well. Wrap each muffin individually in plastic wrap and place them in a freezer bag. They’ll keep for up to 3 months. Thaw at room temperature or warm gently in the oven or microwave.
My muffins didn’t rise much. What happened?
This usually points to one of two things. First, check that your baking soda is fresh—it loses its potency over time. Second, it’s possible the batter was overmixed, which deflated the air bubbles necessary for a good rise. Remember, a light hand is key when combining the wet and dry ingredients.
Can I make this into a loaf instead of muffins?
Yes, you can make a lovely banana oat bread! Pour the batter into a greased 9×5-inch loaf pan. You’ll need to bake it longer, about 50-60 minutes, at the same temperature. Always test for doneness with a toothpick inserted into the center—it should come out clean.
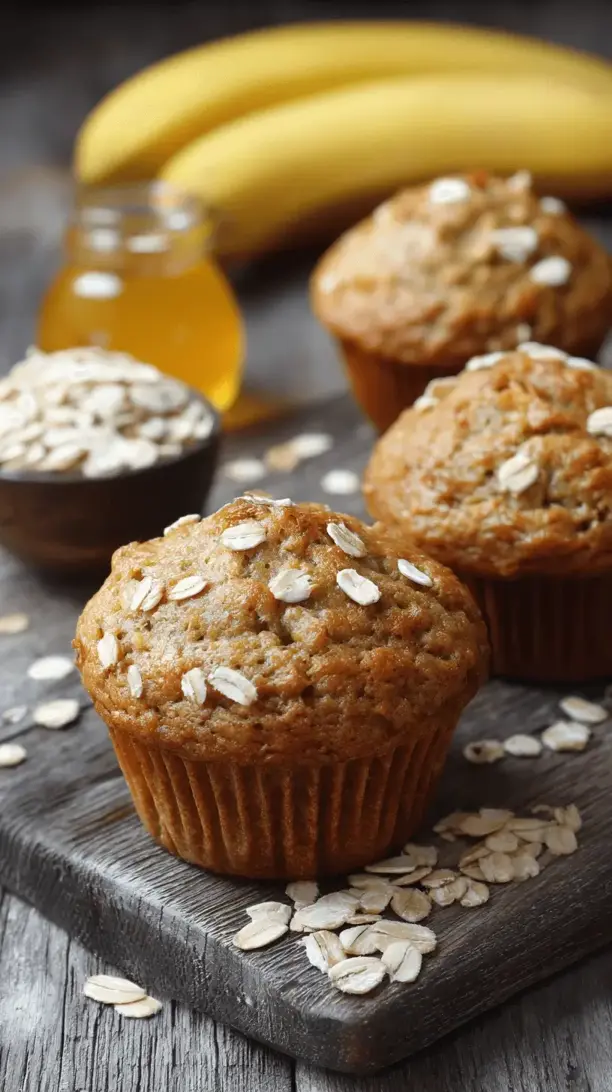
Banana Oat Muffins
Whip up Mike's easy Banana Oat Muffins! This healthy recipe uses overripe bananas & oats for a moist, hearty breakfast or snack. Perfect for using up fruit & freezer-friendly.
Ingredients
Ingredients
-
3 large, very ripe bananas (about 1 ½ cups mashed)
-
2 large eggs (at room temperature)
-
⅓ cup melted coconut oil (or neutral oil like avocado or canola)
-
½ cup pure maple syrup or honey
-
1 teaspoon pure vanilla extract
-
1 ¾ cups old-fashioned rolled oats (divided use)
-
1 cup whole wheat flour (or all-purpose flour)
-
1 teaspoon baking soda
-
1 ½ teaspoons ground cinnamon
-
½ teaspoon fine sea salt
-
A pinch nutmeg (optional, but lovely)
Instructions
-
Prep Your Oats and Oven. First things first, preheat your oven to 350°F (175°C) and line your muffin tin with liners or grease it well. Now, take 1 cup of the rolled oats and pop them into your blender or food processor. Pulse until they resemble a coarse flour. This is your homemade oat flour! It smells so nutty and wonderful already.01
-
Mash and Combine the Wet Ingredients. In a large mixing bowl, peel your very ripe bananas and mash them thoroughly with a fork until mostly smooth—a few small lumps are totally fine. To the bananas, add the room-temperature eggs, melted coconut oil, maple syrup, and vanilla extract. Whisk everything together until it’s well combined and looks creamy. You’ll notice the maple syrup swirling into the banana mixture beautifully.02
-
Whisk Together the Dry Ingredients. In a separate, medium-sized bowl, whisk together your freshly made oat flour, the remaining ¾ cup of whole rolled oats, the whole wheat flour, baking soda, cinnamon, salt, and that optional pinch of nutmeg. Whisking these dry ingredients first ensures the leavening agent is evenly distributed, which is the secret to muffins that rise evenly.03
-
Gently Combine Wet and Dry. Now, pour the dry ingredient mixture into the bowl with the wet ingredients. Use a spatula to gently fold them together. The trick is to stop mixing the very moment you no longer see streaks of flour. The batter will be thick and a bit lumpy—that’s exactly what you want! If you’re adding any mix-ins like chocolate chips, fold them in now.04
-
Portion and Bake. Divide the batter evenly among the 12 muffin cups. I like to use an ice cream scoop for this—it’s so much cleaner and ensures they’re all the same size. You can fill the cups almost to the top for nice, domed muffins. If you like, sprinkle a few extra whole oats on top for a pretty finish. Bake for 20-22 minutes, or until the tops are springy to the touch and a toothpick inserted into the center comes out clean.05
-
The All-Important Cool Down. As soon as the muffins come out of the oven, let them cool in the pan for about 5 minutes. This allows them to set up. Then, carefully transfer them to a wire rack to cool completely. I know it's tempting to eat one straight away, but letting them cool ensures the texture sets perfectly and they won't stick to the liners.06


