
Why You’ll Love This Baked Cinnamon Apple Slices
- Effortless Elegance. This recipe proves you don’t need complicated techniques or a long list of ingredients to create a dessert that feels special. The simple act of baking transforms the apples into something truly magical.
- Your Kitchen Will Smell Incredible. Honestly, consider this a bonus form of aromatherapy. The combination of warm, softening apples and spicy cinnamon is a scent that just makes a house feel like a home.
- Incredibly Versatile. These slices are the ultimate multi-tasker. Enjoy them warm from the oven as a healthy dessert, let them cool and mix them into your morning yogurt, or even spoon them over pancakes—they work beautifully everywhere.
- Naturally Sweetened. We’re letting the natural sweetness of the apples do most of the work here, with just a little boost from maple syrup or honey. It’s a treat you can feel really good about.
Ingredients & Tools
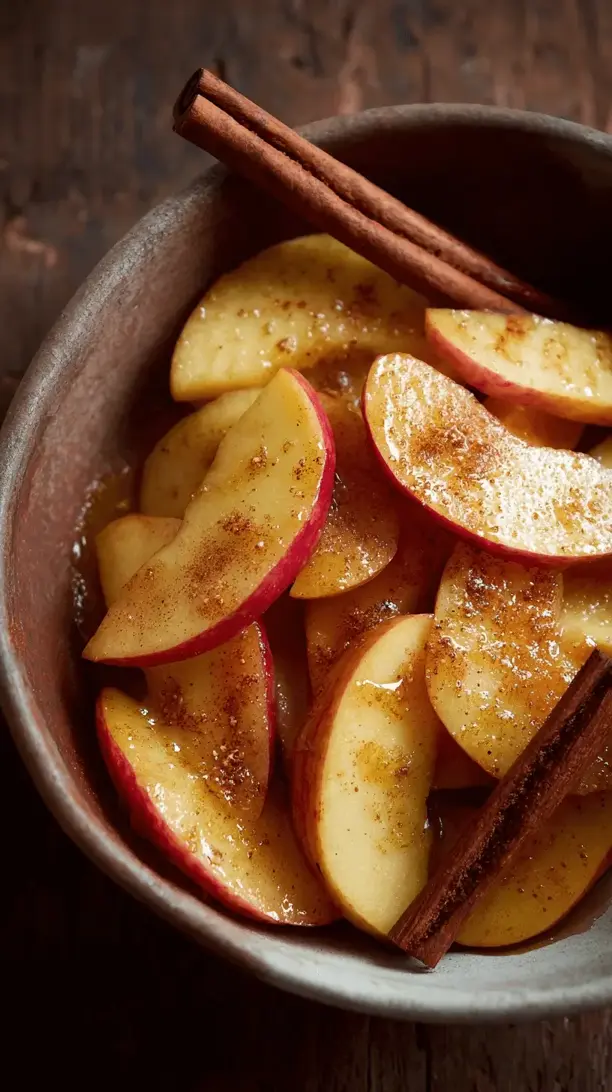
- 4 medium firm-sweet apples (like Honeycrisp, Fuji, or Braeburn)
- 1 tbsp freshly squeezed lemon juice
- 1 tbsp olive oil or melted coconut oil
- 2 tbsp pure maple syrup or honey
- 1 tsp ground cinnamon
- ¼ tsp ground nutmeg (optional, but highly recommended)
- A tiny pinch of fine sea salt
Tools: A large mixing bowl, a sharp knife or mandoline (for even slices!), a rimmed baking sheet, and parchment paper.
The trick is really in the apples—using a variety that holds its shape is key. And that pinch of salt? It’s not there to make things salty, I promise. It just makes all the other flavours, especially the cinnamon, pop in a way you’ll really notice.
Serves: 4 | Prep Time: 10 minutes | Cook Time: 25-30 minutes | Total Time: 40 minutes
Before You Start: Tips & Ingredient Notes
- Apple Selection is Everything. You want an apple that’s firm enough to stand up to the heat without turning to complete mush. Honeycrisp and Fuji are my top picks—they soften beautifully but keep a lovely texture.
- Why the Lemon Juice? Besides adding a subtle bright note, the acid in the lemon juice helps prevent the apple slices from browning too much while you’re prepping everything else. It’s a little trick that goes a long way for presentation.
- Don’t Skip the Oil. It might seem like a small amount, but coating the apples in oil helps the spices and sweetener cling to every slice and promotes that perfect caramelized edge. It makes all the difference.
- Spice It Your Way. Love ginger? Add a pinch! A fan of cardamom? Go for it! This spice blend is a wonderful starting point, but feel free to make it your own. Baking is all about personal expression.
How to Make Baked Cinnamon Apple Slices
Step 1: First things first, preheat your oven to 375°F (190°C). This gives it plenty of time to get nice and hot while you prep the apples. Line your baking sheet with parchment paper—this is a non-negotiable for easy cleanup and preventing any sticky situations.
Step 2: Now, let’s tackle the apples. Wash and dry them thoroughly. You can peel them if you prefer, but I honestly love the extra fibre and texture the peel adds. Using a sharp knife or a mandoline for super even slices, core the apples and slice them into ¼-inch thick rounds. If you’re using a knife, just try to keep them as uniform as possible so they cook at the same rate.
Step 3: Toss those beautiful apple slices into your large mixing bowl and drizzle with the lemon juice. Give them a gentle toss—you’ll notice this immediately gives them a nice sheen. This is where we build the flavour. Add the oil, maple syrup, cinnamon, nutmeg, and that all-important pinch of salt right on top.
Step 4: Time to get your hands in there (or use a spatula if you prefer)! Toss everything together until every single apple slice is evenly coated in the spiced syrup. You want them to look glossy and inviting. Don’t rush this step; proper coating is the secret to perfectly seasoned slices.
Step 5: Arrange the apple slices in a single layer on your prepared baking sheet. It’s okay if they touch a little, but try to avoid major overlapping. This allows the hot air to circulate around each slice, helping them bake evenly and get those slightly crispy edges we’re after.
Step 6: Slide the baking sheet into the preheated oven and bake for 15 minutes. You’ll start to smell that incredible aroma. After 15 minutes, carefully remove the sheet and flip each slice over. This ensures both sides get a chance to caramelize nicely.
Step 7: Return the pan to the oven and bake for another 10-15 minutes. Keep an eye on them towards the end—they’re done when the apples are tender and golden brown around the edges, and your kitchen smells like heaven. They will soften further as they cool.
Step 8: Let the slices cool on the baking sheet for at least 5-10 minutes before serving. This allows the sugars to set a little bit. They’re delicious warm, at room temperature, or even cold straight from the fridge—honestly, they’re hard to resist at any temperature.
Serving Suggestions
Complementary Dishes
- A scoop of vanilla bean ice cream — The classic pairing for a reason. The cold, creamy ice cream melting into the warm, spiced apples is a textural dream.
- Thick, creamy Greek yogurt — This turns your baked apples into a fantastic breakfast or high-protein snack. The tang of the yogurt balances the sweetness perfectly.
- Simple oatmeal or porridge — Stir a generous spoonful into your morning oats. It adds natural sweetness and flavour, meaning you might not need any extra sugar.
Drinks
- A hot mug of chai tea — The warm spices in the chai echo the cinnamon and nutmeg in the apples, creating a wonderfully cohesive and cozy experience.
- A crisp glass of cold milk — Sometimes the simplest options are the best. The cool milk is the perfect contrast to the warm, soft fruit.
- Sparkling apple cider — This doubles down on the apple flavour in a fun, fizzy way. It feels celebratory without any extra effort.
Something Sweet
- A simple shortbread cookie — The buttery, crumbly texture of shortbread is a lovely contrast to the soft apples. It’s elegant and easy.
- A drizzle of salted caramel sauce — If you’re feeling indulgent, this takes the dessert to a whole new level. The salt cuts through the richness beautifully.
- A handful of toasted walnuts or pecans — For a bit of crunch and a nutty depth that complements the spices incredibly well. It adds a lovely textural element.
Top Mistakes to Avoid
- Mistake: Using a soft apple variety like Red Delicious. These apples break down too quickly and will likely turn into a saucy, mushy pile instead of distinct slices. Texture is key here!
- Mistake: Crowding the baking sheet. If the slices are piled on top of each other, they’ll steam instead of bake. You’ll miss out on those delicious caramelized edges and they might end up a bit soggy. Use two sheets if necessary.
- Mistake: Skipping the flip halfway through. I know, it’s a bit tedious, but this simple step ensures even cooking and browning on both sides. It’s the difference between good and great.
- Mistake: Overbaking until they’re black. We’re going for tender with golden-brown edges, not apple jerky. Keep a close eye on them in the last 5 minutes of baking, as all ovens vary.
Expert Tips
- Tip: Add a splash of vanilla. Stir a teaspoon of pure vanilla extract into the maple syrup and oil mixture before tossing with the apples. It adds a beautiful, warm background note that’s just… chef’s kiss.
- Tip: Get a head start with a mandoline. If you have one, a mandoline slicer is your best friend for this recipe. It creates perfectly even slices in seconds, which means they’ll all cook at exactly the same rate.
- Tip: Make a big batch for meal prep. These keep wonderfully in an airtight container in the fridge for up to 5 days. Having them ready to go makes breakfasts and snacks a breeze all week long.
- Tip: Broil for a final crisp. If you love a slightly crispier top, switch your oven to broil for the last minute or two of cooking. Watch them like a hawk though—they can burn in a flash!
FAQs
Can I make these ahead of time?
Absolutely! They are a fantastic make-ahead option. Let them cool completely after baking, then store them in an airtight container in the refrigerator for up to 5 days. You can enjoy them cold, or gently reheat them in the microwave or a warm oven. They might soften a bit more upon reheating, but the flavour will still be fantastic.
Can I use a different sweetener?
You sure can. Brown sugar is a great substitute for the maple syrup—it will give a deeper, more caramel-like flavour. If you’re using a granulated sweetener like coconut sugar, I’d recommend mixing it with the oil first to help it dissolve a little, ensuring it coats the apples evenly.
My apples turned out a bit mushy. What happened?
This usually points to two things: the apple variety was too soft to begin with, or they were baked for a tad too long. Remember, they continue to soften as they cool, so it’s better to pull them out when they’re just tender when pierced with a fork. Even if they are a bit soft, they’re still delicious stirred into yogurt or oatmeal!
Are these suitable for freezing?
They can be frozen, but the texture will change. Once thawed, they will be much softer and release more liquid, making them ideal for using as a topping (like for ice cream) or mixing into baked goods, but not so great for eating as a stand-alone snack. Freeze in a single layer on a parchment-lined sheet, then transfer to a freezer bag.
Can I add other fruits to the mix?
That’s a fun idea! Pears would work beautifully alongside the apples. I’d be cautious with berries, as they release a lot of juice and can make the whole dish quite wet. If you want to experiment, maybe try adding a handful of cranberries for a tart contrast—just know the baking liquid will be more saucy.
Baked Cinnamon Apple Slices
Whip up these easy Baked Cinnamon Apple Slices! A healthy, 40-minute dessert perfect over ice cream or yogurt. Your kitchen will smell amazing!
Ingredients
Ingredients
-
4 medium firm-sweet apples (like Honeycrisp, Fuji, or Braeburn)
-
1 tbsp freshly squeezed lemon juice
-
1 tbsp olive oil or melted coconut oil
-
2 tbsp pure maple syrup or honey
-
1 tsp ground cinnamon
-
¼ tsp ground nutmeg (optional, but highly recommended)
-
A tiny pinch fine sea salt
Instructions
-
First things first, preheat your oven to 375°F (190°C). This gives it plenty of time to get nice and hot while you prep the apples. Line your baking sheet with parchment paper—this is a non-negotiable for easy cleanup and preventing any sticky situations.01
-
Now, let's tackle the apples. Wash and dry them thoroughly. You can peel them if you prefer, but I honestly love the extra fibre and texture the peel adds. Using a sharp knife or a mandoline for super even slices, core the apples and slice them into ¼-inch thick rounds. If you're using a knife, just try to keep them as uniform as possible so they cook at the same rate.02
-
Toss those beautiful apple slices into your large mixing bowl and drizzle with the lemon juice. Give them a gentle toss—you'll notice this immediately gives them a nice sheen. This is where we build the flavour. Add the oil, maple syrup, cinnamon, nutmeg, and that all-important pinch of salt right on top.03
-
Time to get your hands in there (or use a spatula if you prefer)! Toss everything together until every single apple slice is evenly coated in the spiced syrup. You want them to look glossy and inviting. Don't rush this step; proper coating is the secret to perfectly seasoned slices.04
-
Arrange the apple slices in a single layer on your prepared baking sheet. It's okay if they touch a little, but try to avoid major overlapping. This allows the hot air to circulate around each slice, helping them bake evenly and get those slightly crispy edges we're after.05
-
Slide the baking sheet into the preheated oven and bake for 15 minutes. You'll start to smell that incredible aroma. After 15 minutes, carefully remove the sheet and flip each slice over. This ensures both sides get a chance to caramelize nicely.06
-
Return the pan to the oven and bake for another 10-15 minutes. Keep an eye on them towards the end—they're done when the apples are tender and golden brown around the edges, and your kitchen smells like heaven. They will soften further as they cool.07
-
Let the slices cool on the baking sheet for at least 5-10 minutes before serving. This allows the sugars to set a little bit. They're delicious warm, at room temperature, or even cold straight from the fridge—honestly, they're hard to resist at any temperature.08


