
Why You’ll Love This Roasted Sweet Potato Fries
- They’re actually crispy. This isn’t a recipe for soggy sweet potato sticks. We use a few key techniques to draw out moisture and encourage maximum browning, giving you a fry with a satisfying crunch.
- Incredibly versatile. Enjoy them plain with a dip, use them as a base for a hearty bowl, or load them up with chili and cheese for a next-level meal. They’re a blank canvas for your cravings.
- Surprisingly simple. With just a handful of pantry staples and about 30 minutes, you can have a restaurant-quality side dish on the table. The process is straightforward, but the results feel special.
- The flavor is unreal. Roasting caramelizes the natural sugars in the sweet potatoes, creating a deep, complex sweetness that pairs beautifully with savory spices and a pinch of flaky salt.
Ingredients & Tools
- 2 large sweet potatoes (about 1.5 lbs / 680 g total)
- 1.5 tablespoons cornstarch or arrowroot powder
- 2 tablespoons olive oil, avocado oil, or melted coconut oil
- 1 teaspoon kosher salt, plus more for finishing
- 1/2 teaspoon garlic powder
- 1/4 teaspoon smoked paprika (optional, for a smoky kick)
- 1/4 teaspoon black pepper
Tools: A large baking sheet, parchment paper or a silicone baking mat, a large bowl, a sharp knife, and a kitchen towel or paper towels.
You’ll notice the cornstarch might seem like an odd ingredient, but honestly, it’s the secret weapon for crispiness. It creates a delicate coating that soaks up any remaining surface moisture and fries up beautifully in the oven. And don’t skip on the oil—it’s essential for conducting heat and creating that golden-brown exterior.
Serves: 3-4 | Prep Time: 15 minutes | Cook Time: 25-30 minutes | Total Time: 40-45 minutes
Before You Start: Tips & Ingredient Notes
- Choosing your sweet potatoes. Look for potatoes that are firm, smooth, and uniform in shape. This makes them much easier to cut into even-sized fries. I find that the varieties with orange flesh, often labeled as ‘yams’ in the US, work best for this recipe.
- The cornstarch controversy. I know it might feel like cheating, but a little goes a long way. It’s what gives you that satisfying, crispy texture without deep-frying. If you don’t have it, the fries will still be delicious but might be a bit softer.
- Why kosher salt? Its larger flakes distribute more evenly and adhere better to the fries than fine table salt. If you only have table salt, use about half the amount to start, as it’s much saltier by volume.
- Don’t crowd the pan. This is the golden rule of roasting. If the fries are piled on top of each other, they’ll steam instead of roast. Using a large enough baking sheet is non-negotiable for crispy results.
How to Make Roasted Sweet Potato Fries
Step 1: Prep and Cut the Potatoes. First, give your sweet potatoes a good scrub under cold water—we’re leaving the skin on for extra fiber and texture. Now, the cut is crucial. Slice off a thin piece from one long side to create a stable base. Slice the potato into 1/4 to 1/2-inch thick planks, then stack a few planks and slice them into evenly-sized sticks. The goal is uniformity; this ensures they all cook at the same rate. If some are thin and some are thick, you’ll have a mix of burnt and undercooked fries.
Step 2: The All-Important Soak (or Rinse). This step is a game-changer for crispiness. Place your cut fries into a large bowl and cover them with cold water. Let them soak for at least 10 minutes, or up to an hour if you have time. This pulls out the excess starch that can make the fries gummy. You’ll notice the water get cloudy—that’s the starch leaving the building! After soaking, drain the fries and pat them completely dry with a kitchen towel or paper towels. They need to be bone-dry.
Step 3: Coat with Cornstarch and Oil. Place the thoroughly dried fries back into the dry bowl. Sprinkle the cornstarch over them and toss very well, until every fry has a light, invisible coating. Next, drizzle the oil over the fries. Toss again, massaging the oil onto every surface. Finally, sprinkle the salt, garlic powder, smoked paprika (if using), and pepper. Toss one last time until the spices are evenly distributed. The fries should look lightly coated but not gloopy.
Step 4: Arrange and Roast. Preheat your oven to 425°F (220°C). Line a large baking sheet with parchment paper or a silicone mat—this prevents sticking and makes cleanup a breeze. Arrange the fries in a single layer on the sheet, making sure they aren’t touching. This air circulation is key! Roast for 15 minutes. You’ll notice the edges just starting to brown.
Step 5: Flip and Finish. After 15 minutes, carefully remove the pan from the oven. Use a thin spatula to flip each fry over—this promotes even browning on all sides. Return the pan to the oven and roast for another 10-15 minutes. Keep a close eye on them towards the end. They’re done when they are deeply browned, crispy on the edges, and tender in the middle. A little char on the tips is a good thing!
Step 6: The Final Touch. As soon as the fries come out of the oven, sprinkle them with an extra pinch of flaky sea salt. Let them rest on the pan for about 2-3 minutes—this helps them firm up a bit more. Then, serve immediately. Honestly, they are at their absolute peak of crispiness right out of the oven.
Serving Suggestions
Complementary Dishes
- Classic Burger or Veggie Burger — These fries are the ultimate sidekick to a juicy burger. The sweet and savory combo is a timeless winner.
- Pulled Jackfruit or Chicken Sandwich — The soft, savory filling contrasts beautifully with the crispy texture of the fries for a fantastic meal.
- A Big, Green Salad — Balance out the richness of the fries with a bright, lemony arugula or kale salad for a well-rounded dinner.
Drinks
- A Crisp Lager or Pale Ale — The carbonation and slight bitterness of a cold beer cut through the sweetness and oil perfectly.
- Sparkling Water with Lime — A non-alcoholic option that provides a refreshing, palate-cleansing fizz between bites.
- Iced Green Tea — Its slight astringency and earthy notes are a surprisingly great match for the caramelized sweet potato flavors.
Something Sweet
- Dark Chocolate-Dipped Orange Slices — The dark chocolate echoes the deep notes of the fries, while the orange provides a fresh, clean finish.
- A Simple Berry Sorbet — The bright, tart fruitiness is a lovely, light way to end a meal after the hearty fries.
- Warm Cinnamon Apple Crisp — Lean into the cozy, autumnal vibes with a warm dessert that shares the sweet potato’s comforting warmth.
Top Mistakes to Avoid
- Mistake: Skipping the soak and dry. This is the number one reason for soggy fries. That surface starch needs to be rinsed away, and the potatoes must be completely dry before oil touches them, otherwise, they’ll steam.
- Mistake: Cutting the fries unevenly. I’ve messed this up before too… if your fries are different thicknesses, the thin ones will burn while the thick ones are still raw inside. Take your time with the knife!
- Mistake: Crowding the baking sheet. If the fries are piled on top of each other, they release steam and essentially boil each other. Give them plenty of personal space for maximum crispiness.
- Mistake: Not preheating the oven. A hot oven is essential for that initial blast of heat that sears the outside. Putting fries in a cold oven is a surefire path to limp results.
Expert Tips
- Tip: Use an air fryer for ultra-crisp results. If you have one, an air fryer is a game-changer. Cook at 400°F (200°C) for 12-15 minutes, shaking the basket halfway through. The powerful convection air creates an incredibly crispy exterior.
- Tip: Experiment with spice blends. Once you master the basic method, get creative! Toss the fries with curry powder, chili powder, or everything bagel seasoning for a whole new flavor profile.
- Tip: For a crowd, use two baking sheets. If you’re doubling the recipe, use two sheets and rotate their positions in the oven halfway through cooking. This ensures even browning.
- Tip: Make them a meal. Turn these fries into “loaded fries” by topping them with black beans, corn, avocado, a dollop of Greek yogurt or sour cream, and a squeeze of lime for a fun, casual dinner.
FAQs
Can I make these ahead of time?
You can prep the potatoes ahead by cutting and soaking them in water for up to 24 hours in the refrigerator. Keep them submerged to prevent browning. When you’re ready to cook, drain and pat them completely dry before proceeding with the recipe. I don’t recommend roasting them fully ahead of time, as they will lose their crispiness. They are truly best served straight from the oven.
Why are my fries still not crispy?
The most common culprits are not drying them well enough after soaking, overcrowding the pan, or an oven that isn’t hot enough. Make sure you’re patting them until the towel comes away dry, spread them out in a single layer, and use an oven thermometer to confirm your oven is at the right temperature. Humidity can also play a role on a rainy day!
Can I use a different type of oil?
Absolutely. Avocado oil has a high smoke point and neutral flavor, making it a great choice. Melted coconut oil will add a subtle sweetness. Avoid extra virgin olive oil if your oven runs very hot, as it can smoke. The key is to use an oil that can handle high-heat cooking.
Are these gluten-free and vegan?
Yes! This recipe is naturally gluten-free and vegan, assuming you use a vegan-friendly oil. It’s a fantastic side dish for almost any dietary preference. Just always double-check your specific spice blends to ensure no hidden gluten or additives.
What’s the best way to reheat leftovers?
Leftover fries will inevitably be softer, but you can revive them. Reheat them in a 400°F (200°C) oven or toaster oven for 5-10 minutes, or in an air fryer for 3-4 minutes. The microwave will make them steam and become very soft, so I’d avoid that if you want any crispiness back.
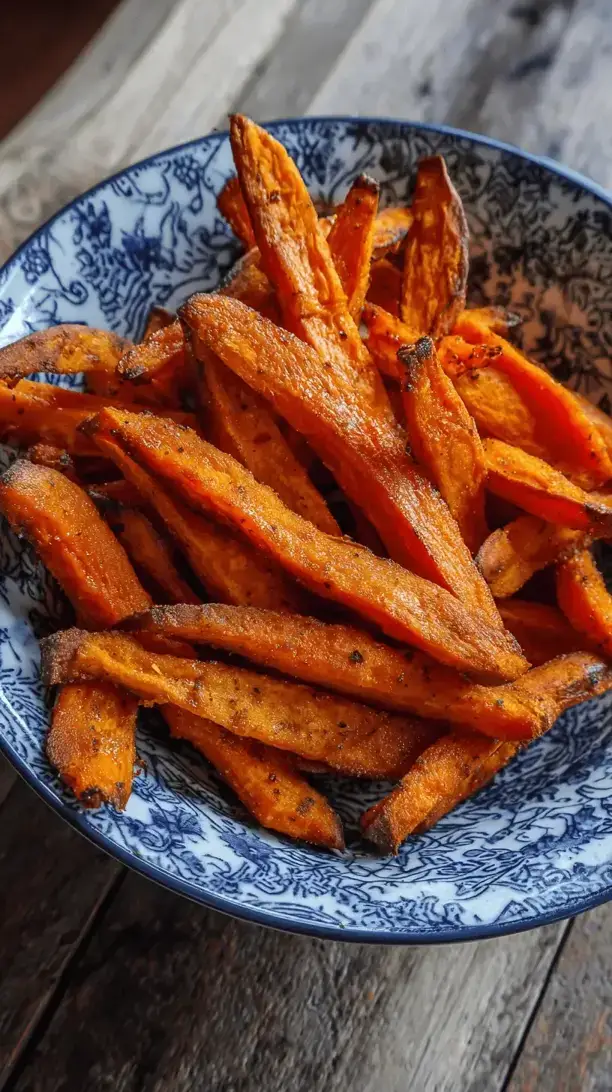
Roasted Sweet Potato Fries
Tired of soggy sweet potato fries? Chicago home cook Mike reveals his secret for perfectly crispy oven-baked fries every time. Simple ingredients, huge flavor!
Ingredients
Ingredients
-
2 large sweet potatoes (about 1.5 lbs / 680 g total)
-
1.5 tablespoons cornstarch or arrowroot powder
-
2 tablespoons olive oil, avocado oil, or melted coconut oil
-
1 teaspoon kosher salt (plus more for finishing)
-
0.5 teaspoon garlic powder
-
0.25 teaspoon smoked paprika (optional, for a smoky kick)
-
0.25 teaspoon black pepper
Instructions
-
Prep and Cut the Potatoes. First, give your sweet potatoes a good scrub under cold water—we're leaving the skin on for extra fiber and texture. Now, the cut is crucial. Slice off a thin piece from one long side to create a stable base. Slice the potato into 1/4 to 1/2-inch thick planks, then stack a few planks and slice them into evenly-sized sticks. The goal is uniformity; this ensures they all cook at the same rate. If some are thin and some are thick, you'll have a mix of burnt and undercooked fries.01
-
The All-Important Soak (or Rinse). This step is a game-changer for crispiness. Place your cut fries into a large bowl and cover them with cold water. Let them soak for at least 10 minutes, or up to an hour if you have time. This pulls out the excess starch that can make the fries gummy. You'll notice the water get cloudy—that's the starch leaving the building! After soaking, drain the fries and pat them completely dry with a kitchen towel or paper towels. They need to be bone-dry.02
-
Coat with Cornstarch and Oil. Place the thoroughly dried fries back into the dry bowl. Sprinkle the cornstarch over them and toss very well, until every fry has a light, invisible coating. Next, drizzle the oil over the fries. Toss again, massaging the oil onto every surface. Finally, sprinkle the salt, garlic powder, smoked paprika (if using), and pepper. Toss one last time until the spices are evenly distributed. The fries should look lightly coated but not gloopy.03
-
Arrange and Roast. Preheat your oven to 425°F (220°C). Line a large baking sheet with parchment paper or a silicone mat—this prevents sticking and makes cleanup a breeze. Arrange the fries in a single layer on the sheet, making sure they aren't touching. This air circulation is key! Roast for 15 minutes. You'll notice the edges just starting to brown.04
-
Flip and Finish. After 15 minutes, carefully remove the pan from the oven. Use a thin spatula to flip each fry over—this promotes even browning on all sides. Return the pan to the oven and roast for another 10-15 minutes. Keep a close eye on them towards the end. They're done when they are deeply browned, crispy on the edges, and tender in the middle. A little char on the tips is a good thing!05
-
The Final Touch. As soon as the fries come out of the oven, sprinkle them with an extra pinch of flaky sea salt. Let them rest on the pan for about 2-3 minutes—this helps them firm up a bit more. Then, serve immediately. Honestly, they are at their absolute peak of crispiness right out of the oven.06


