
Why You’ll Love This Herbed Sweet Potato Fries
- They’re the perfect texture. We’re not aiming for soggy, steamed sticks here. The method we use encourages those crispy, slightly caramelized edges while keeping the insides beautifully fluffy and tender. It’s a textural dream come true.
- The herby aroma is unreal. The combination of rosemary, thyme, and garlic powder creates a savory, almost rustic fragrance that will make your entire home smell like a cozy, professional kitchen. It’s an experience in itself.
- They’re incredibly versatile. Serve them alongside a burger, with a fried egg on top for breakfast, or as a base for a hearty bowl with chickpeas and tahini sauce. They happily adapt to any meal situation.
- They feel like a treat, but are genuinely wholesome. Baked, not fried, and packed with the natural goodness of sweet potatoes, you can feel really good about enjoying these. They satisfy that craving for something salty and delicious without any guilt.
Ingredients & Tools
- 2 large sweet potatoes (about 1.5 lbs / 700 g total)
- 2 tablespoons olive oil (or avocado oil)
- 1 teaspoon dried rosemary
- 1 teaspoon dried thyme
- 1/2 teaspoon garlic powder
- 1/2 teaspoon smoked paprika (optional, for a hint of smokiness)
- 1 teaspoon cornstarch or arrowroot powder (the secret to crispiness!)
- 3/4 teaspoon fine sea salt, plus more for serving
- 1/4 teaspoon freshly ground black pepper
Tools: A large baking sheet, parchment paper or a silicone baking mat, a sharp chef’s knife, a large mixing bowl.
Honestly, the cornstarch might seem like a strange addition, but a little goes a long way in soaking up excess moisture from the sweet potatoes, which is the key to getting that fantastic crispiness without deep-frying. And don’t skip on the dried herbs here—their concentrated flavor really clings to the fries beautifully during roasting.
Serves: 3-4 | Prep Time: 15 minutes | Cook Time: 25-30 minutes | Total Time: 40-45 minutes
Before You Start: Tips & Ingredient Notes
- Choosing your sweet potatoes. Look for firm potatoes with smooth, taut skin. Avoid any with soft spots or sprouts. The shape matters more than you think—try to pick ones that are relatively uniform in thickness for more evenly sized fries.
- To peel or not to peel? That is the question! I personally love leaving the skin on for extra fiber, texture, and nutrients. Just give them a really good scrub. If you prefer them peeled, that works perfectly too.
- The cornstarch secret. I know I mentioned it, but it’s worth repeating. This is the single biggest tip for achieving fries that are crispy, not steamed. It creates a light coating that makes all the difference, so please don’t be tempted to skip it.
- Why dried herbs? Fresh herbs are wonderful, but they can burn easily in the hot oven. Dried herbs are more robust and will infuse the fries with a deeper, more consistent flavor throughout the cooking process.
How to Make Herbed Sweet Potato Fries
Step 1: First, preheat your oven to a nice and hot 425°F (220°C). This high heat is non-negotiable—it’s what gives us that beautiful caramelization. While the oven heats up, line your large baking sheet with parchment paper or a silicone mat. This prevents sticking and makes cleanup an absolute breeze.
Step 2: Now, let’s tackle the potatoes. Scrub them clean and dry them thoroughly. The drier they are, the crispier they’ll get. If you’re peeling them, do that now. The trick is to cut them into even-sized batons, about 1/4 to 1/2-inch thick. Consistency is key here—if they’re all different sizes, some will burn while others are still soft.
Step 3: Place your cut fries into a large mixing bowl. Drizzle with the olive oil and toss, toss, toss until every single fry is lightly and evenly coated. You’ll notice the oil helps the seasoning stick. Now, sprinkle the cornstarch over the fries. Toss again—really get in there—until the cornstarch has disappeared and coated the fries.
Step 4: Time for the herbs! Sprinkle the dried rosemary, thyme, garlic powder, smoked paprika (if using), salt, and pepper over the fries. Give everything one final, vigorous toss. You want to see those lovely herbs distributed across every fry. The mixture should smell incredible already.
Step 5: Arrange the fries in a single layer on your prepared baking sheet. This is crucial—if they’re crowded or piled on top of each other, they’ll steam instead of roast. Give them a little space to breathe. This might mean using two baking sheets if yours is on the smaller side.
Step 6: Slide the baking sheet into the preheated oven and roast for 15 minutes. You’ll start to smell the herbs wafting through your kitchen. After 15 minutes, carefully remove the pan and flip the fries. This ensures even browning on all sides. They should be starting to get some golden spots.
Step 7: Return the pan to the oven and roast for another 10-15 minutes, or until the fries are deeply golden brown, crispy on the edges, and tender in the middle. Keep a close eye on them for the last 5 minutes, as oven temperatures can vary. The edges might look almost charred in spots—that’s the caramelized sugar, and it’s delicious!
Step 8: As soon as you take them out of the oven, you can sprinkle them with a little extra pinch of salt if you like. Let them cool on the pan for just a minute or two—this helps them firm up a bit. Then, serve immediately. Honestly, they are best enjoyed straight away, hot and crispy.
Serving Suggestions
Complementary Dishes
- A classic burger or veggie burger — The sweet, savory fries are the ultimate sidekick to a juicy, well-seasoned patty. They add a wonderful color and flavor contrast to the plate.
- Grilled chicken or fish — The lightness of grilled protein pairs beautifully with the earthy sweetness of the fries. Try them with a simple lemon-herb marinated chicken breast.
- A big, hearty grain bowl — Use the fries as a base! Top with black beans, avocado, a runny egg, and a creamy sauce for a seriously satisfying meal.
Drinks
- A crisp, cold lager or pale ale — The bitterness of the beer cuts through the sweetness of the potatoes and cleanses the palate perfectly between bites.
- Sparkling water with lemon — For a non-alcoholic option, the bubbles and citrus are incredibly refreshing and help balance the rich, herby flavors.
- An unoaked Chardonnay — A wine with a little acidity and citrus notes will complement the fries without overpowering them.
Something Sweet
- A simple fruit sorbet — The clean, bright fruitiness after the savory fries is a lovely palate cleanser. Lemon or raspberry would be fantastic.
- Dark chocolate squares — Just a few pieces of high-quality dark chocolate provide a rich, bittersweet finish that contrasts wonderfully with the meal.
- Warm apple crumble — Lean into the cozy, autumnal vibe of sweet potatoes with a classic, comforting dessert that shares similar warm spices.
Top Mistakes to Avoid
- Mistake: Crowding the pan. This is the number one reason fries turn out soggy. If the fries are touching, they steam each other. Always use a large enough pan to spread them in a single layer, even if it means baking in two batches.
- Mistake: Skipping the cornstarch. I’ve messed this up before too, thinking it wouldn’t make much difference. It does. It’s the magic dust that draws out moisture and creates that desirable crispy exterior.
- Mistake: Not preheating the oven. Putting the fries into a cold oven means they’ll start to cook slowly and release all their moisture before they have a chance to crisp up. A blazing hot oven from the start is essential.
- Mistake: Cutting the fries unevenly. Thin pieces will burn before the thick ones are cooked through. Take your time to cut them as uniformly as possible for the most consistent results.
Expert Tips
- Tip: Soak the fries (for extra crispiness). If you have a little extra time, soak the cut sweet potatoes in cold water for 30 minutes to an hour before drying and seasoning. This removes excess surface starch, which can lead to an even crispier result.
- Tip: Use a wire rack. For the absolute crispiest fries ever, place a wire rack on top of your baking sheet and arrange the fries on the rack. This allows hot air to circulate all around each fry, cooking them evenly on all sides.
- Tip: Fresh herbs at the end. While we use dried herbs for roasting, you can add a flourish of freshness by sprinkling chopped fresh parsley or chives over the fries right after they come out of the oven.
- Tip: Experiment with spice blends. Once you’ve mastered the classic herbed version, get creative! A Cajun spice blend, za’atar, or even just a simple dusting of nutritional yeast can create completely different flavor profiles.
FAQs
Can I make these in an air fryer?
Absolutely! Air fryers are fantastic for these. The process is very similar: toss the prepared fries in the oil, cornstarch, and seasoning, then cook in a preheated air fryer at 380°F (195°C) for about 15-20 minutes, shaking the basket halfway through. They might cook a bit faster, so keep an eye on them. The result is incredibly crispy with less oil.
Why are my fries still soft and not crispy?
This usually comes down to one of three things: the oven wasn’t hot enough, the pan was too crowded, or there was too much moisture on the potatoes. Remember to preheat thoroughly, spread the fries out, and make sure they are completely dry before adding oil. The cornstarch is your best friend here for combating moisture.
Can I prepare the fries ahead of time?
You can cut the sweet potatoes a few hours in advance and keep them submerged in a bowl of cold water in the fridge. This actually helps remove starch! Just make sure to drain them and pat them *very* dry with a kitchen towel before tossing with oil and seasoning. I don’t recommend seasoning them until right before baking.
How do I store and reheat leftovers?
Let’s be real, they’re best fresh. But if you have leftovers, store them in an airtight container in the fridge for up to 3 days. To reheat, spread them on a baking sheet and warm them in a 400°F (200°C) oven for 5-10 minutes. The microwave will make them soft, so the oven or air fryer is the way to go for restoring some crispiness.
Can I use different types of oil?
Yes! Olive oil is my go-to for flavor, but avocado oil has a higher smoke point, which is great for high-heat roasting. Melted coconut oil would also work and add a subtle sweetness. I’d avoid using butter, as it can burn at this high temperature before the fries are done cooking.
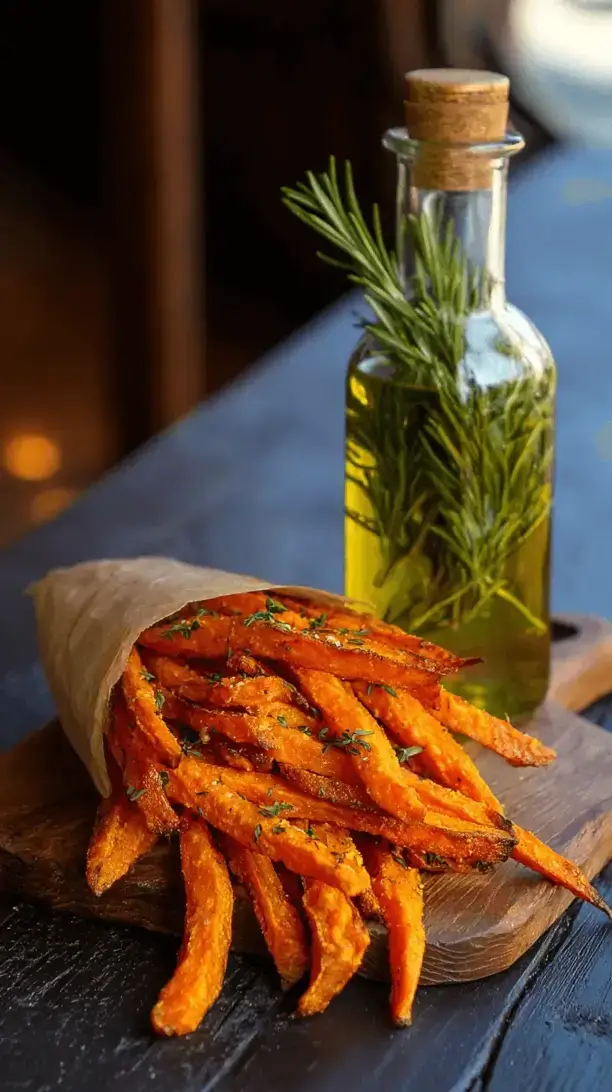
Herbed Sweet Potato Fries
Crispy, baked herbed sweet potato fries recipe! Easy, healthy & packed with flavor. Perfect side dish or snack. Get my secret tip for the crispiest fries every time.
Ingredients
Ingredients
-
2 large sweet potatoes (about 1.5 lbs / 700 g total)
-
2 tablespoons olive oil (or avocado oil)
-
1 teaspoon dried rosemary
-
1 teaspoon dried thyme
-
1/2 teaspoon garlic powder
-
1/2 teaspoon smoked paprika (optional, for a hint of smokiness)
-
1 teaspoon cornstarch or arrowroot powder (the secret to crispiness!)
-
3/4 teaspoon fine sea salt (plus more for serving)
-
1/4 teaspoon freshly ground black pepper
Instructions
-
First, preheat your oven to a nice and hot 425°F (220°C). This high heat is non-negotiable—it's what gives us that beautiful caramelization. While the oven heats up, line your large baking sheet with parchment paper or a silicone mat. This prevents sticking and makes cleanup an absolute breeze.01
-
Now, let's tackle the potatoes. Scrub them clean and dry them thoroughly. The drier they are, the crispier they'll get. If you're peeling them, do that now. The trick is to cut them into even-sized batons, about 1/4 to 1/2-inch thick. Consistency is key here—if they're all different sizes, some will burn while others are still soft.02
-
Place your cut fries into a large mixing bowl. Drizzle with the olive oil and toss, toss, toss until every single fry is lightly and evenly coated. You'll notice the oil helps the seasoning stick. Now, sprinkle the cornstarch over the fries. Toss again—really get in there—until the cornstarch has disappeared and coated the fries.03
-
Time for the herbs! Sprinkle the dried rosemary, thyme, garlic powder, smoked paprika (if using), salt, and pepper over the fries. Give everything one final, vigorous toss. You want to see those lovely herbs distributed across every fry. The mixture should smell incredible already.04
-
Arrange the fries in a single layer on your prepared baking sheet. This is crucial—if they're crowded or piled on top of each other, they'll steam instead of roast. Give them a little space to breathe. This might mean using two baking sheets if yours is on the smaller side.05
-
Slide the baking sheet into the preheated oven and roast for 15 minutes. You'll start to smell the herbs wafting through your kitchen. After 15 minutes, carefully remove the pan and flip the fries. This ensures even browning on all sides. They should be starting to get some golden spots.06
-
Return the pan to the oven and roast for another 10-15 minutes, or until the fries are deeply golden brown, crispy on the edges, and tender in the middle. Keep a close eye on them for the last 5 minutes, as oven temperatures can vary. The edges might look almost charred in spots—that's the caramelized sugar, and it's delicious!07
-
As soon as you take them out of the oven, you can sprinkle them with a little extra pinch of salt if you like. Let them cool on the pan for just a minute or two—this helps them firm up a bit. Then, serve immediately. Honestly, they are best enjoyed straight away, hot and crispy.08


